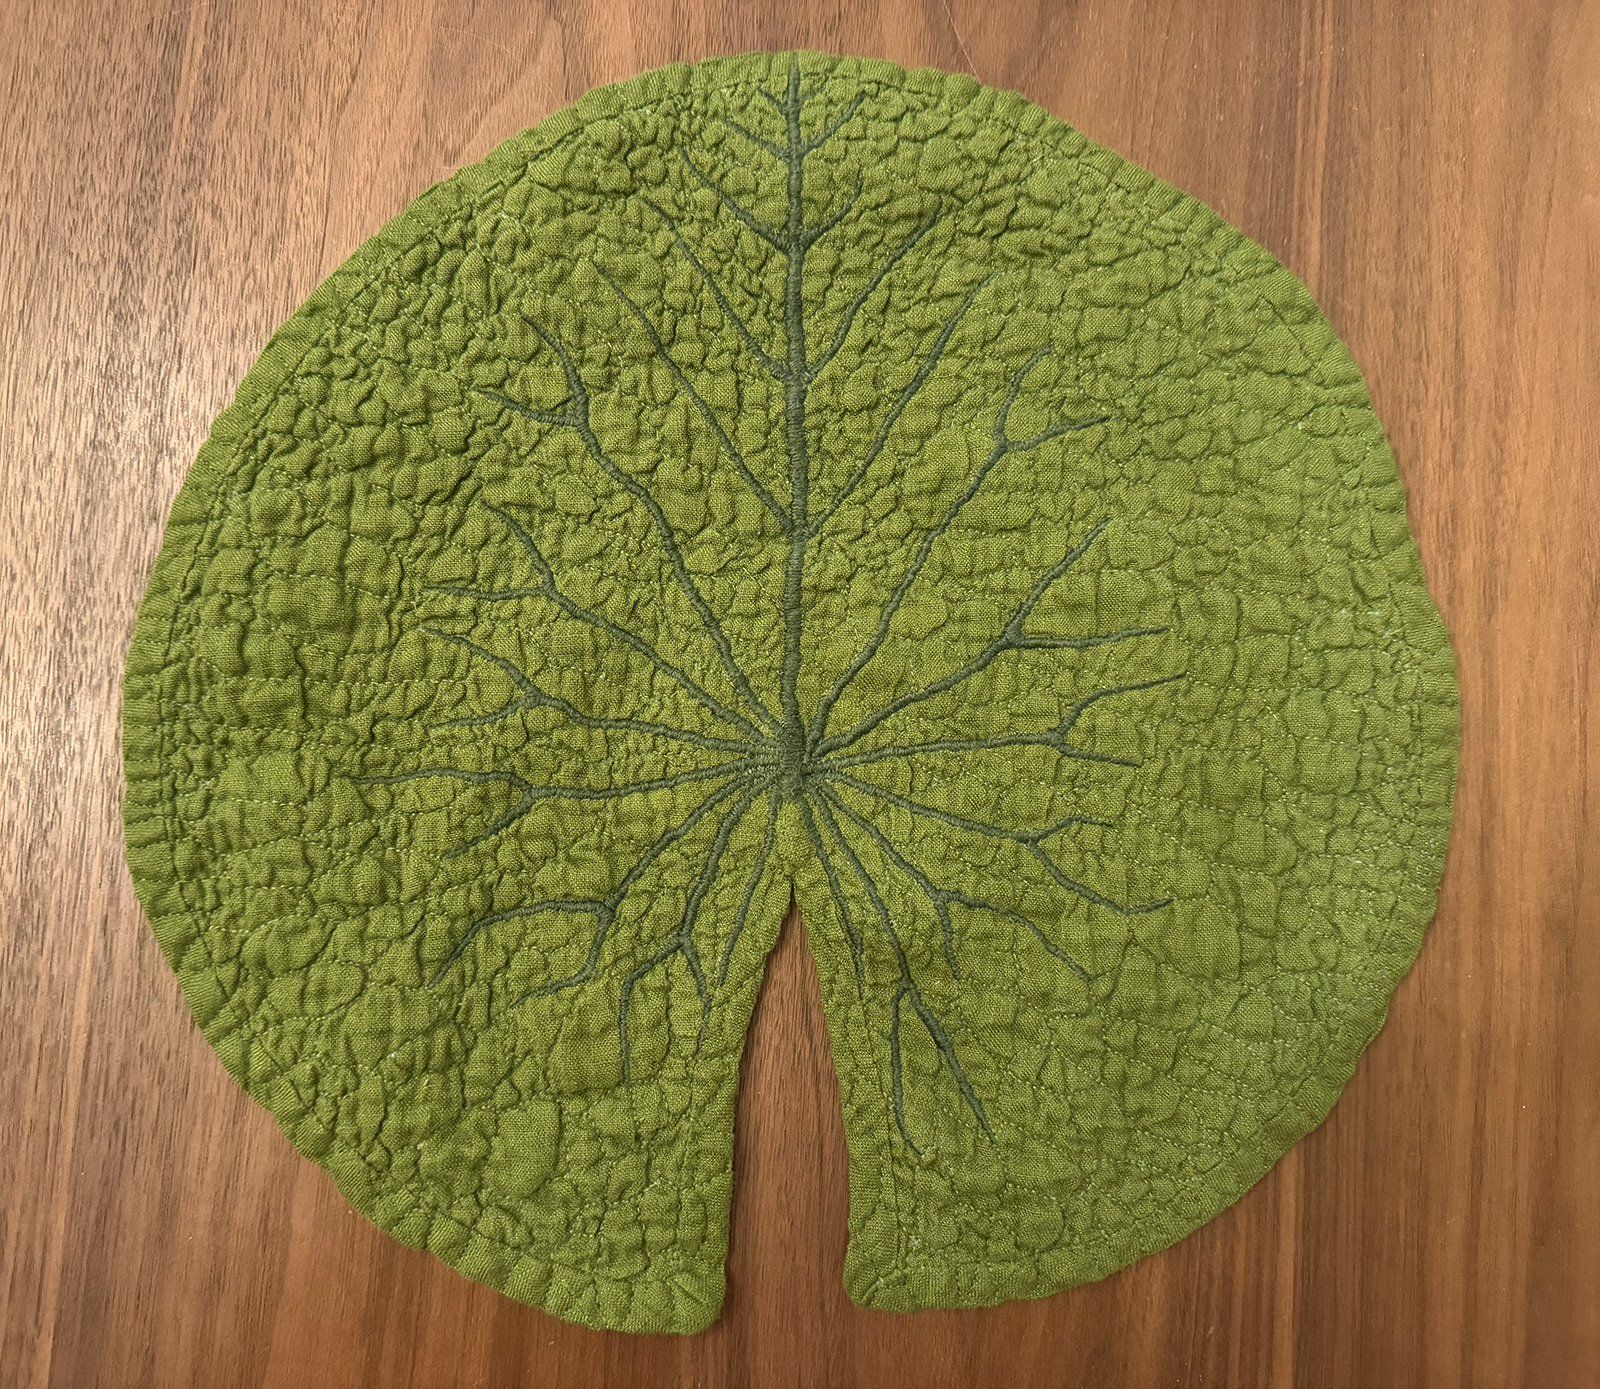
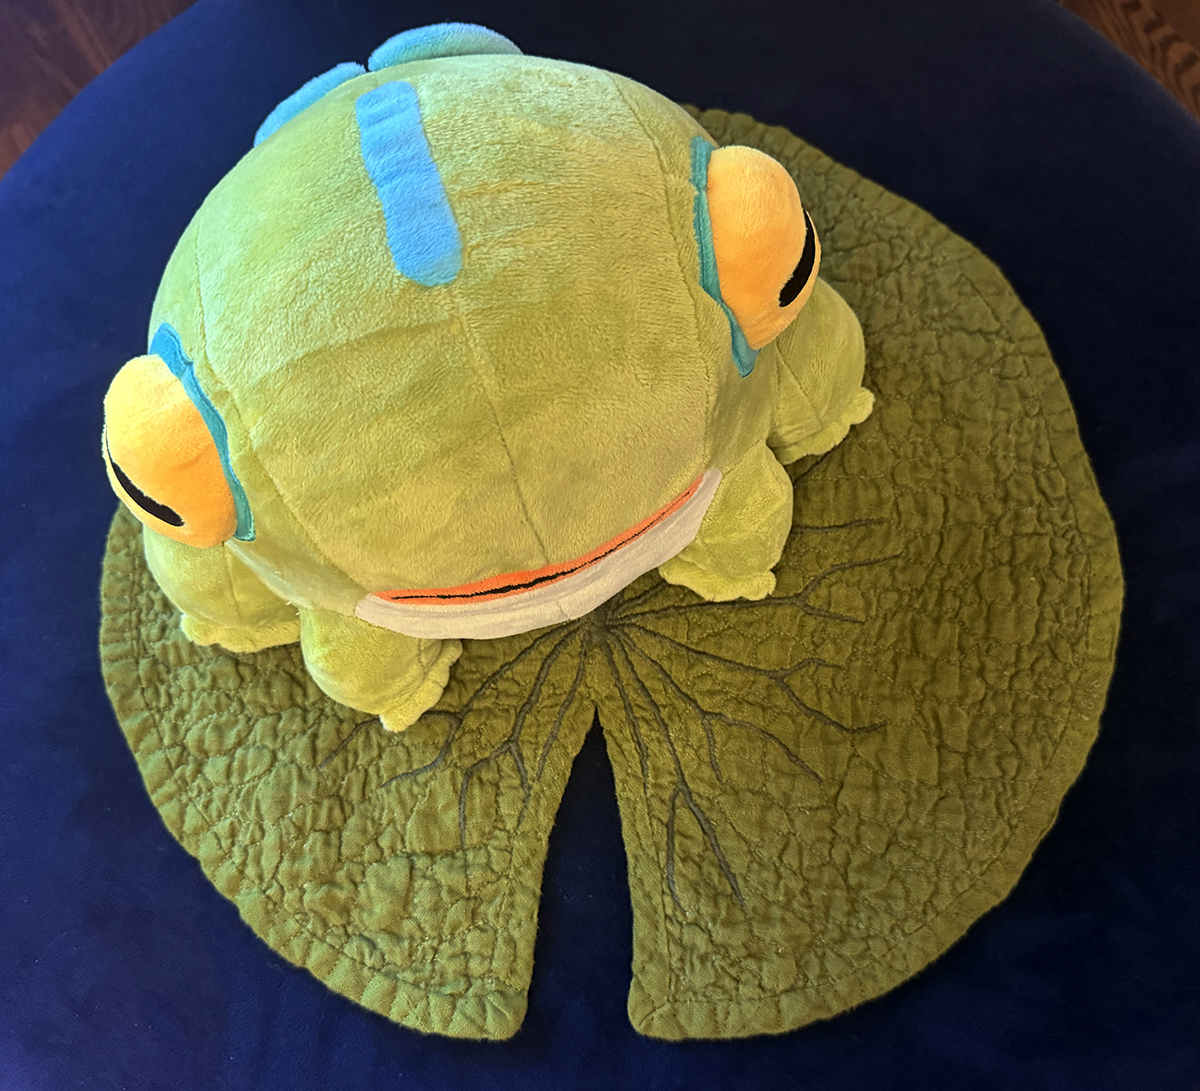
While on a short road trip and then recovering from surgery, I hand quilted and hand embroidered a linen lily pad quilt.
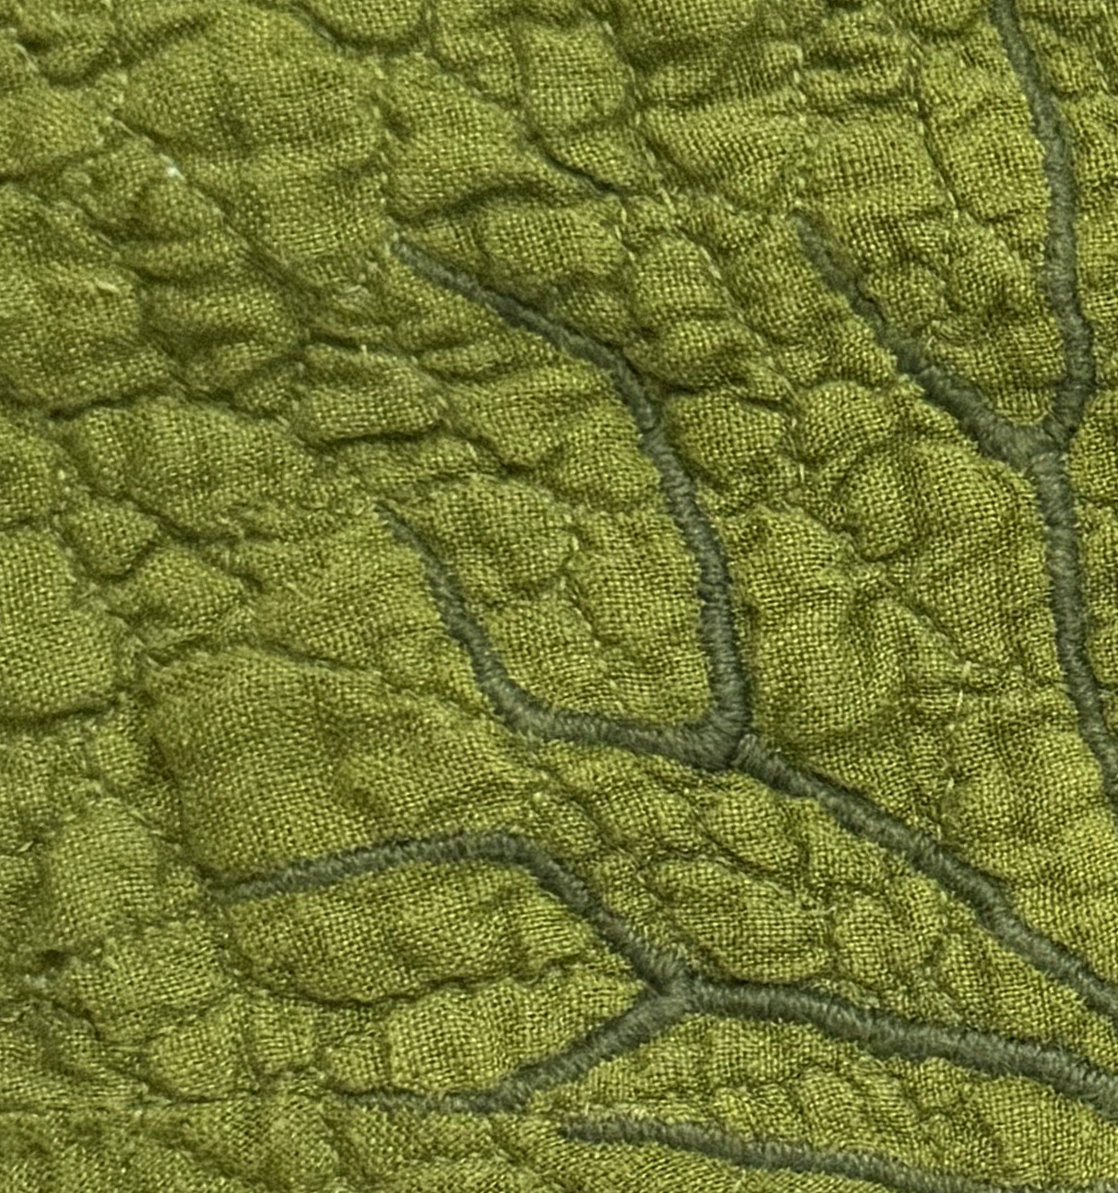
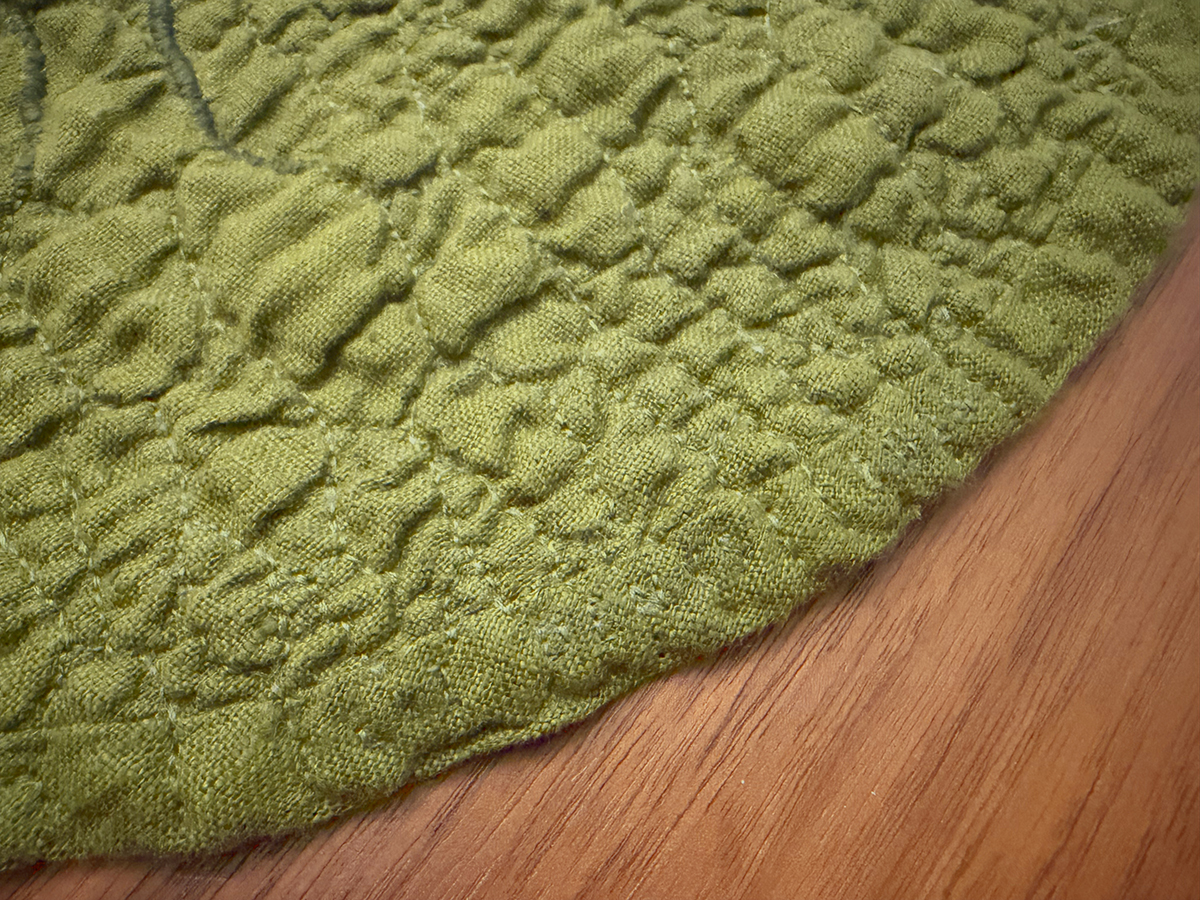
And yes, I did make this little quilt for my Frinos plush from Hades II to have a nice place to rest.
While on a short road trip and then recovering from surgery, I hand quilted and hand embroidered a linen lily pad quilt.
And yes, I did make this little quilt for my Frinos plush from Hades II to have a nice place to rest.
As a fan of both Animal Crossing New Horizons and the LEGO Botanical series, I figured I'd make the ACNH in-game LEGO Plum Blossom item with real LEGO pieces:
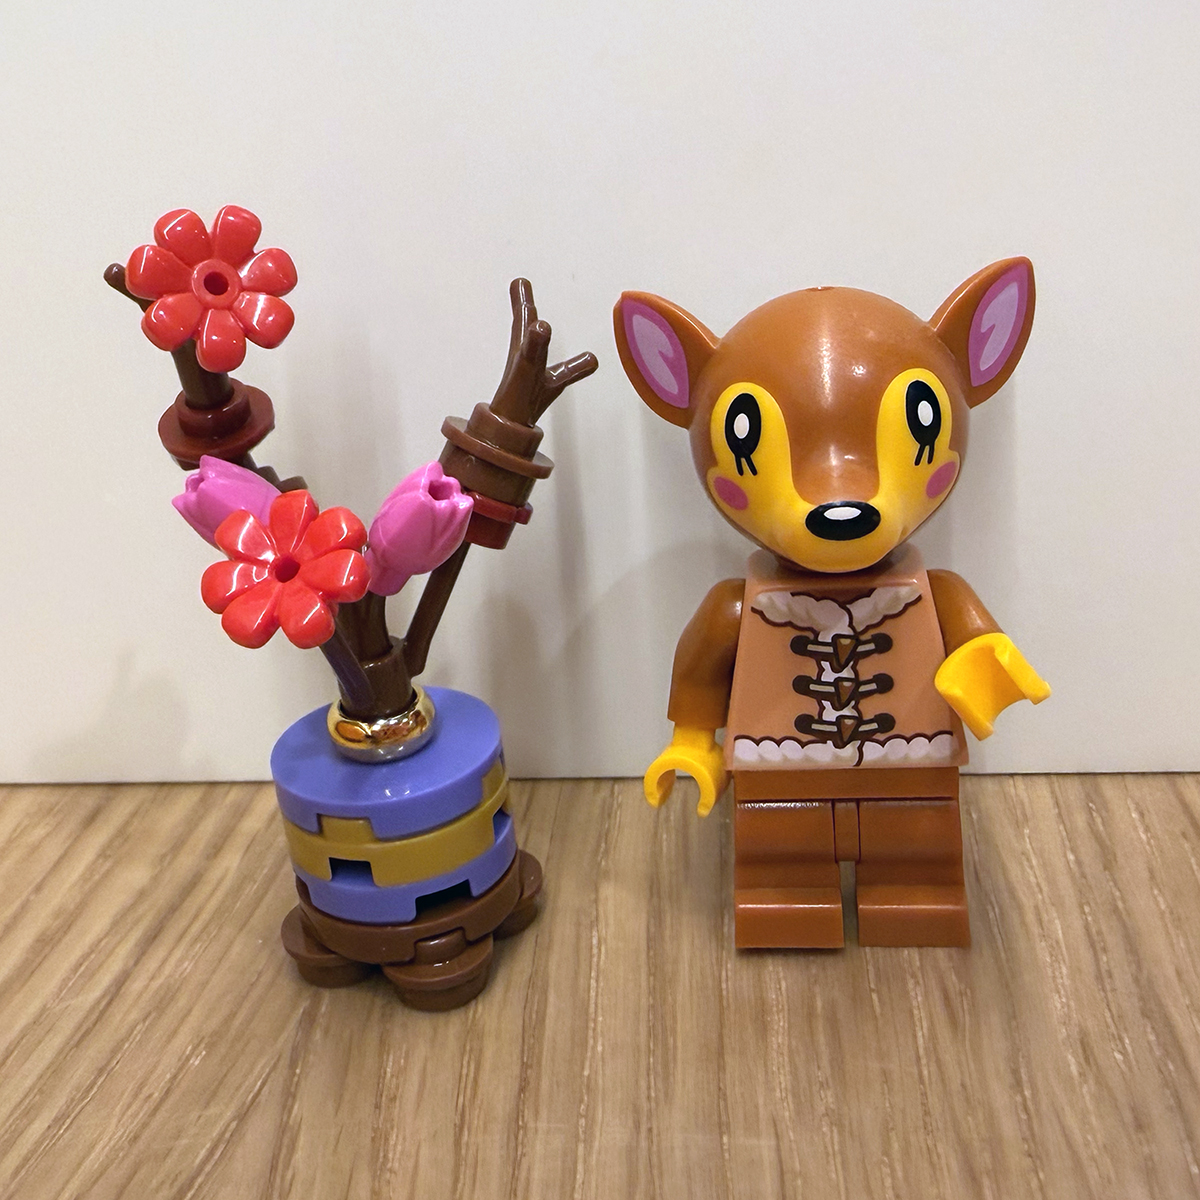
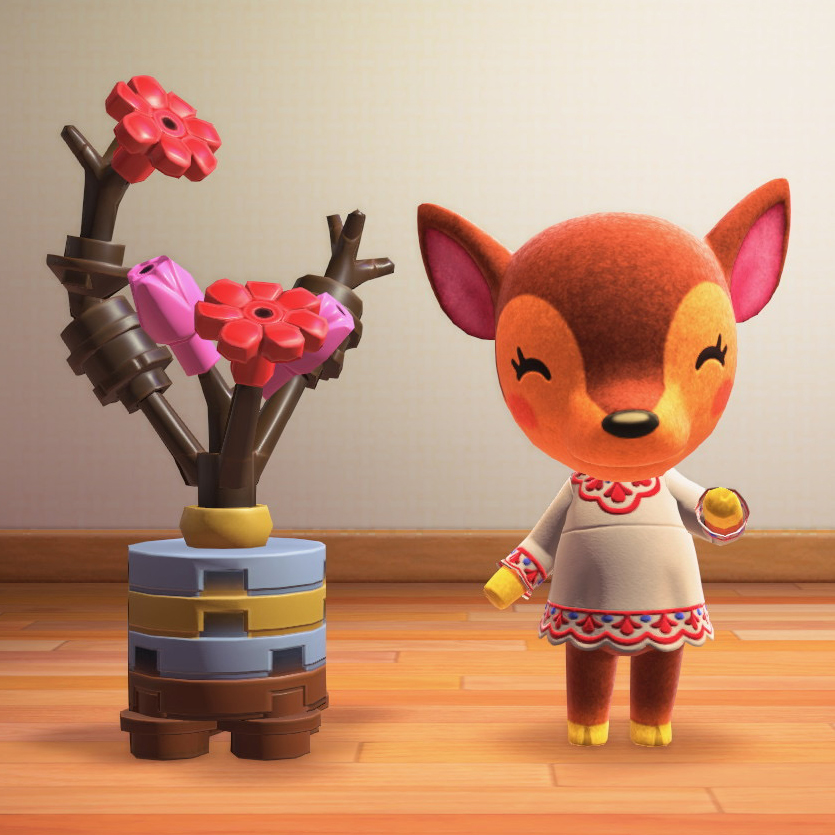
The real LEGO brick one even has a similar scale compared to LEGO Fauna as the in-game item compared to Fauna!
22 LEGO pieces are needed:
I've created a parts list you can use with Bricklink as well: download here (.xml).
I also made instructions in Studio, which can be downloaded here (.pdf).
Thank you to my friend Chris Post for helping me think through possible pieces to use!
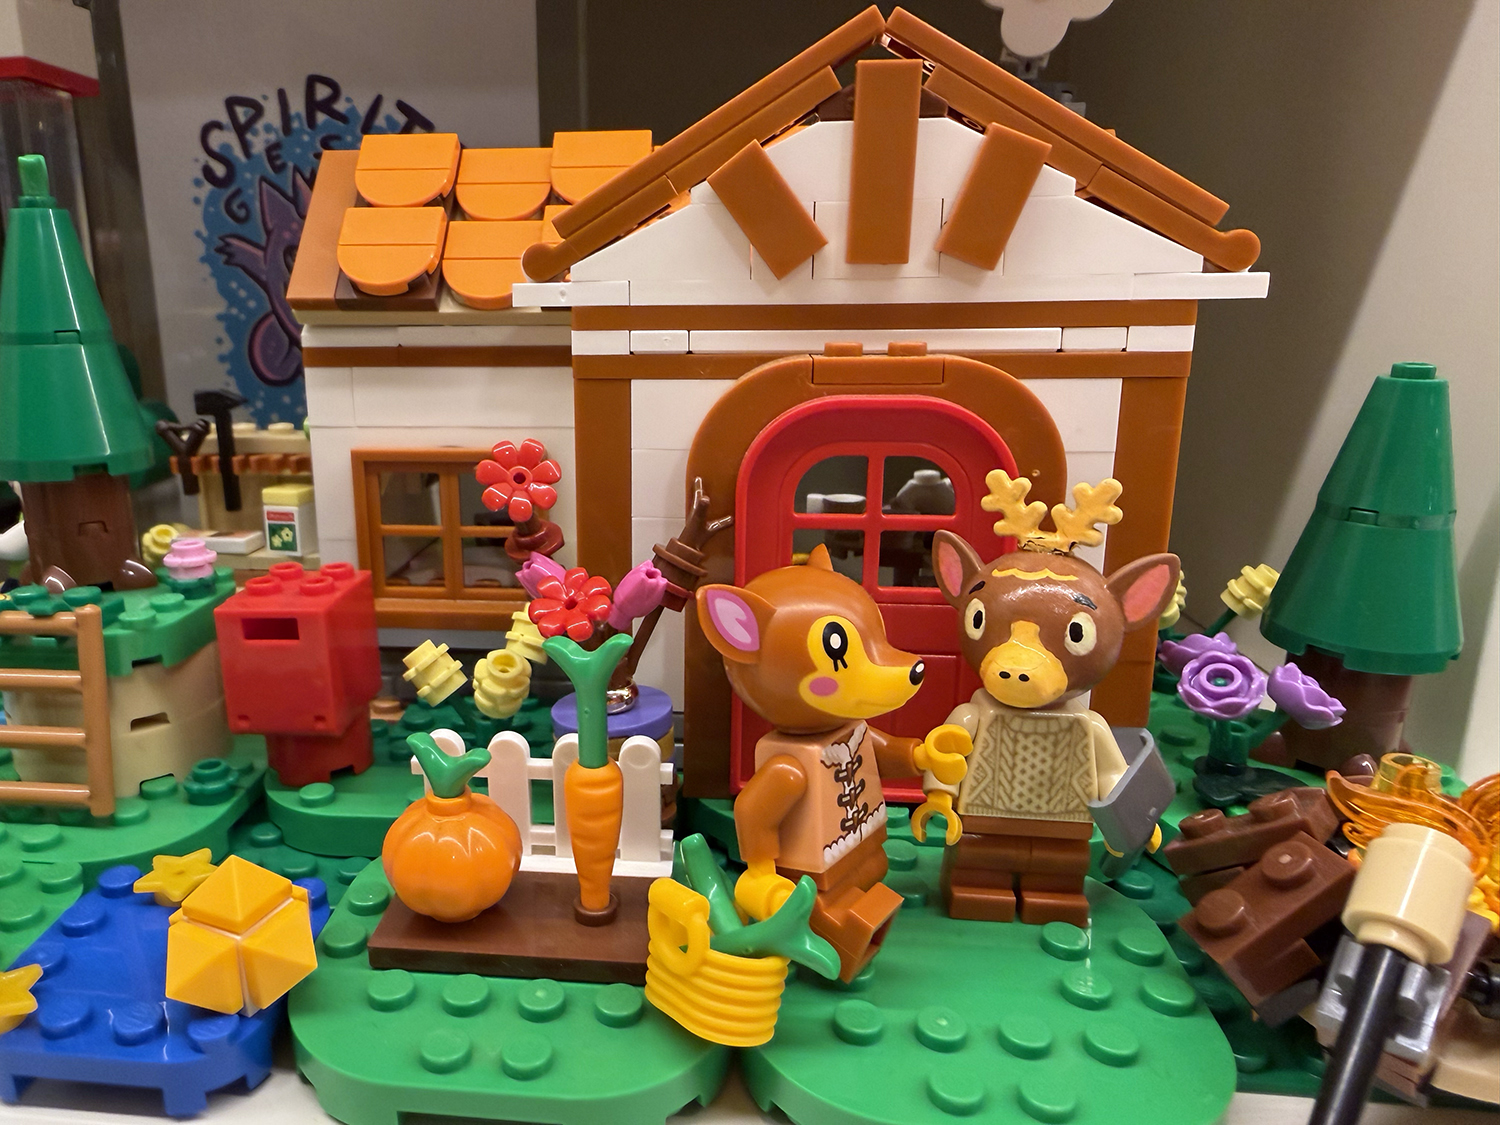
P.S. You, too, can make a LEGO minifig version of the villager Erik with various LEGO parts and Posca paint markers.
I've worked out of a handful of different community studios at this point, so I figured I'd share a (probably incomplete) list of you might want to consider when picking a community ceramics studio for your practice.
Finally, while it's unlikely that every community studio, or perhaps even any community studio, will be a completely perfect fit for any given potter, I've personally found my practice to be enjoyable at every community studio I've been at with a good community vibe. The goal of this list isn't to find a reason to avoid any particular studio as much as knowing how a studio's choices or limitations might affect your practice so you know what to expect and how to adapt!
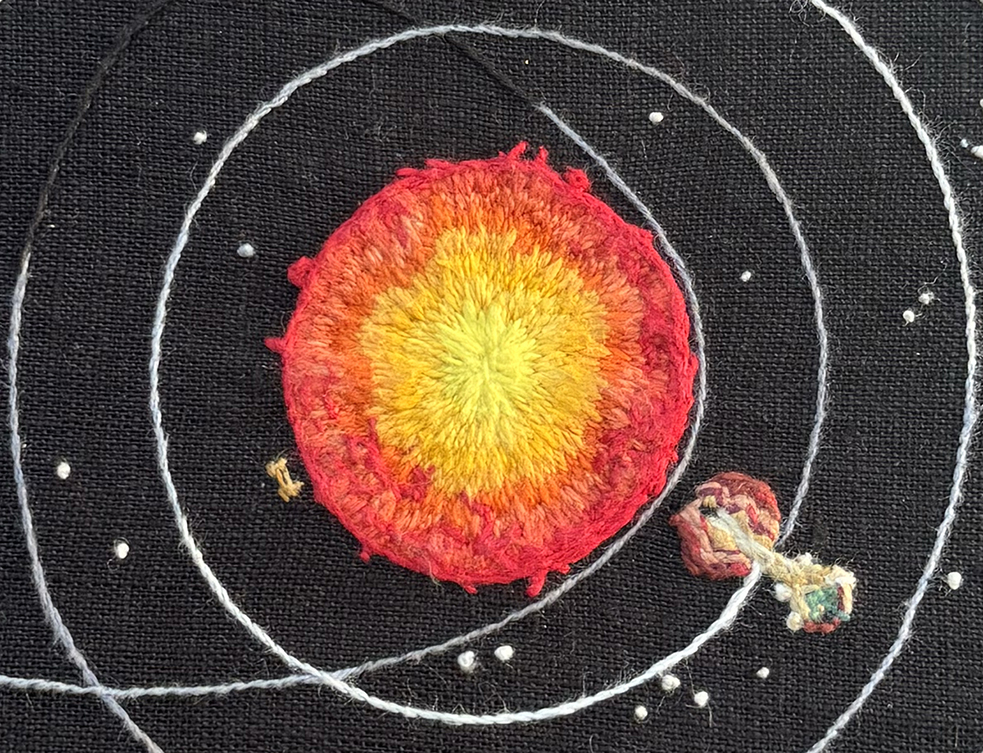
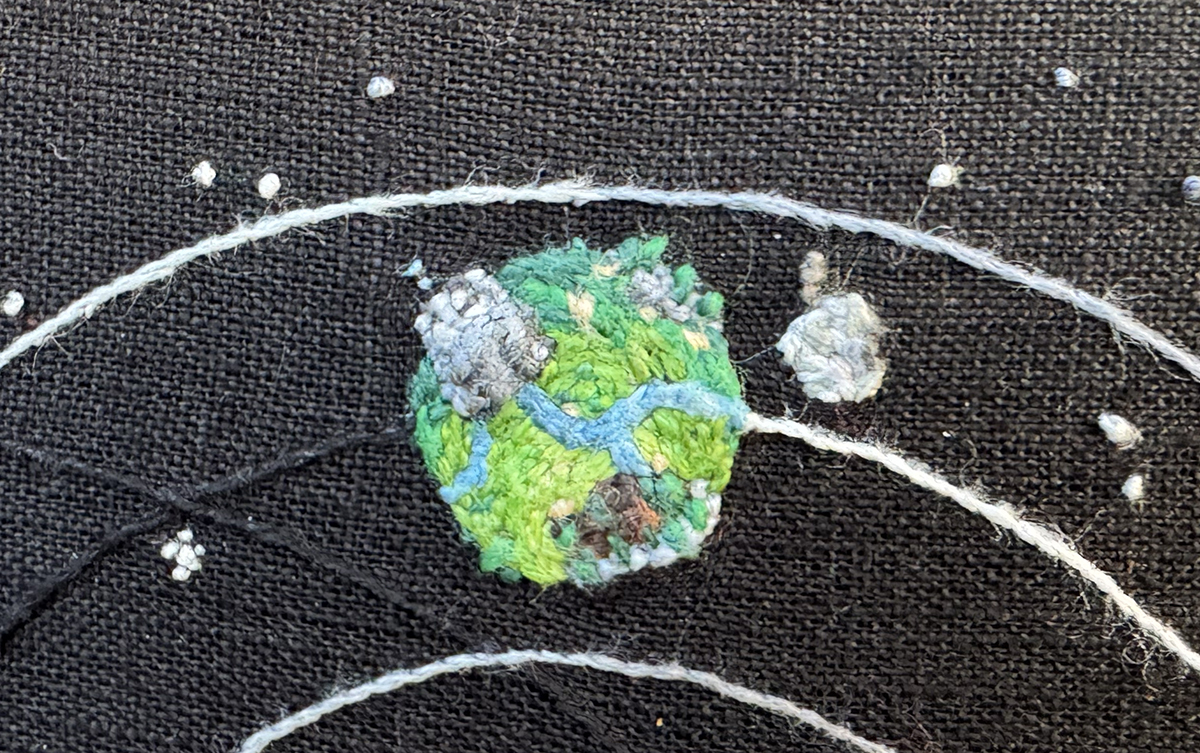
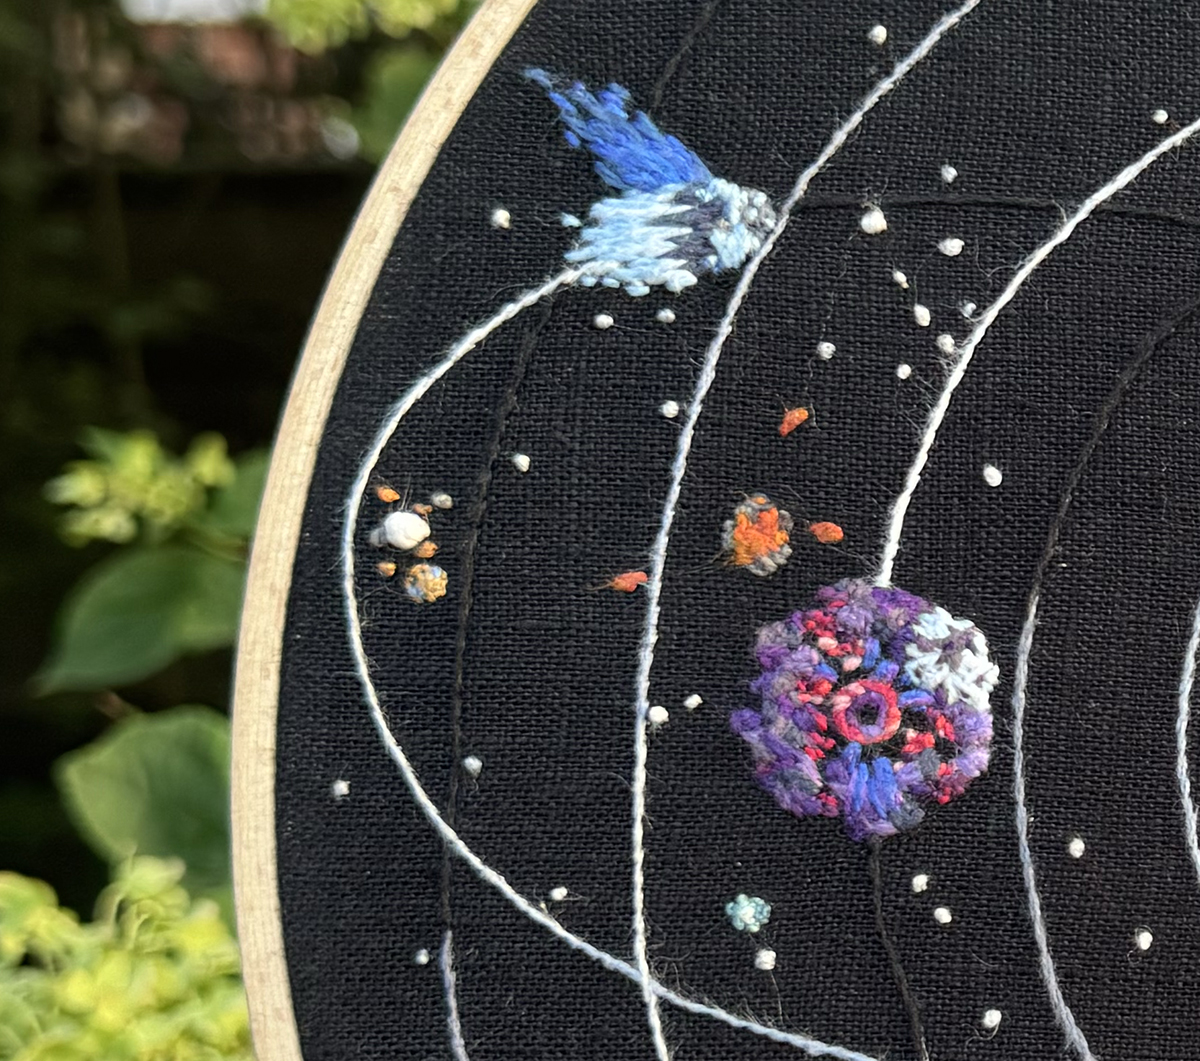
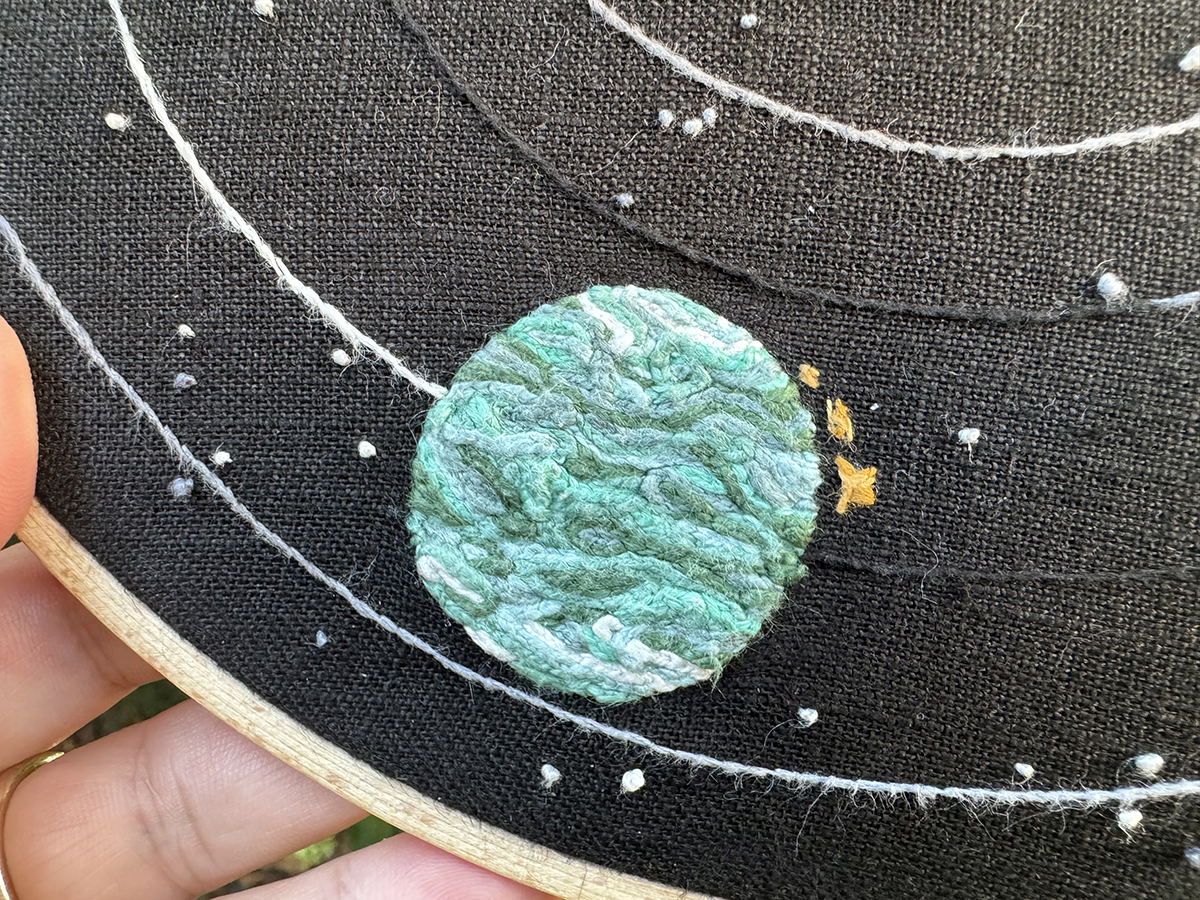
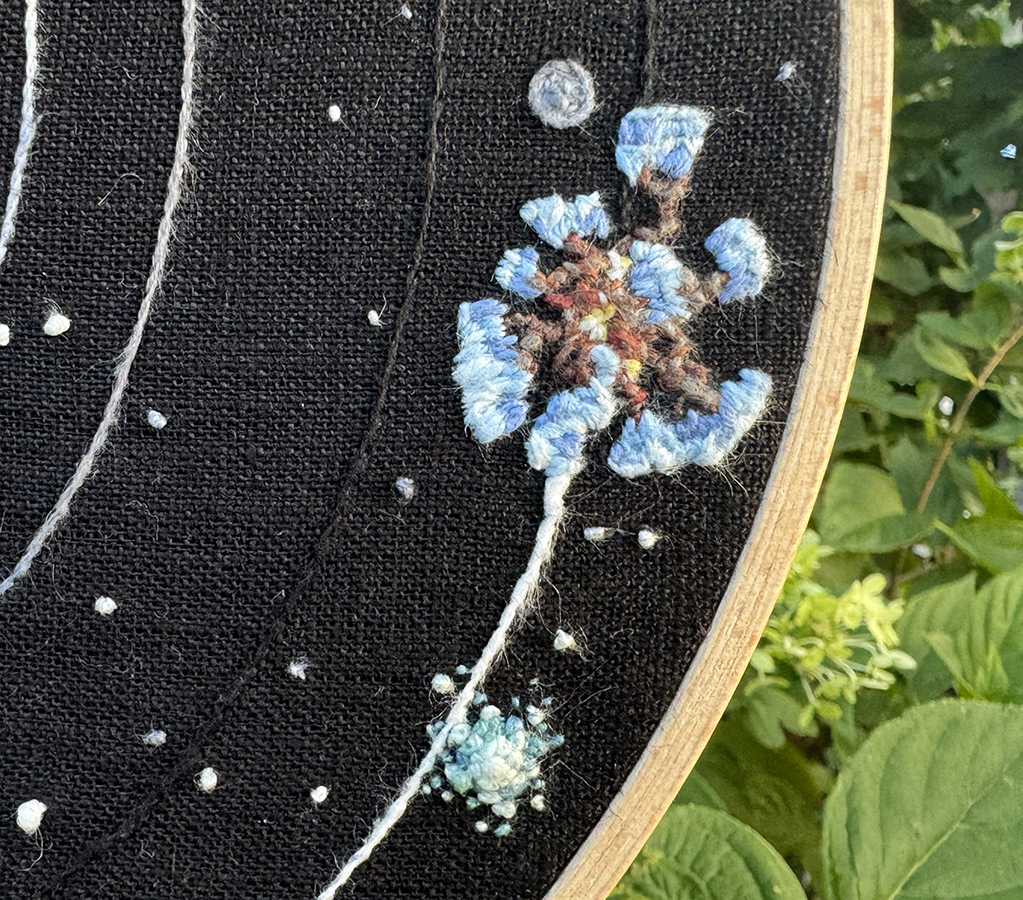
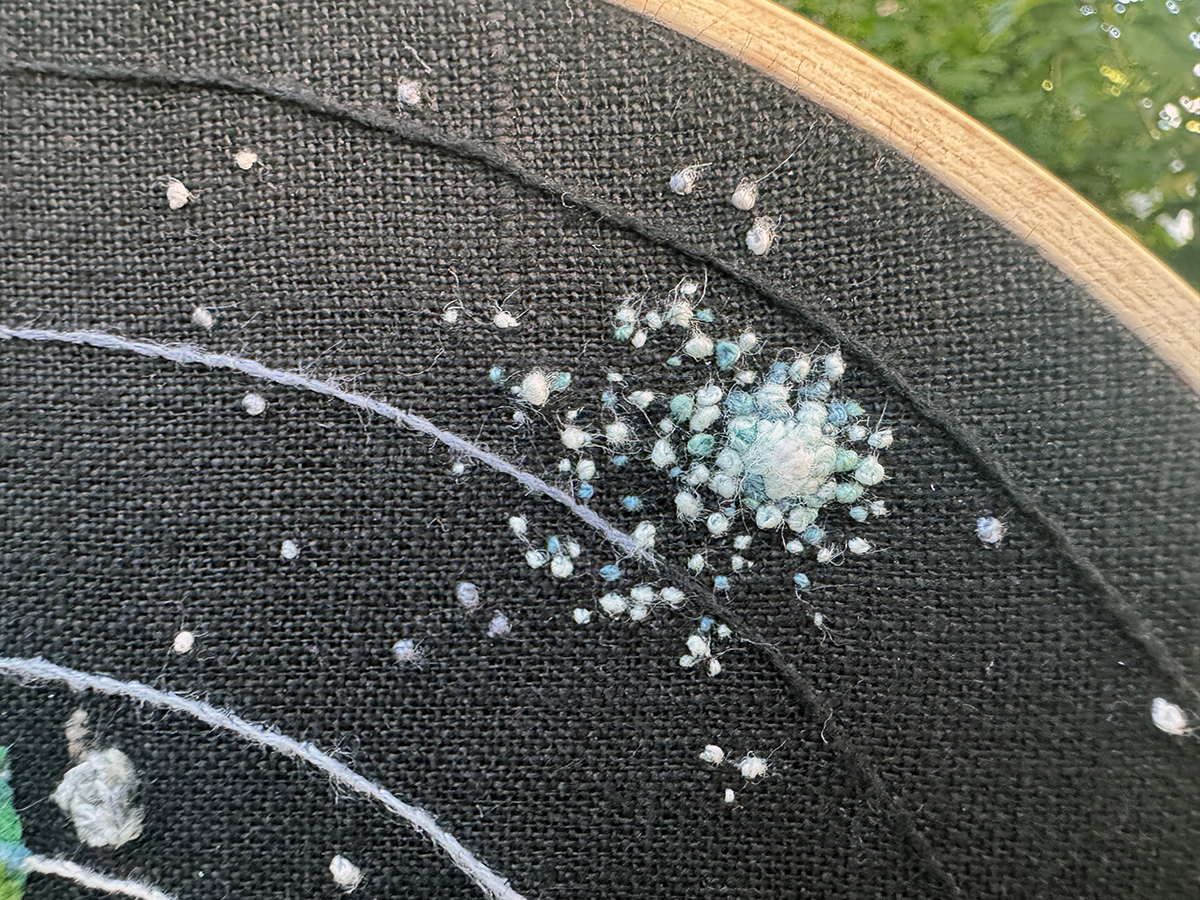
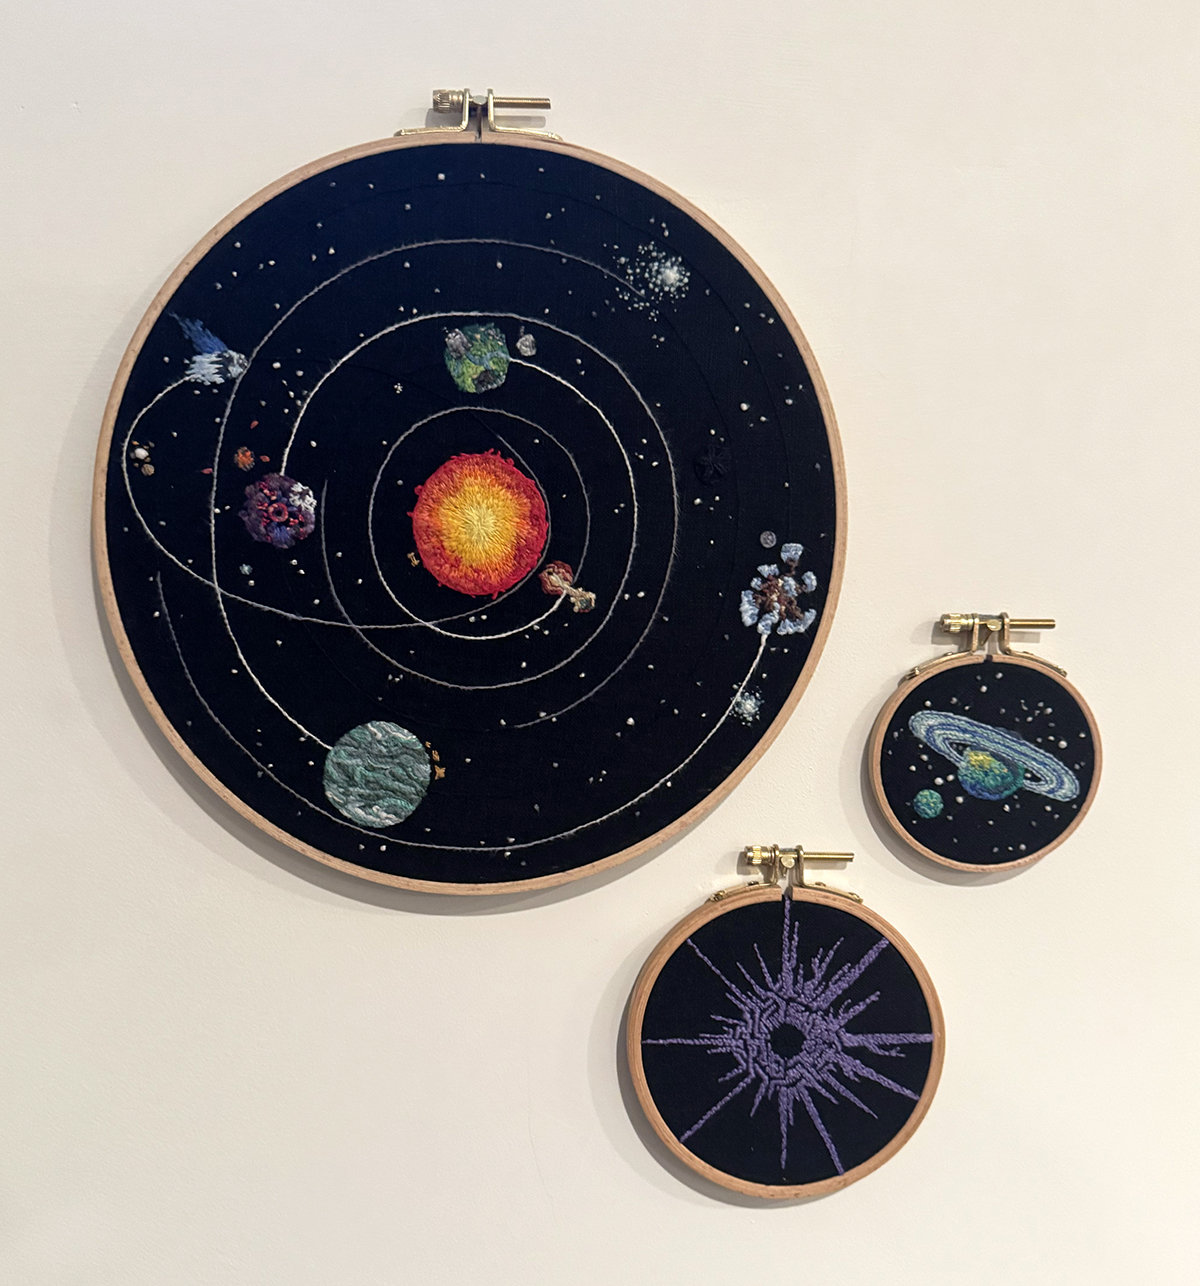
My partner and I played a lot of Outer Wilds during the peak of the COVID-19 pandemic, and it's probably no surprise that I fell in love with its charming characters and expansive universe. I decided to celebrate the game by embroidering its solar system.
Since Outer Wilds fans are especially touchy about spoilers, I should note that this project has them everywhere, I should probably note that you should read no further if you don't want any hints of what may come later in the game if you haven't already completed it and its DLC!
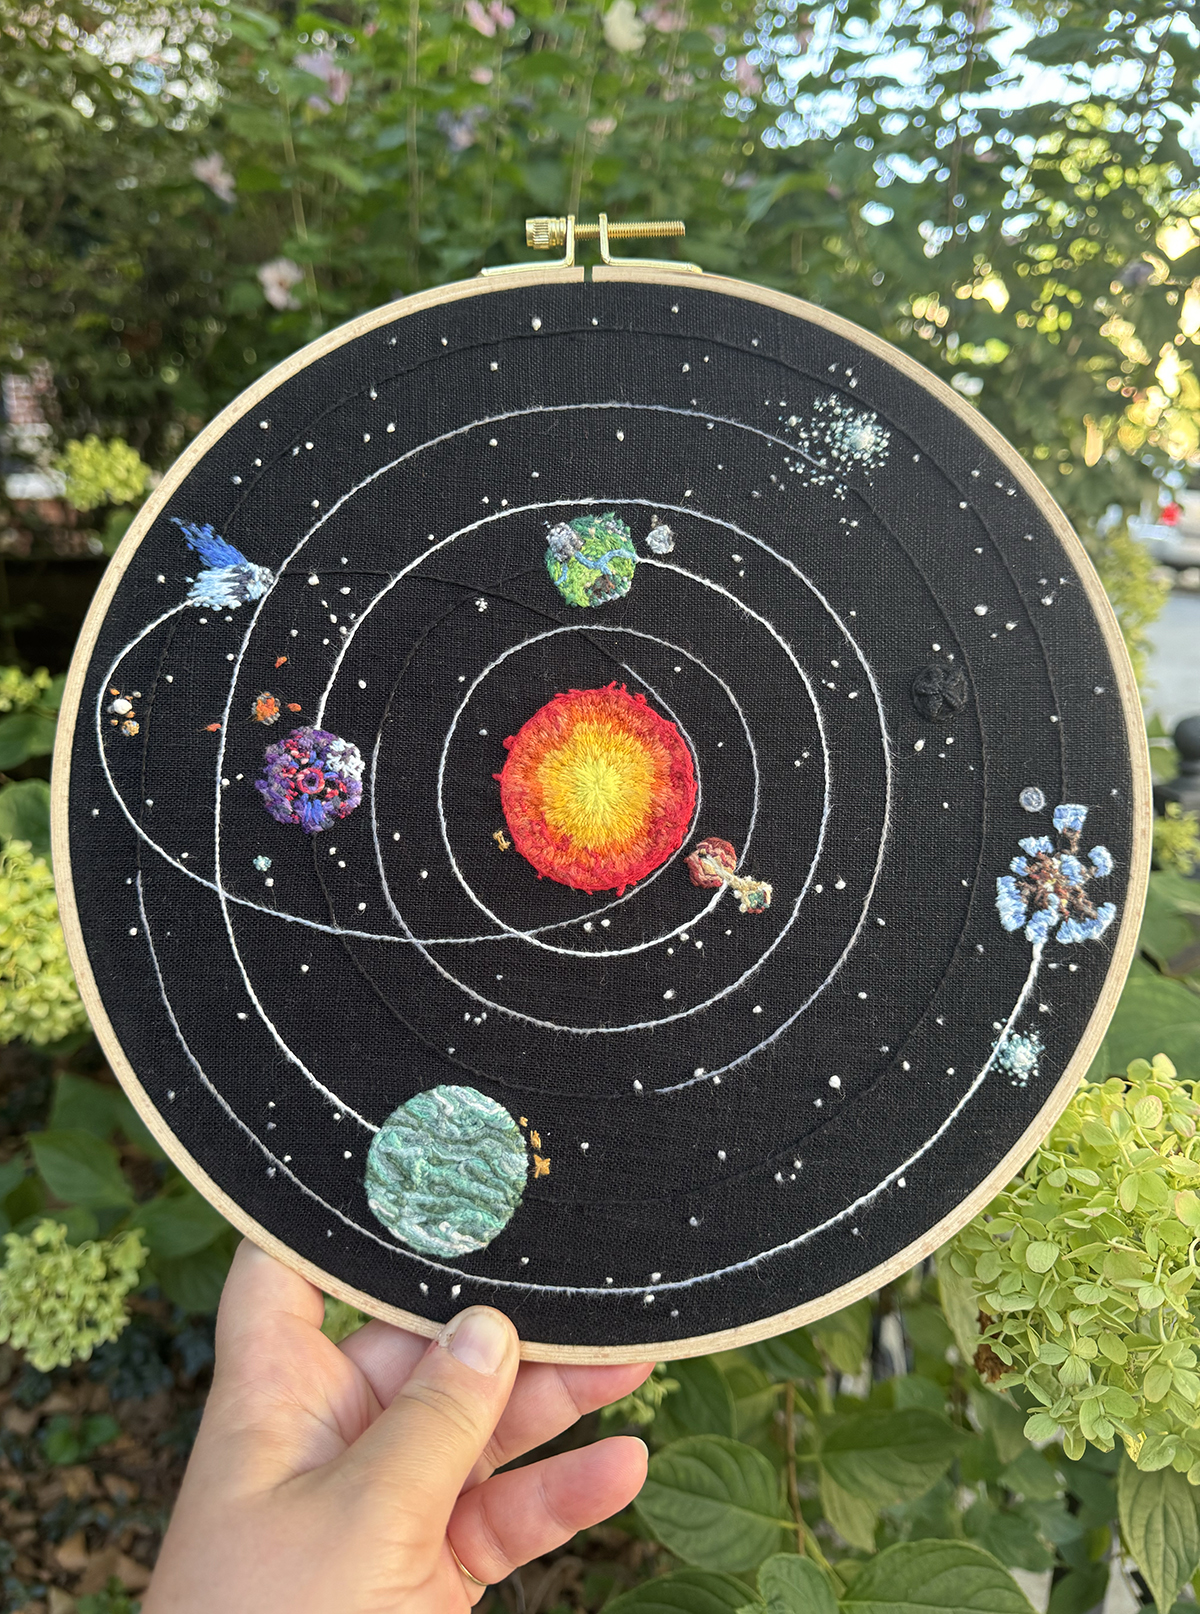
I based my Outer Wilds solar system design on where the planets are at about 9 minutes and 48 seconds into the loop, but everything is re-scaled - while maintaining the vibes of the original proportions - so the planets and background supernovas in the dying universe aren't tiny. I realize now that I have a pattern of adding hundreds of additional (and arguably unnecessary) French knots to my embroidery projects - I am non-sarcastically shocked that I made this choice right after doing thousands upon thousands of French knots for the Milky Way in my Northern Sky & Southern Sky quilts.
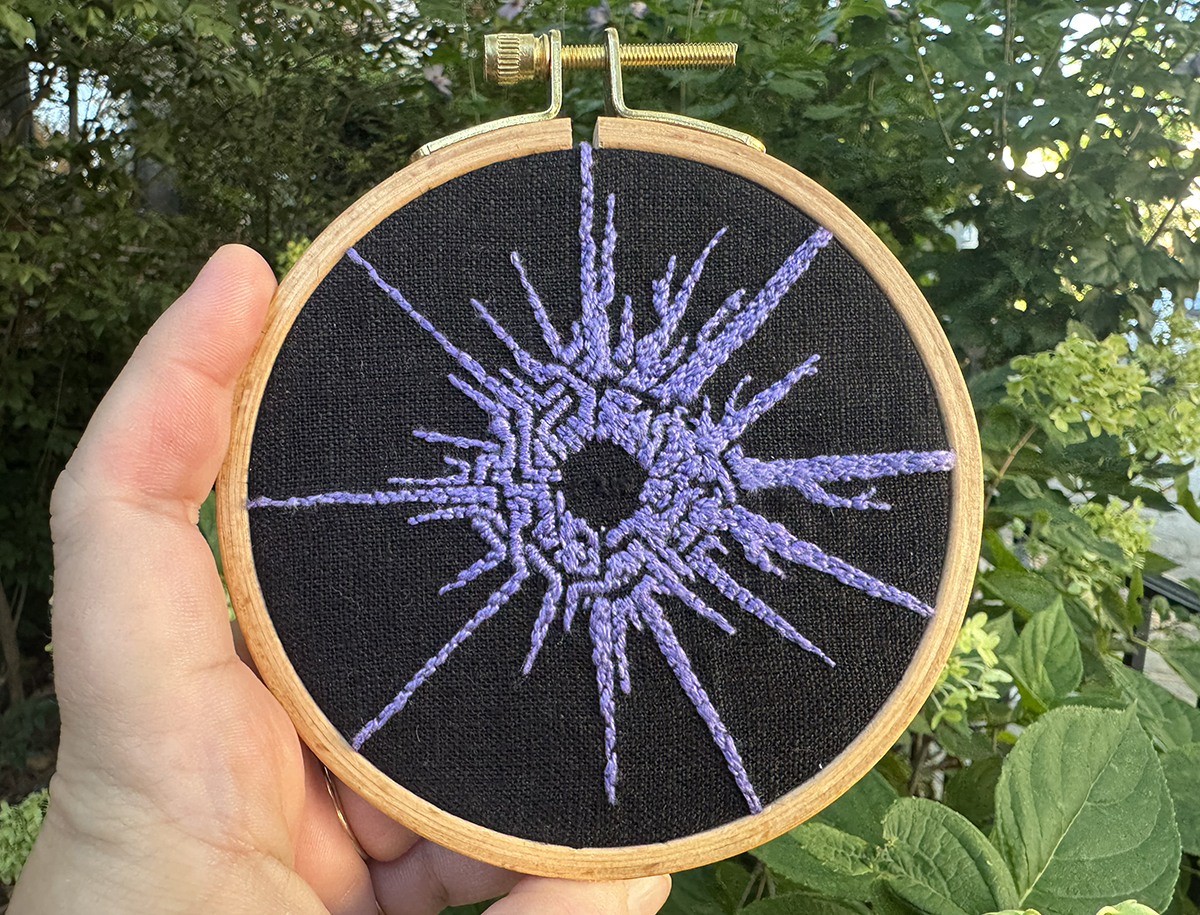
Since the Eye of the Universe and the Owlk's home both aren't in Hatchling's solar system, I did each in a separate hoop, too. I chose to represent the Eye with a blend of the symbols used by the Nomai and the Stranger's inhabitants, and I opted to represent the Owlk's home moon and the planet it orbits before they raided it to build the Stranger.
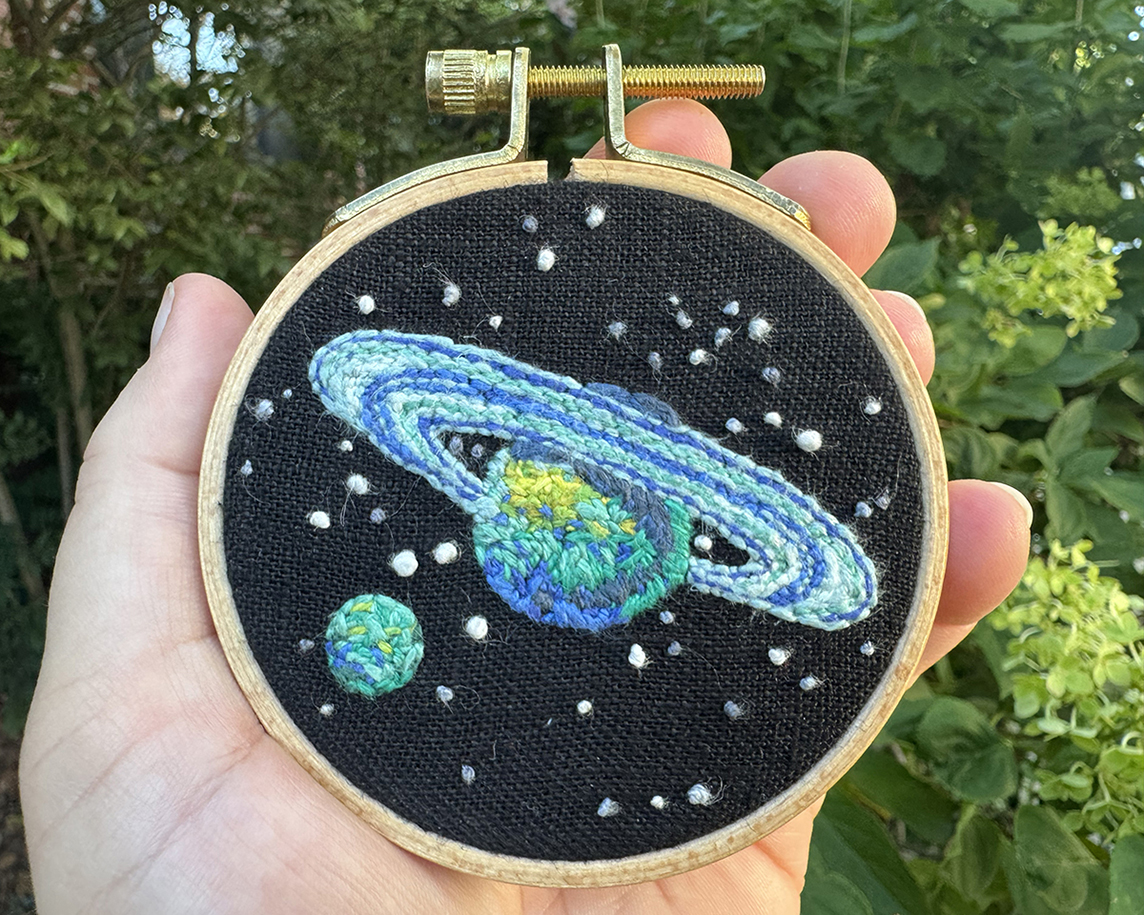
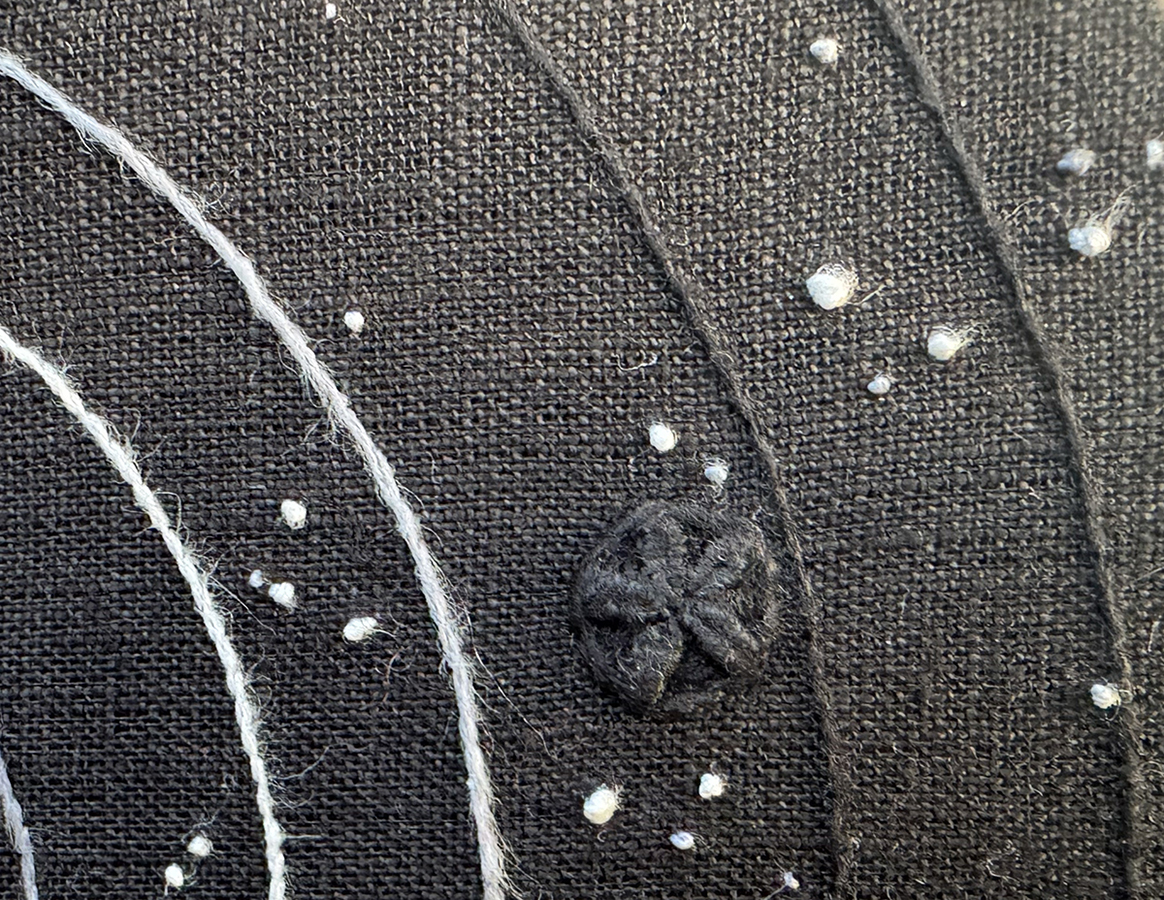
Each of the planets has a slightly different feel due to the stitches I chose. Here are some detail shots of the main hoop:
I've hung the three hoops together on a wall near my desk:
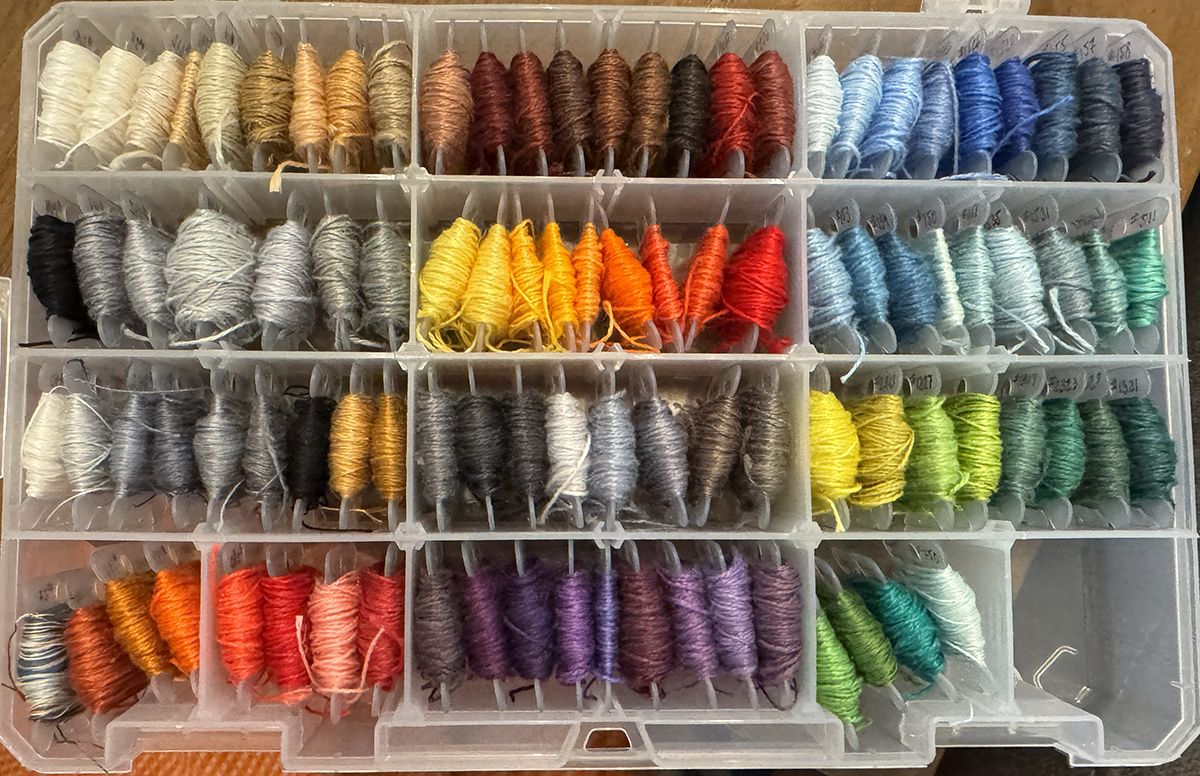
All in all, I ended up using 97 different linen threads in this project, including a handful of vintage ones and a highly variegated space-dyed thread that gave me access to 5 different colors and blends between them.
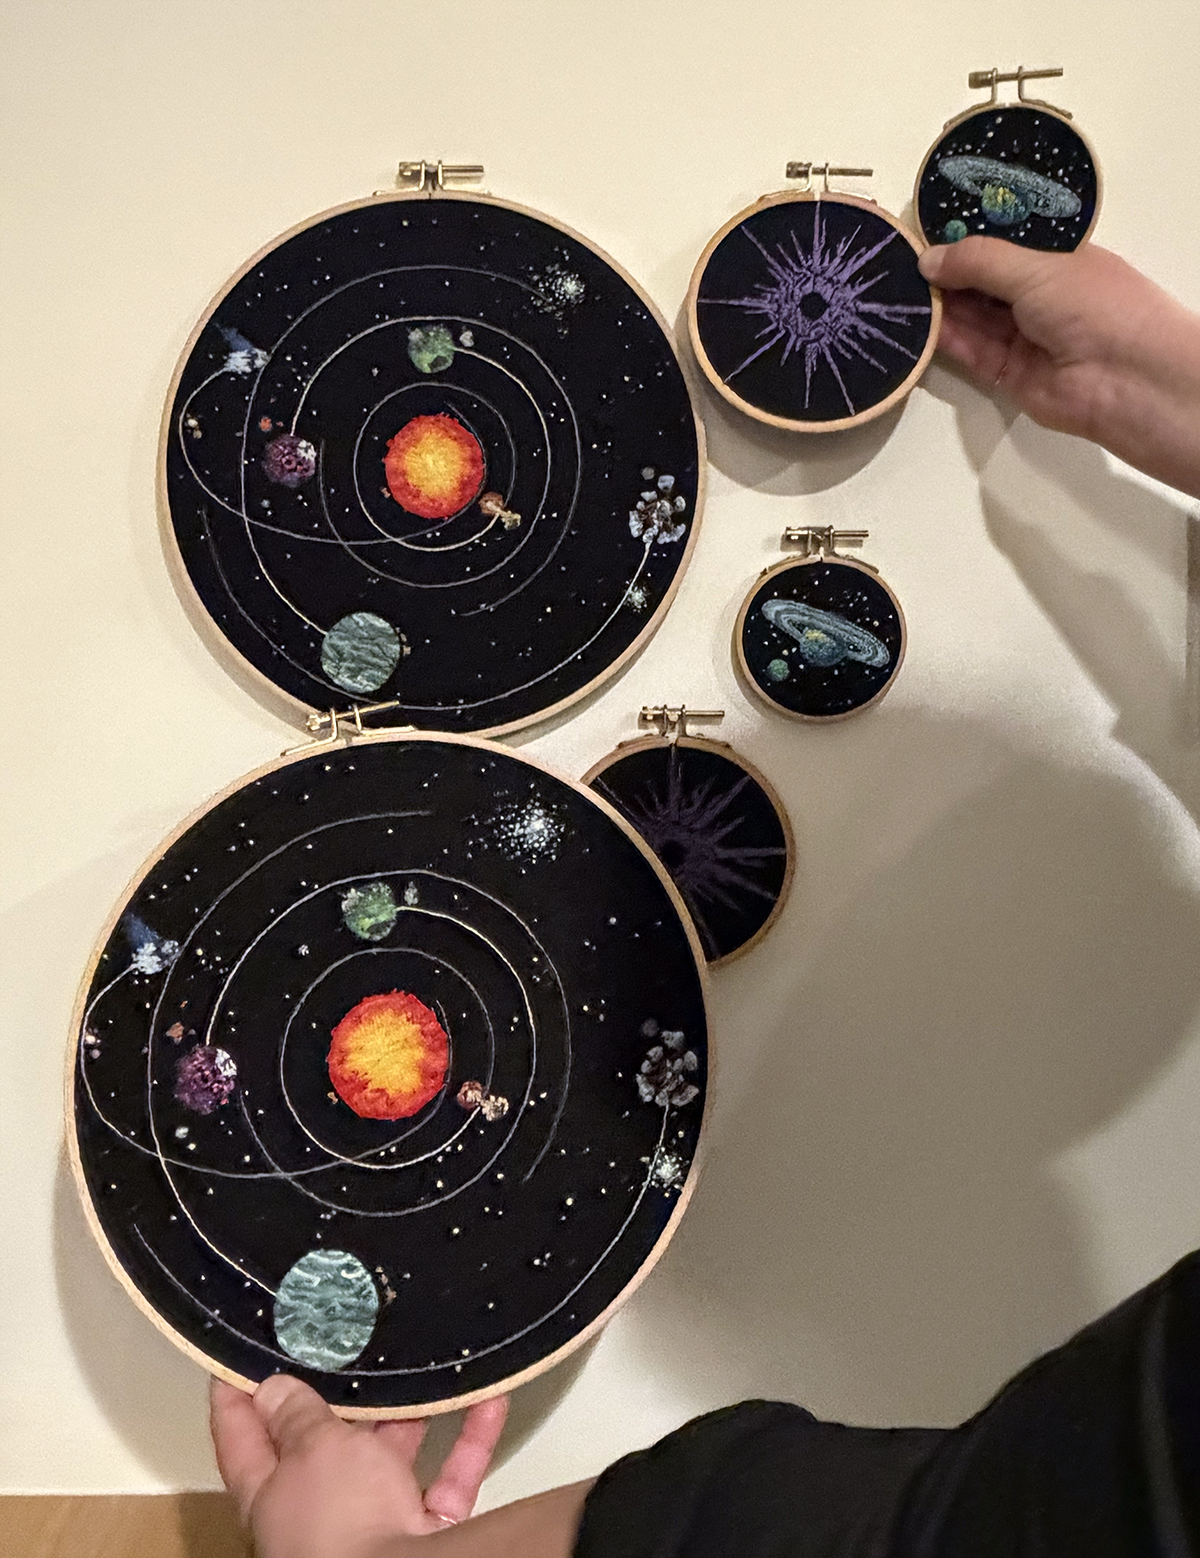
...and just in case that wasn't enough, I actually made this whole project twice, so I could give a copy to the friend who introduced me and my partner to this phenomenal game!
P.S. Since this is fan art, I don't feel comfortable publishing my design - sorry!
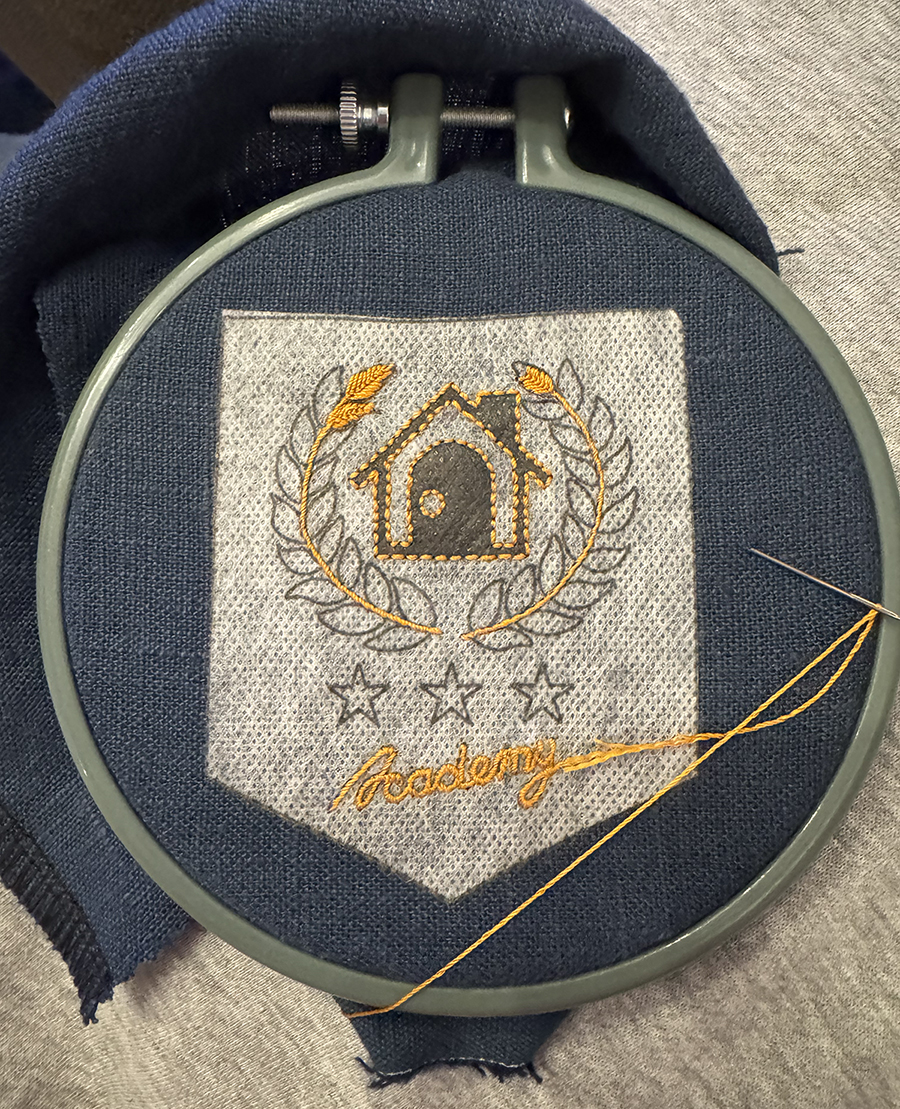
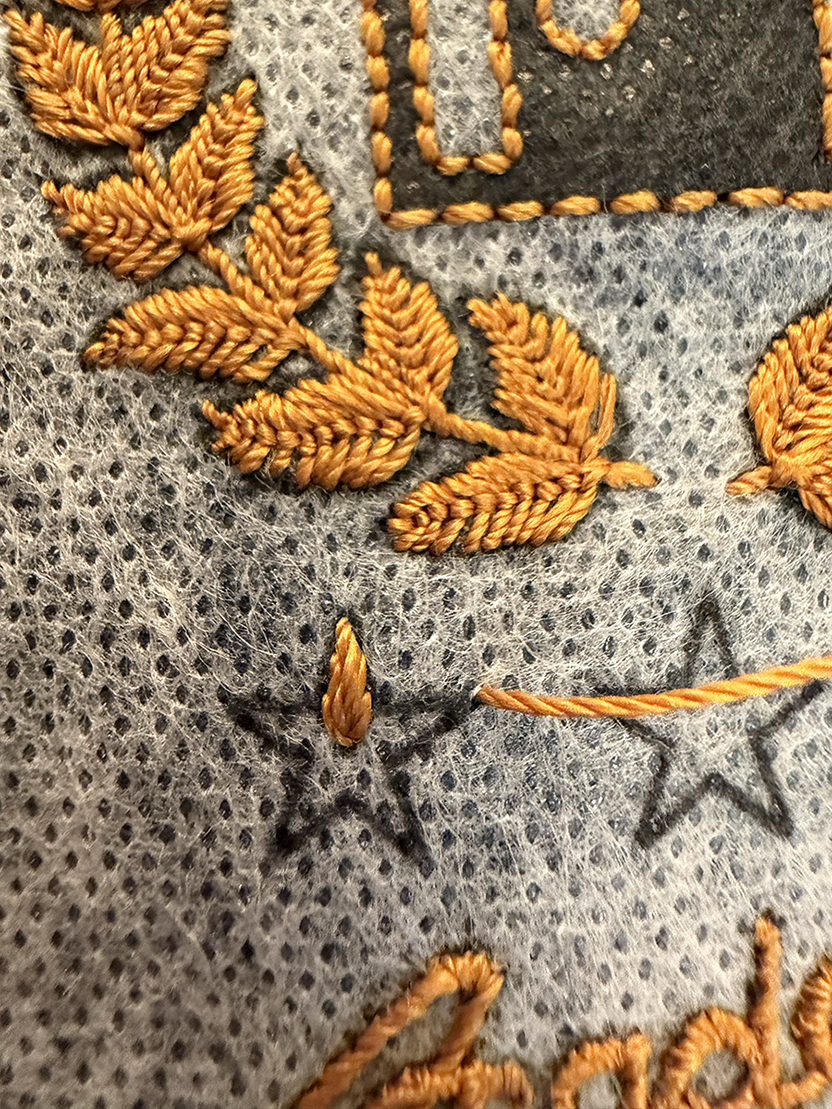
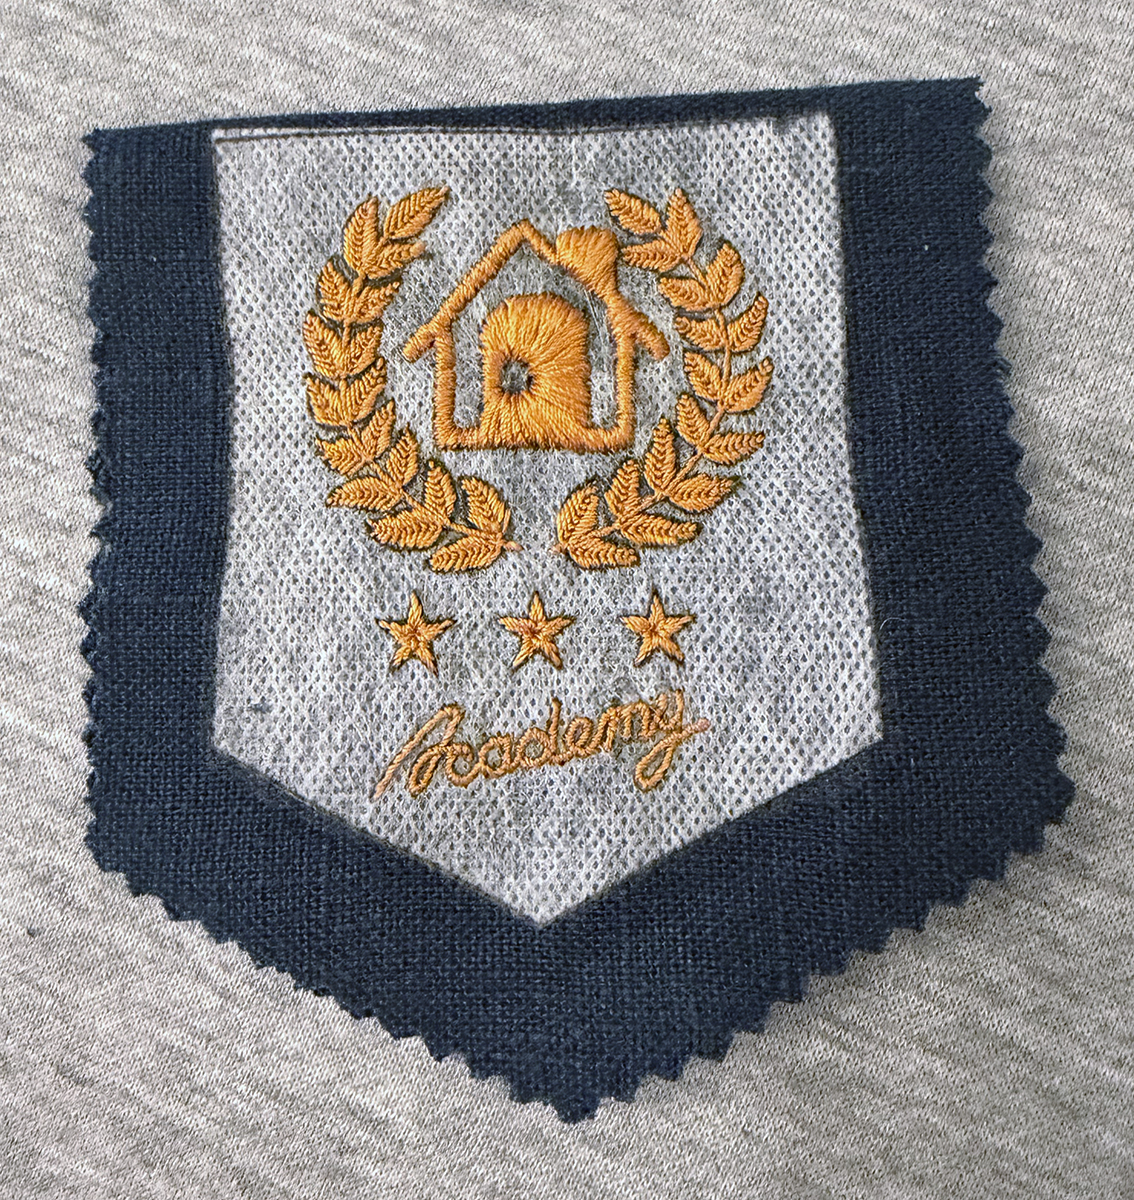
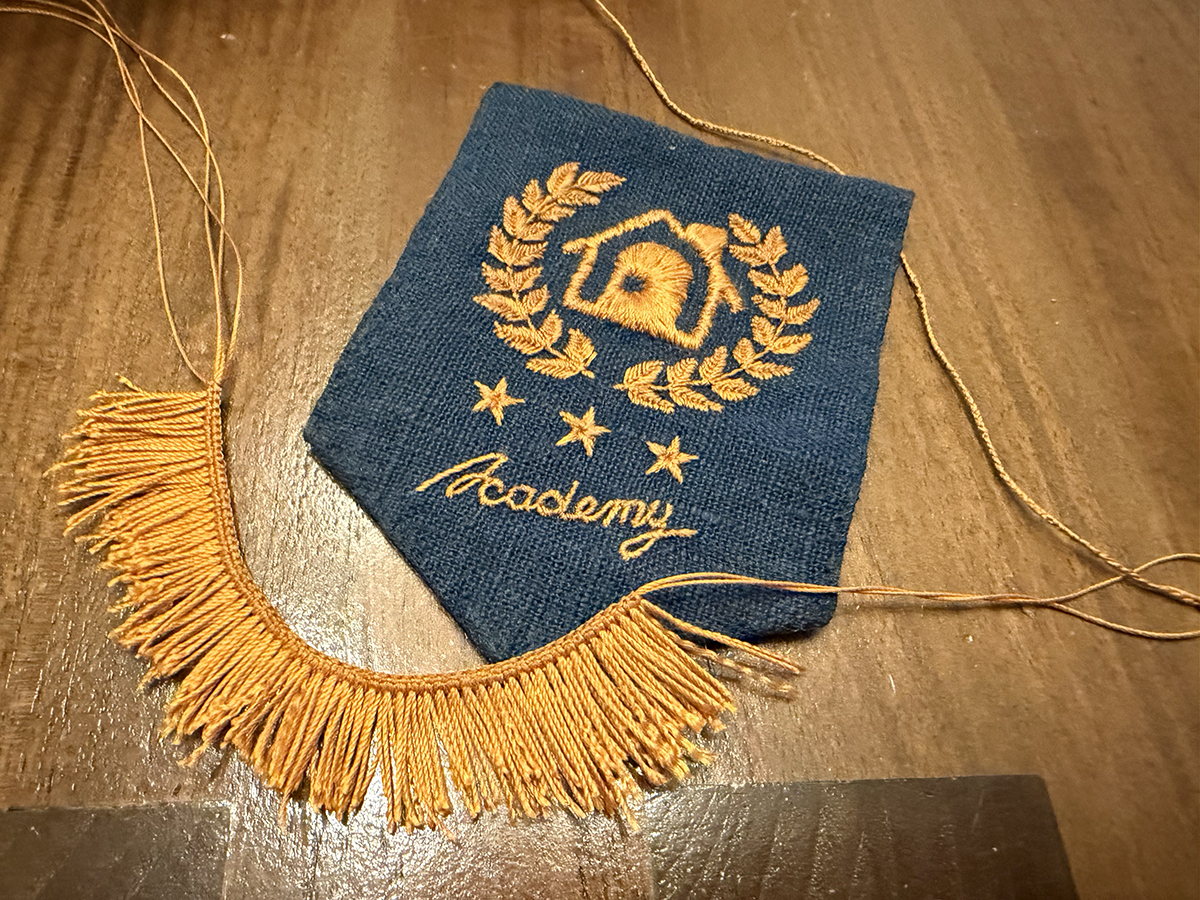
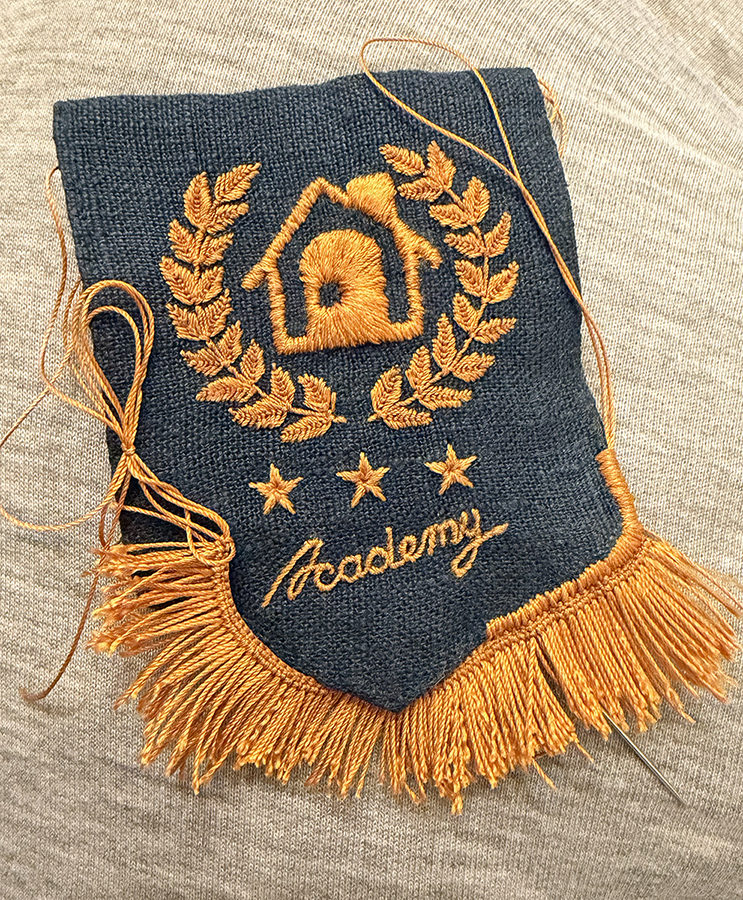
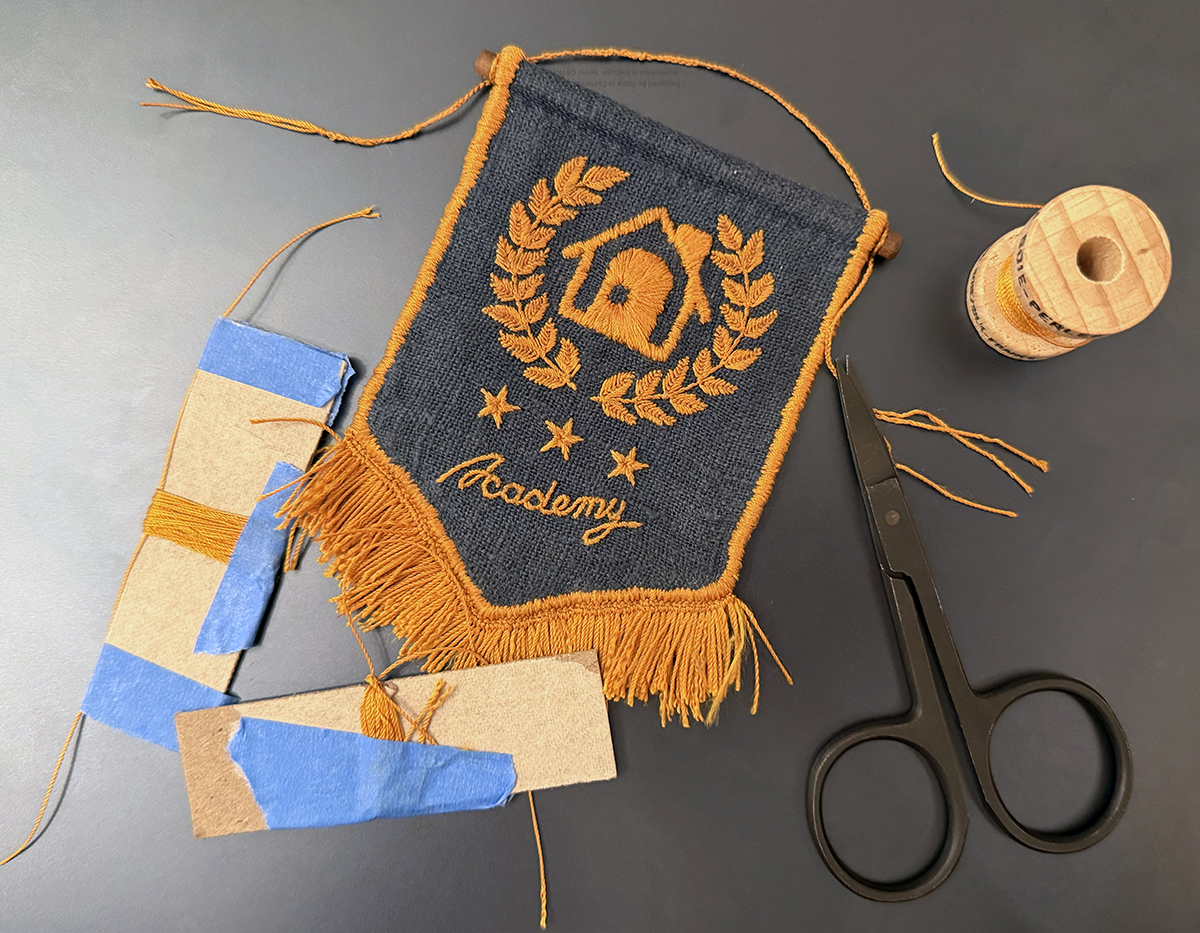
I wanted a small embroidery project after spending months on my Northern Sky & Southern Sky quilts, and since I was in the middle of planning a complicated original design that would use a many, many colors, I wanted something that used just a single embroidery thread.
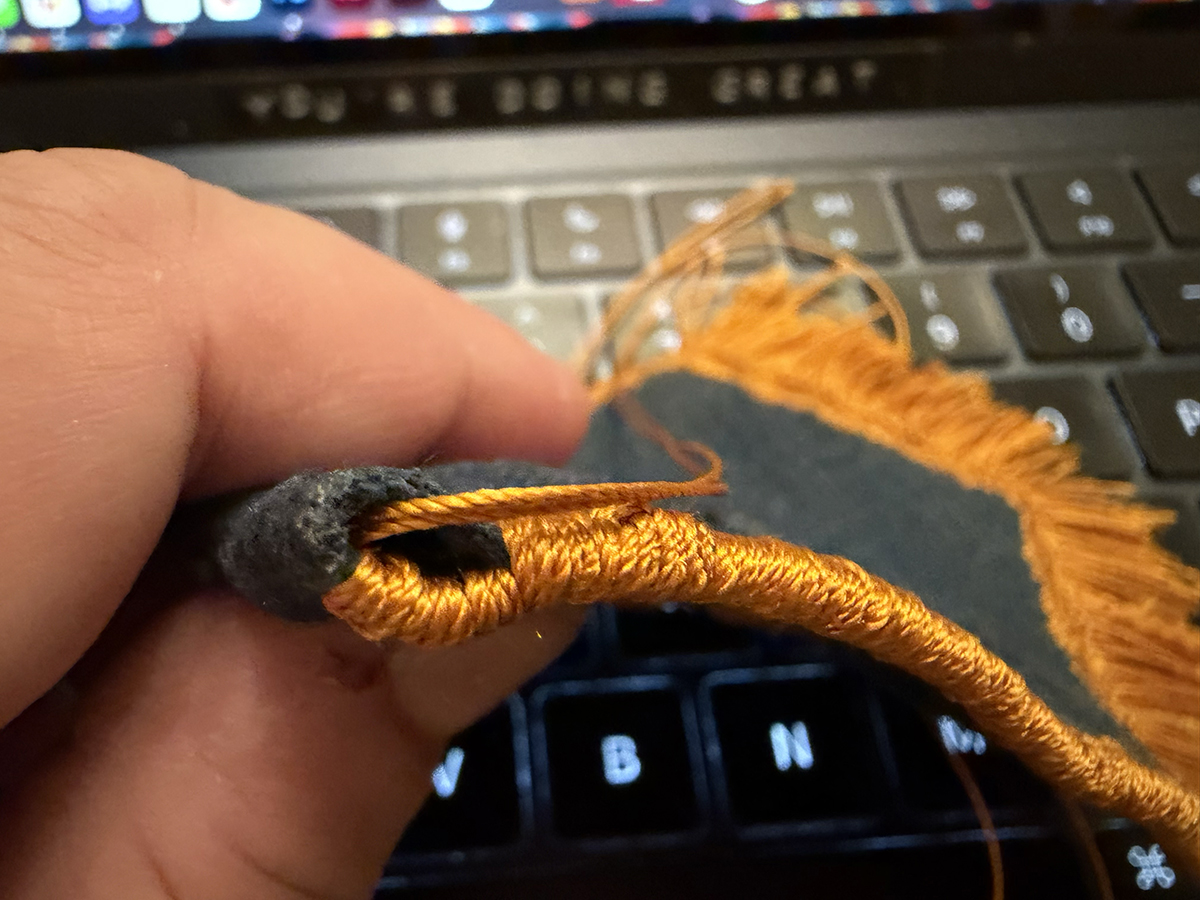
A tiny little embroidered Happy Home Academy pennant would fit that bill and help me use up some of the scrap linen from the Northern & Southern Sky quilts:
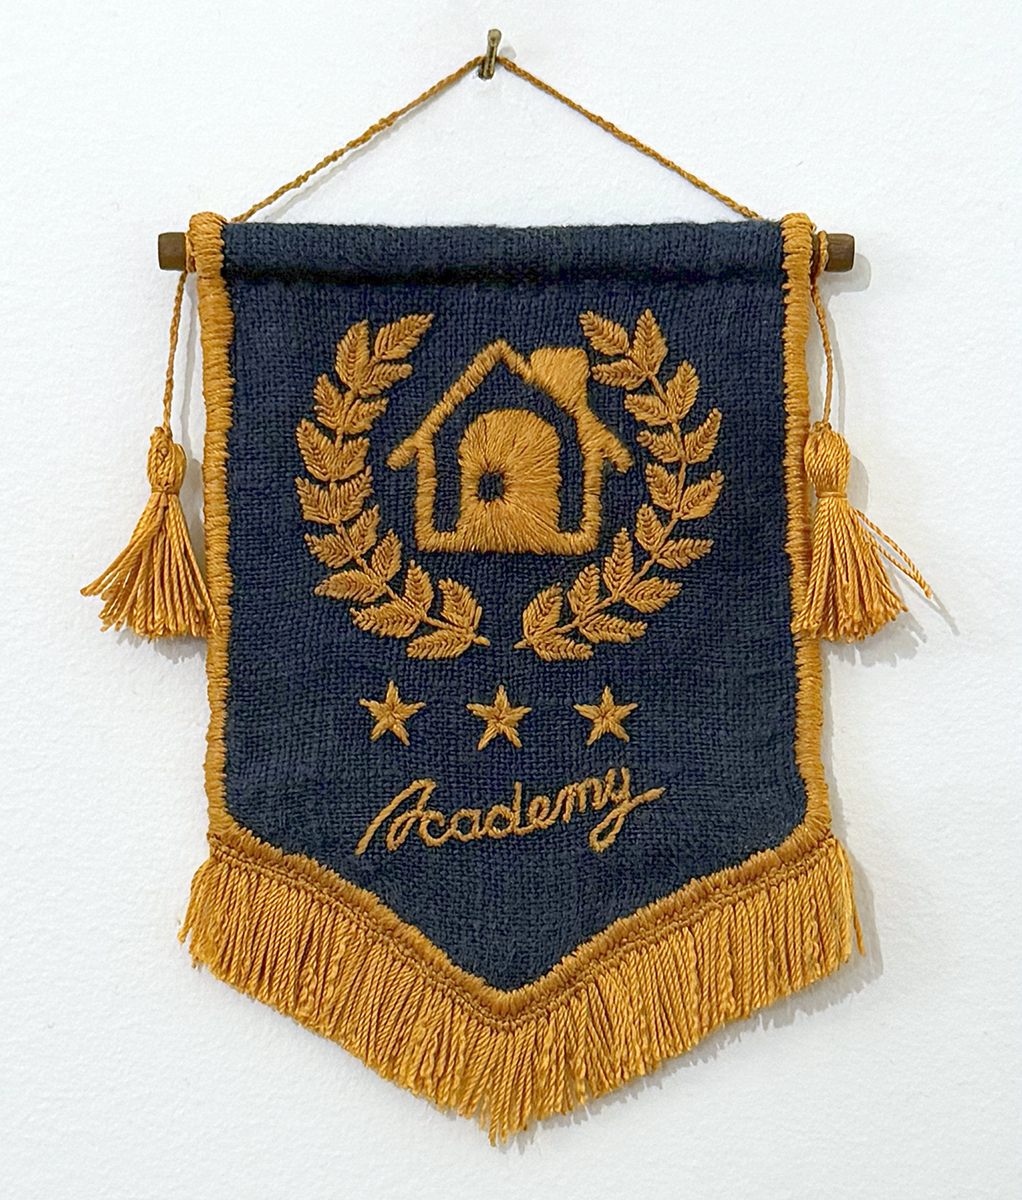
I'm not really sure why this felt like the right tiny thing to make in 2025 - years since I've actually played this game - but I'm excited for the surpise update that's dropping in January!


Here's my favorite villager next to the finished mini-pennant:
