I wanted a small embroidery project after spending months on my Northern Sky & Southern Sky quilts, and since I was in the middle of planning a complicated original design that would use a many, many colors, I wanted something that used just a single embroidery thread.
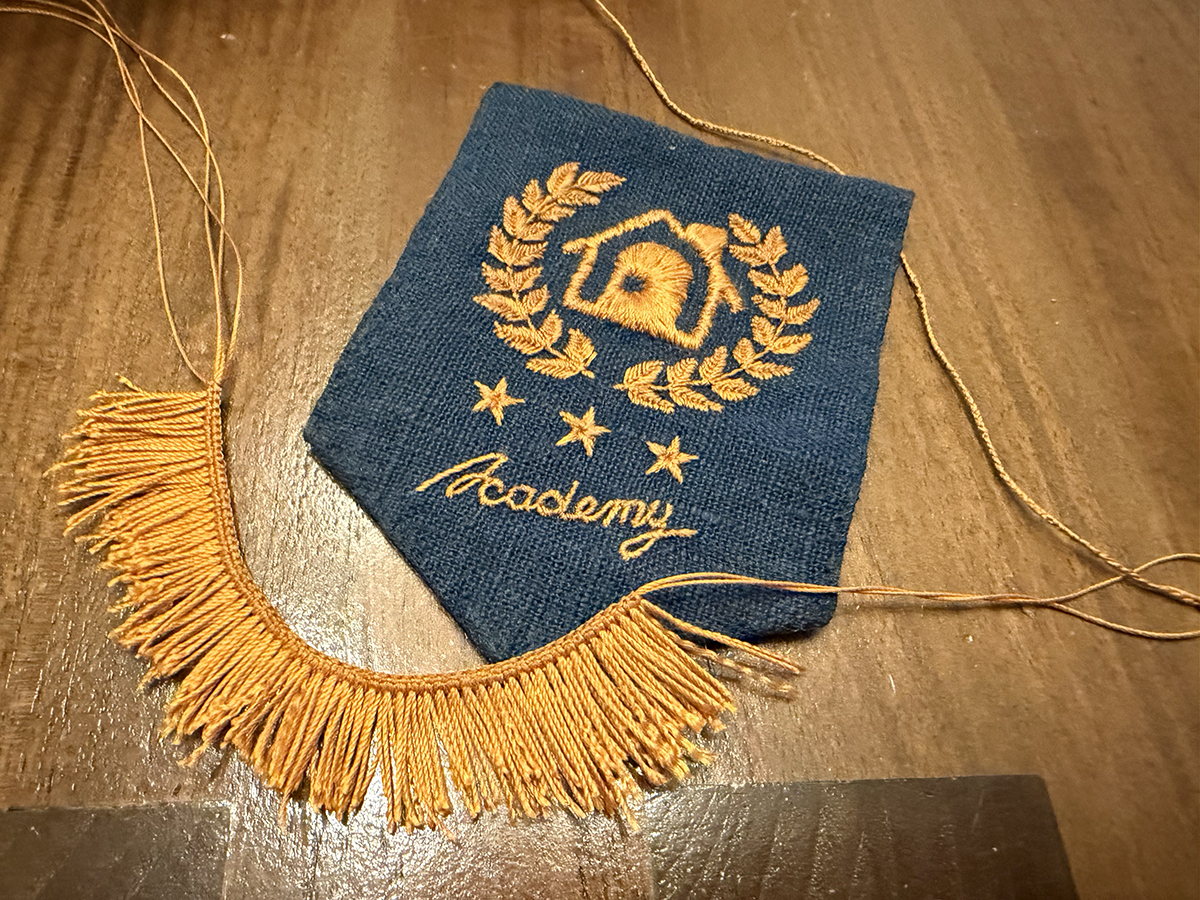
A tiny little embroidered Happy Home Academy pennant would fit that bill and help me use up some of the scrap linen from the Northern & Southern Sky quilts:
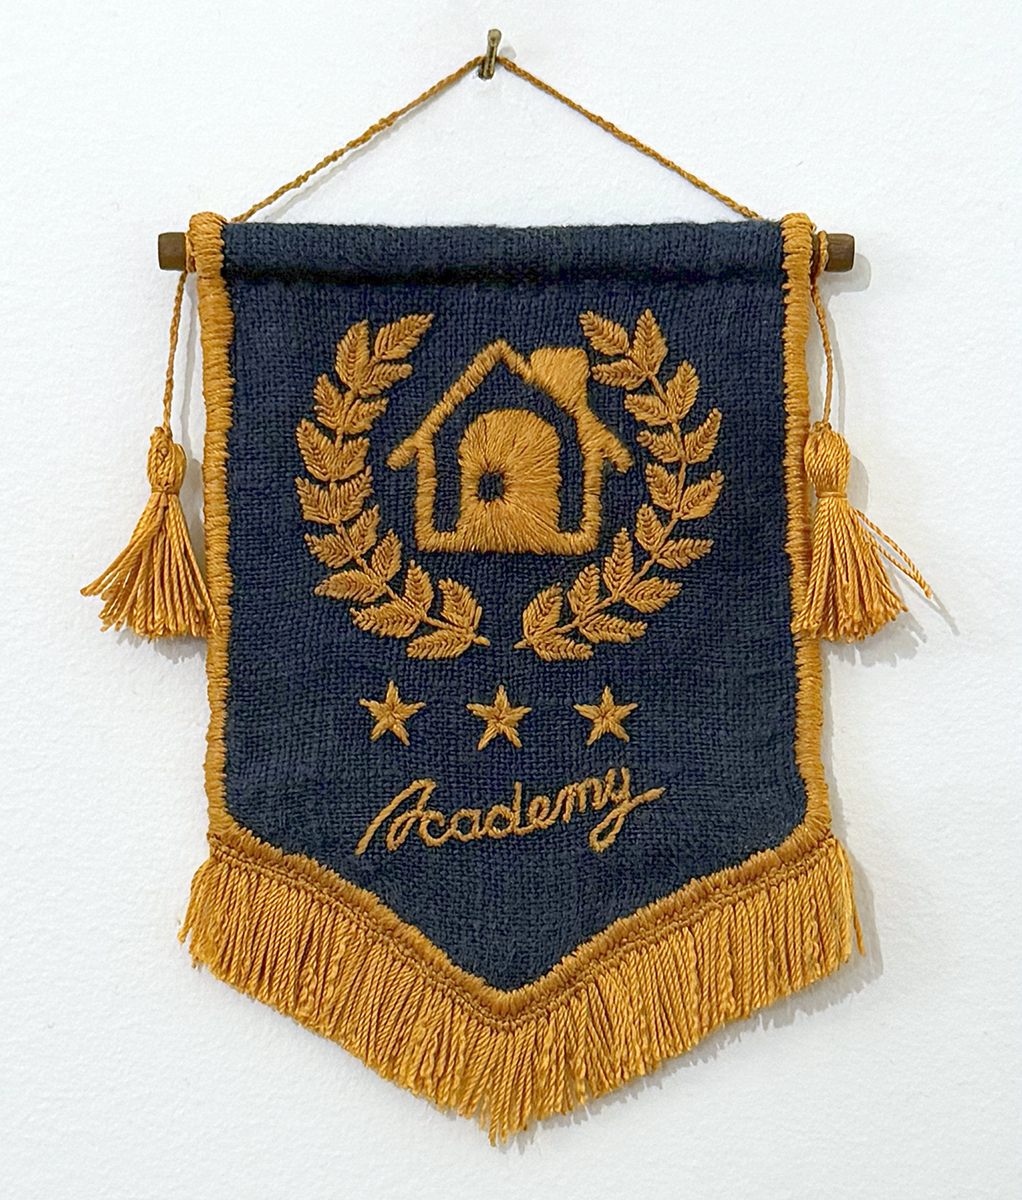
I'm not really sure why this felt like the right tiny thing to make in 2025 - years since I've actually played this game - but I'm excited for the surpise update that's dropping in January!
Materials
- Gold embroidery thread - I used Soie Perlée Silk Thread in Burnished Gold #677 and needed just under three 16-meter spools between the embroidery, fringe, hanging cord, tassels, and edge wrapping. I was very efficient in reusing scraps in the fringe and tassels and had about 2 meters leftover afterwards, so you may need a fourth spool.
- Dark blue fabric - I used a scrap of the Inky blue "Newton 260" linen from Merchant & Mills leftover from my Northern Sky & Southern Sky quilts
- Sulky Sticky Fabri-Solvy Stabilizer - I printed my basic design on this and affixed it to the fabric to embroider.
- Dark blue sewing thread to match the fabric - This is technically optional, as the stitches just under the rod could be omitted and you could sew it together just with gold embroidery thread instead of basting with thin, matching thread first. I used the linen's matching Gütermann thread.
- Wood dowel - I used a dark toned, 4mm thick dowel. FYI that some dark toned dowels are unstained inside - when I cut mine down, I had to recolor the end. I used extra wood stain I had around, but a marker would work well enough, too, in my opinion.
Tools
- Appropriately sized chenille needles - I used both size 22 and size 24 needles. Size 24 is a better fit for the thread size, but a little extra heft was helpful in dense areas so I wouldn't break the needle.
- Thimble - I prefer a leather one, and it's not strictly necessary, but it was occasionally helpful in areas where there was a high density of stitches.
- Fabric scissor - I used pinking shears to help prevent the linen from fraying.
- Embroidery scissor - I suppose this is optional, but I don't like keeping large scissors out by my embroidery projects.
- Iron and ironing board - Honestly, this project was so small that I used a hair flatiron most of the time because it was less to pull out and put away... even as someone who never bothers to use it on my hair anymore.
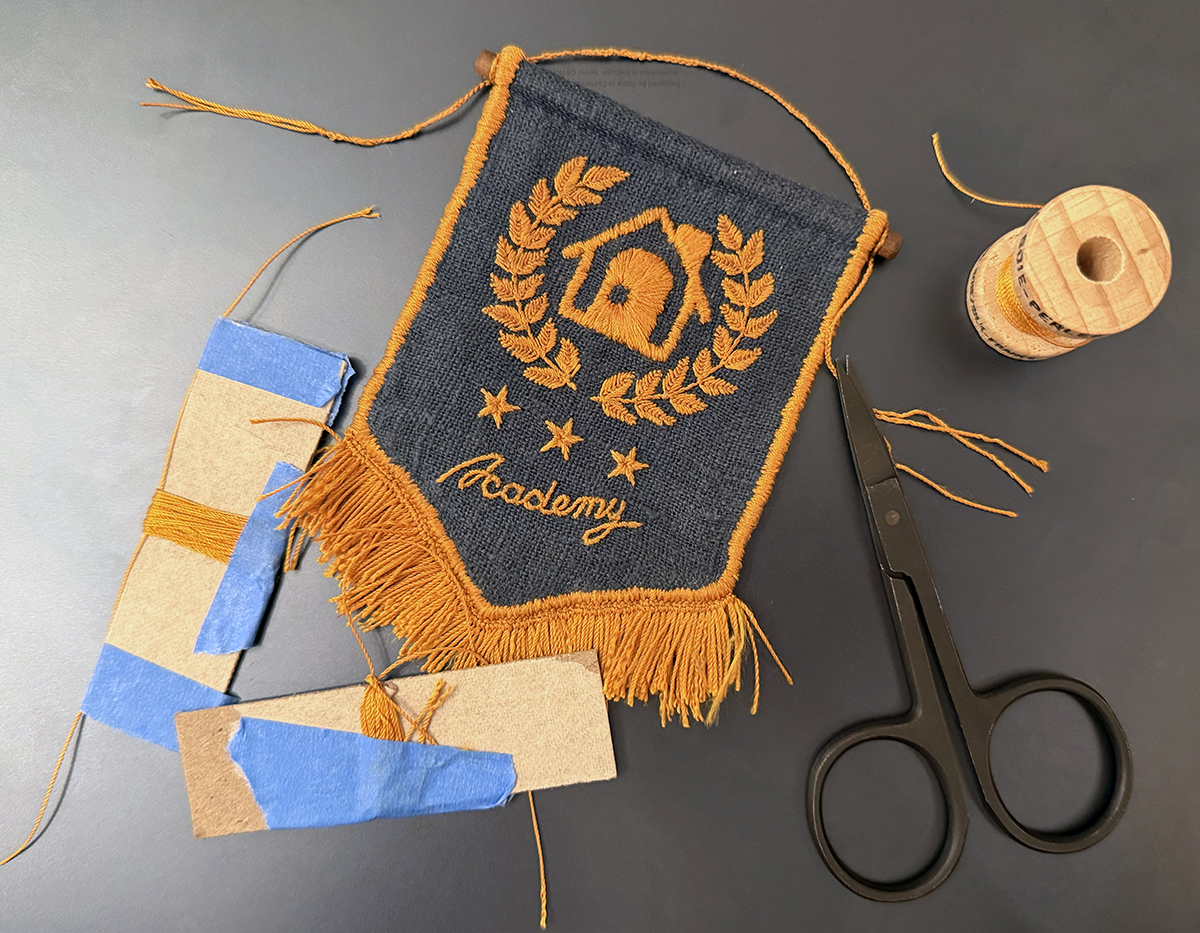
- Small cardboard piece - This is for making the tassels around.
Notes
- I did this project in little bits so I don't know how long it took me, but likely it was under 12 hours total (including trial and error and making decisions you wouldn't need to make if you follow all my notes on this project). Making the fringe by hand took a big chunk of that time, and you could buy premade fringe or forgo it instead to save time and avoid a really tedious task.
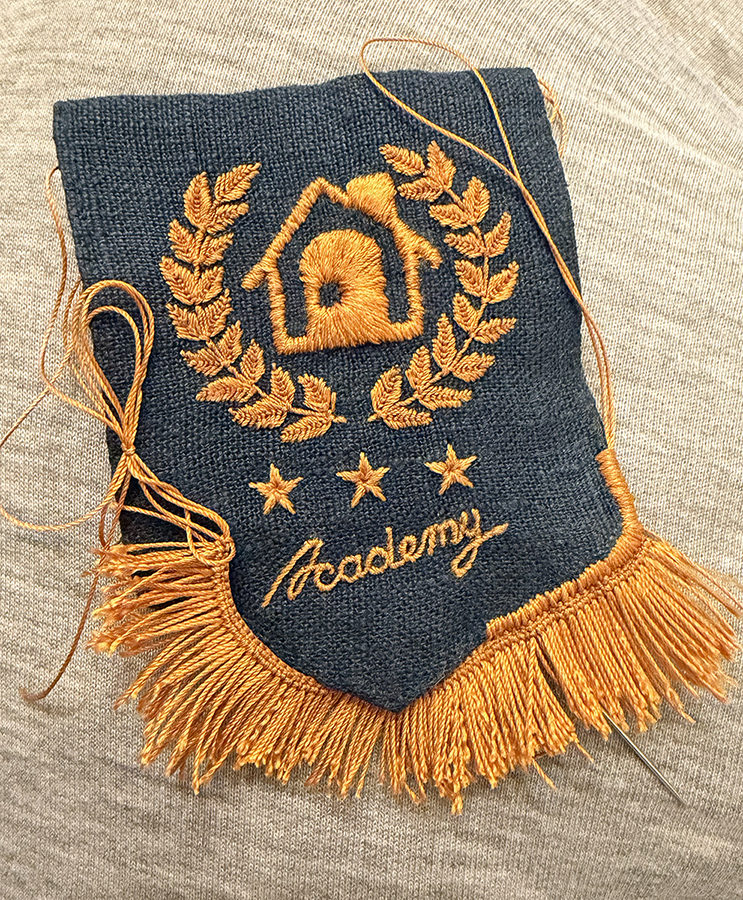
- I embroidered the main design - house, laurels, stars, and the word "Academy" in script - before cutting out the mini-pennant.
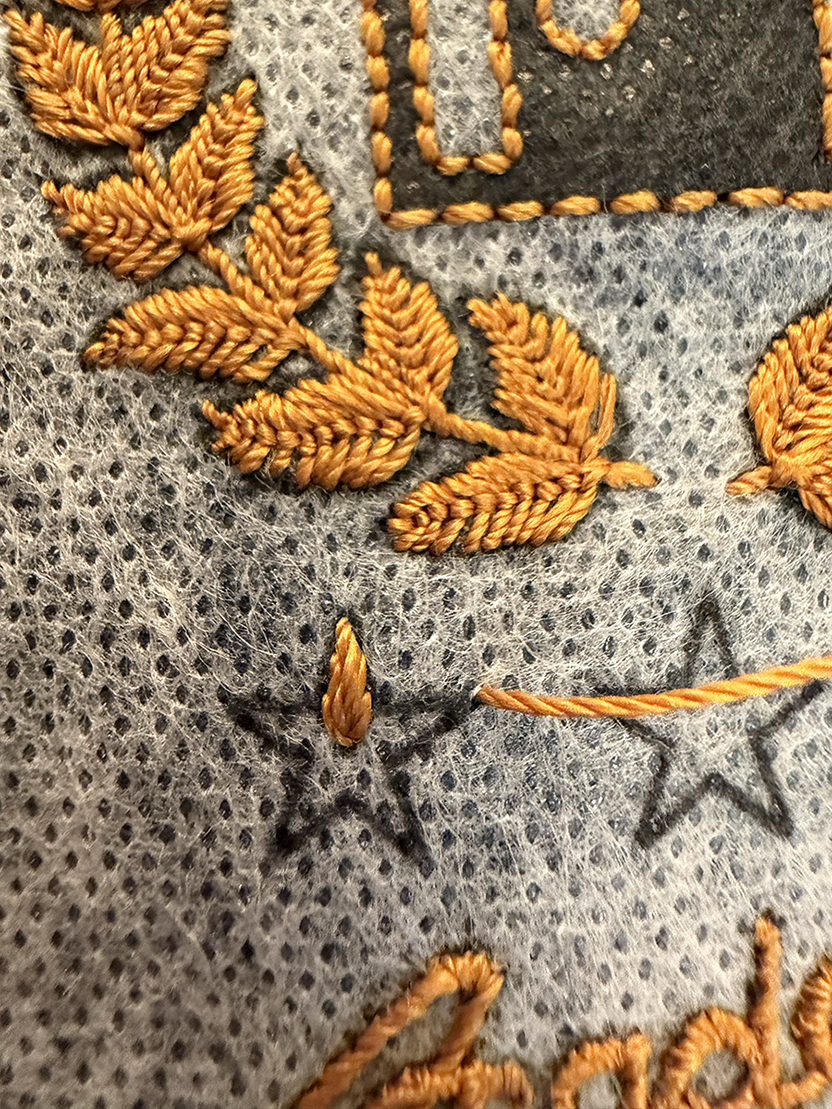
- I used satin stitch radiating out from the door handle for the home icon, stem stitch for the laurel branches and the word "Academy," closed fly stitch for the laurel leaves, and a very tight ray stitch for each of the five segments of each star from the center of the star to the point. I embroidered with the gold silk thread as a single thread.
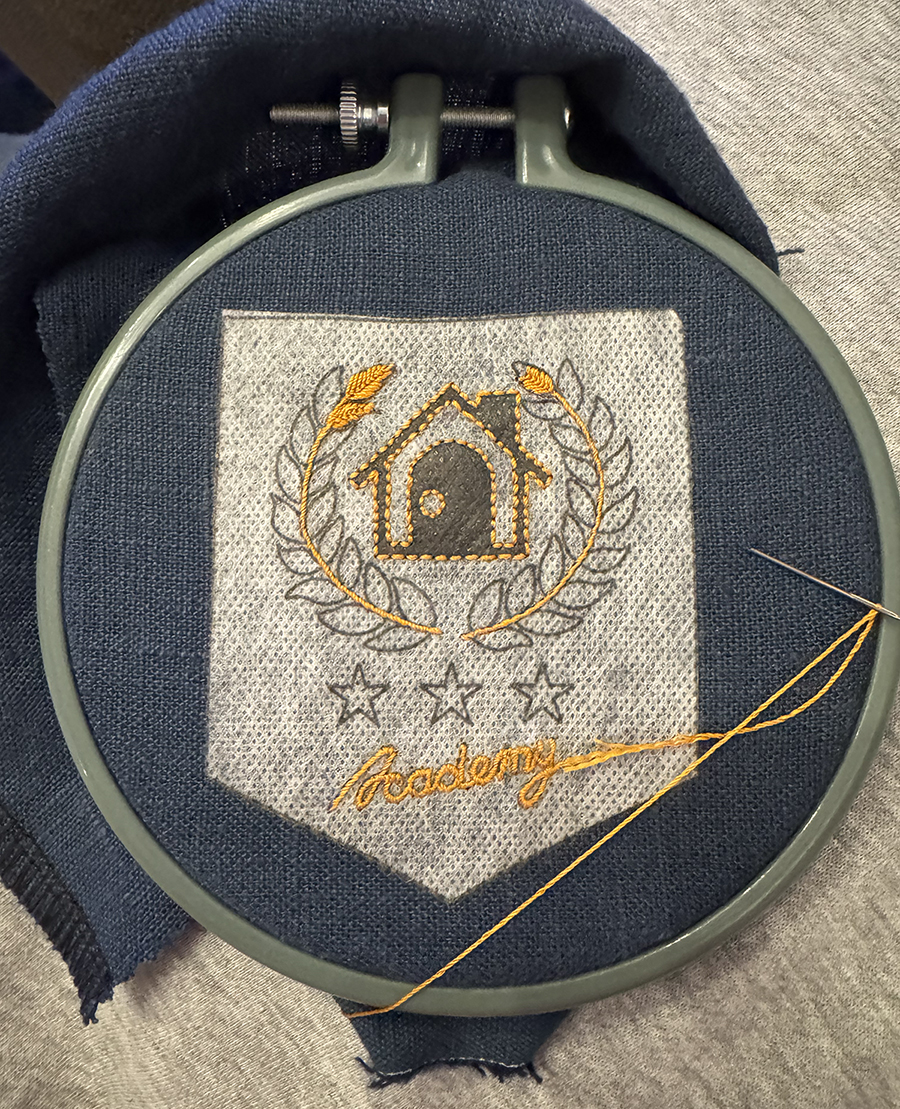

- I made a rough template for my design on Sulky Sticky Fabri-Solvy Stabilizer and washed it off before wrapping the edges or attaching the rod, fringe, or hanging cord. Sorry, but since it's fan art and not my design, I don't feel comfortable sharing it. To be honest, if I wasn't otherwise interested in improving my proficiency with the Photoshop pen tool, I would have just printed a screenshot of the game item to scale on Fabri-Solvy.
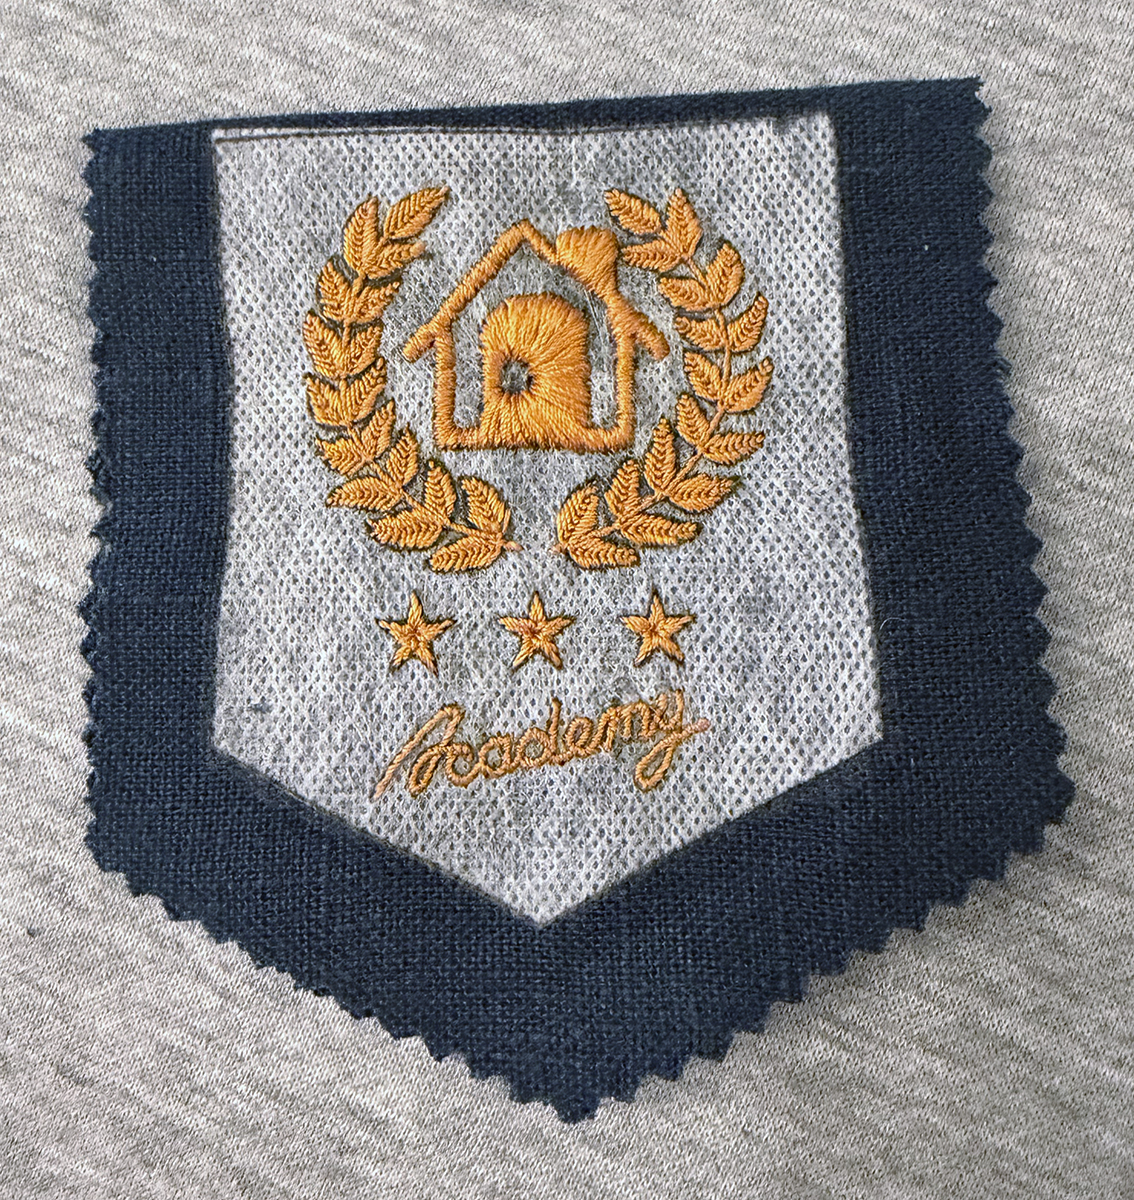
- Since I was using linen, I gave myself a 1/2-inch seam allowance and cut out the shape with pinking shears. If you don't cut it evenly enough and think about how to fold over the seam allowance so that it doesn't lie flat before wrapping the edges, it will show even more after wrapping the edges.
- I made fringe by doing macrame square knots with lark's heads added on one side (the same side) of every knot like one could add a bead on the side (every knot meaning 2 per repeat) with the hitch facing the same direction every time. To attach it to the pennant, I stitched through the loops on the other side where I didn't add lark's heads. There are probably better ways to make fringe - I just decided to try something I thought would work with skills I already knew, and it did!
- I did not tie or cut off the ends of my fringe before I attached it. I made this choice deliberately so that I could undo knots or add more length as needed, and this turned out to be very wise as I needed much more length than I expected because I ended up able to stitch it more closely together than I guessed.
- I left my fringe untrimmed until I was otherwise completely done with the project so that I could iron it one more time in its final form before trimming to get the straightest possible edge.
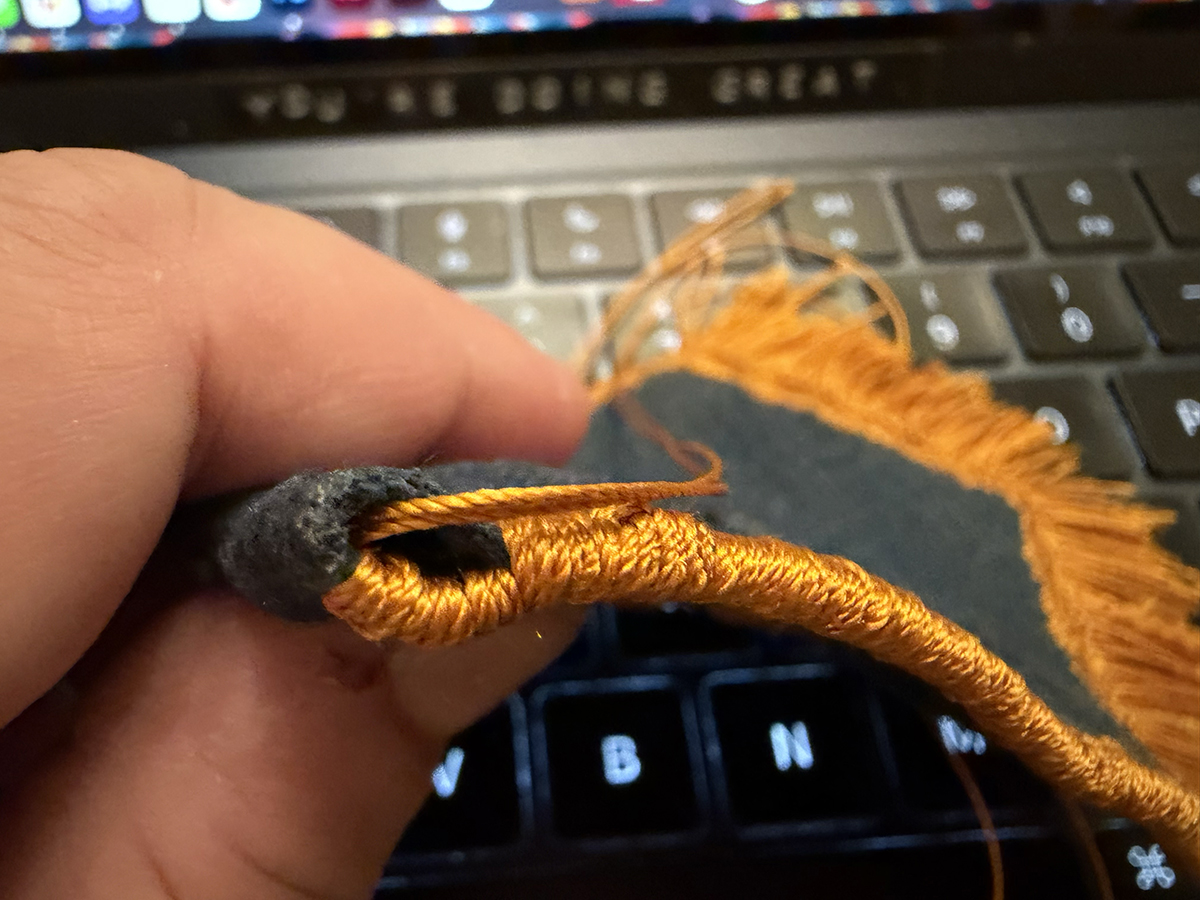
- I held the gold embroidery thread double when attaching the fringe and wrapping the edges of the pennant. I hid excess threads from the base of the macrame square knots under the edge wrapping.
- I braided the hanging cord out of three single strands of the gold silk thread to make it more substantial. I notched the dowel with a scissor before tying the braid on so it wouldn't slip, and I also ended up stitching the square knots I secured in those notches into the wrapped border so they'd stay on the back of the pennant. (One side actually had a third knot on top of the square so the ends both were on the bottom).
- I made simple tassels, like so, to hang at the bottom of the hanging cord. I used a long piece of thread for the knot to draw the tassel top together. I ran one side of that piece of thread through the braided hanging cord's end where I wanted the tassel to begin, knotted it, and incorporated the leftovers into the tassel. I tied another small piece of thread around the tassel about a third of the way down to gather it together.

- To match the original pennant's design, I used my dark blue sewing thread in a running stitch just under the dowel.
- I'm overall extremely happy with the result, but if I were to make it again (I will not), I would sandwich a layer of very thin batting between the pennant sides so that the knots hidden inside aren't visible at all as subtle lumps from the back. That said, the lumps are very subtle, and this is at most 0.0005% unhappiness with the project as they won't even be seen when it's hanging on a wall - it just feels a little bad to have finished the back slightly imperfectly!
Here's my favorite villager next to the finished mini-pennant:
