Like so many other hat knitters, I've knitted the classic WWII watch cap, which is also known as Beanie no. 212, more than a handful of times. (You can find it on Ravelry here and here, respectively.) It's a charming, quick knit that's easy to resize, but I've never really liked the crown shaping on the original.
I've knit a lot of these hats, and only one's had the original crown shaping for the decreases. I'm sharing two crown shaping variations I keep going back to below. I always knit this hat in the round, and my crown shaping patterns assume you will be knitting in the round, too.
Alternate crown shaping 1
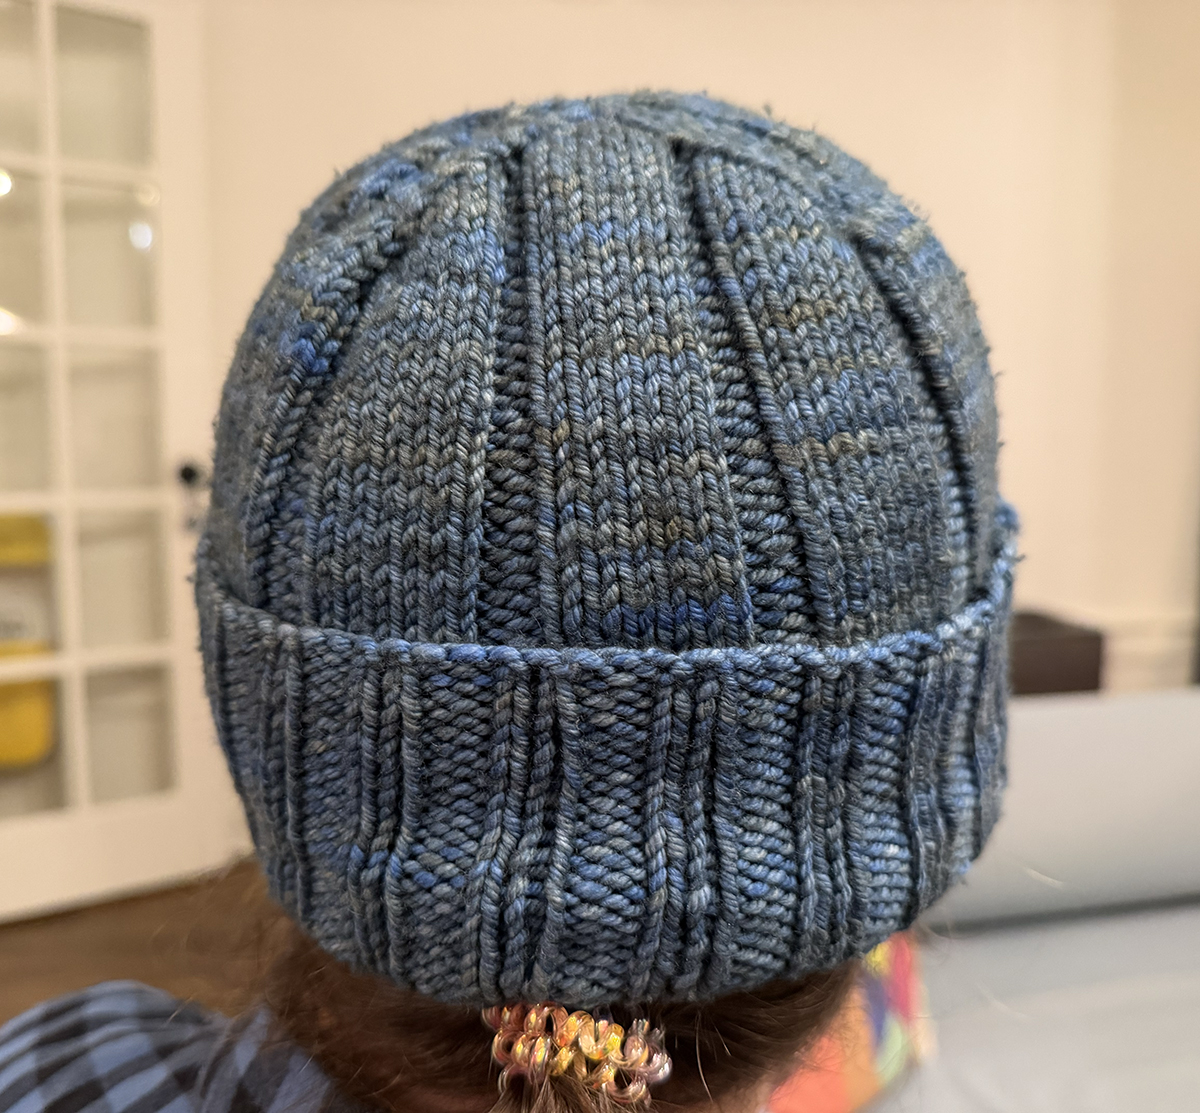
This alternate crown shaping follows the 6x2 ribbing of the previous section for the bulk of each round so that the ribbing continues throughout the entire hat.
Written out:
Divide stitches on 3 double pointed needles with stitches evenly divided among the three needles or mark out even sections with stitch markers if decreasing across 2 circular needles or with magic loop.
- (k1, ssk or skp, k if previous row was knit or p if previous row was purl until 3 stitches are left on the needle/before the next marker, k2tog, k) x3.
- Repeat step 1 until 4 stitches remain on each needle/in each marked section.
- Cut and draw yarn through the remaining 12 stitches 2-3 times. Tie off and weave in the ends.
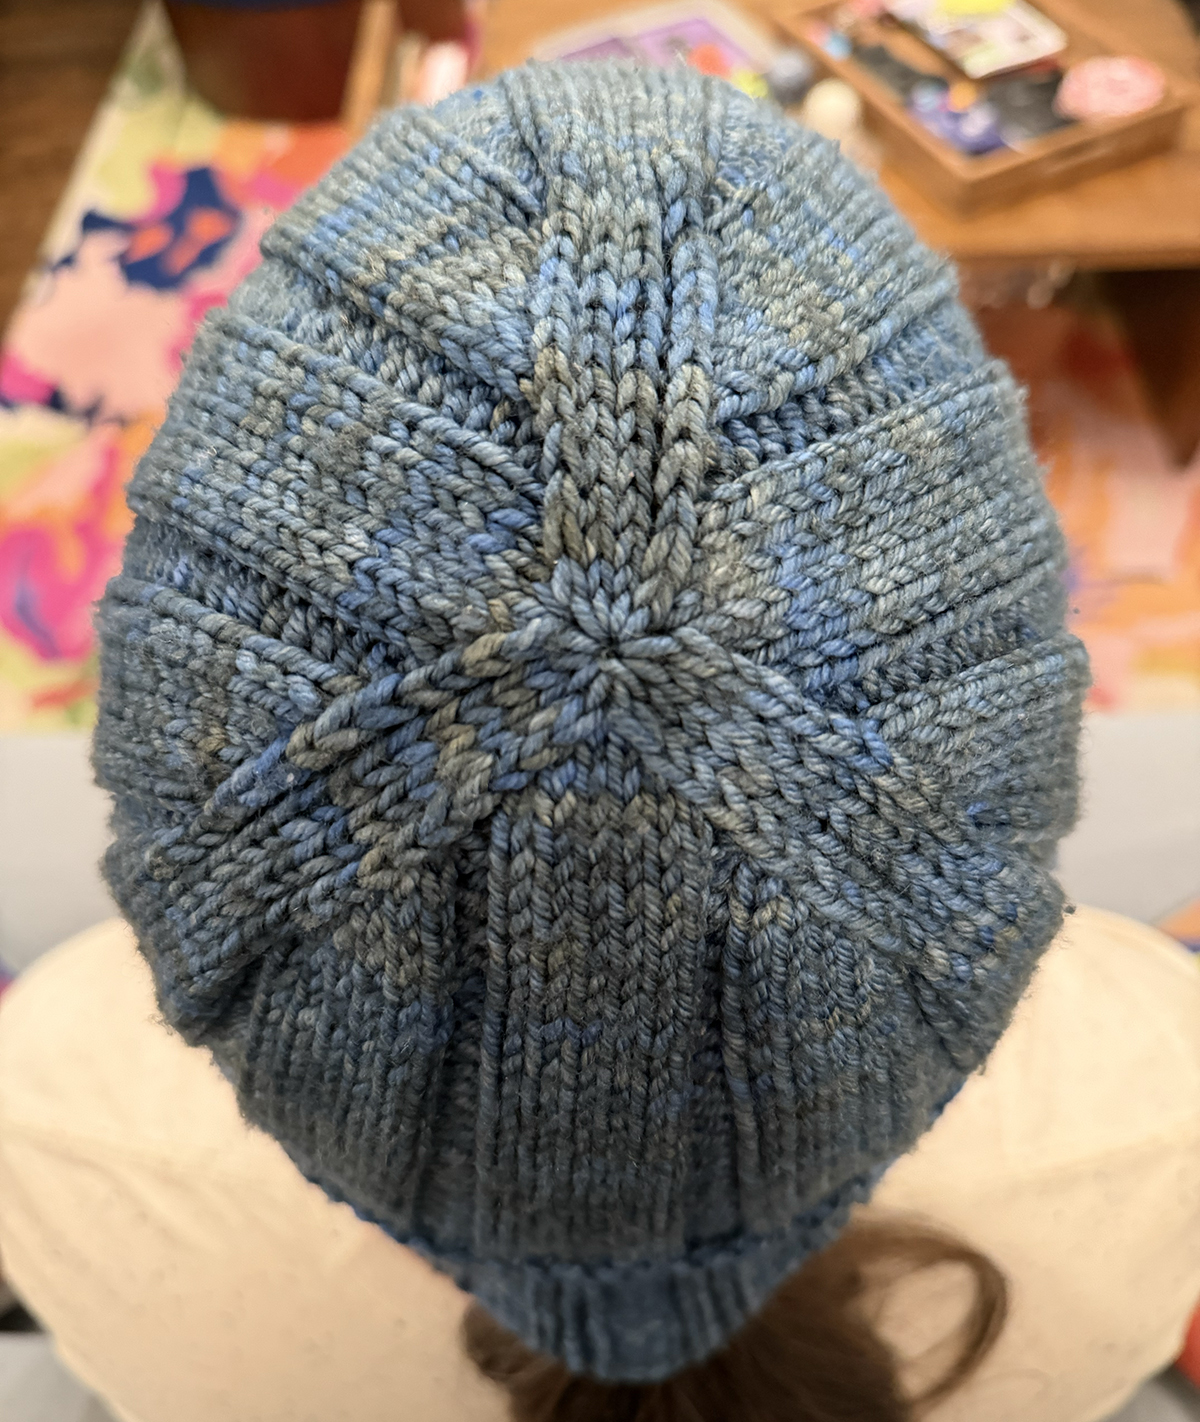
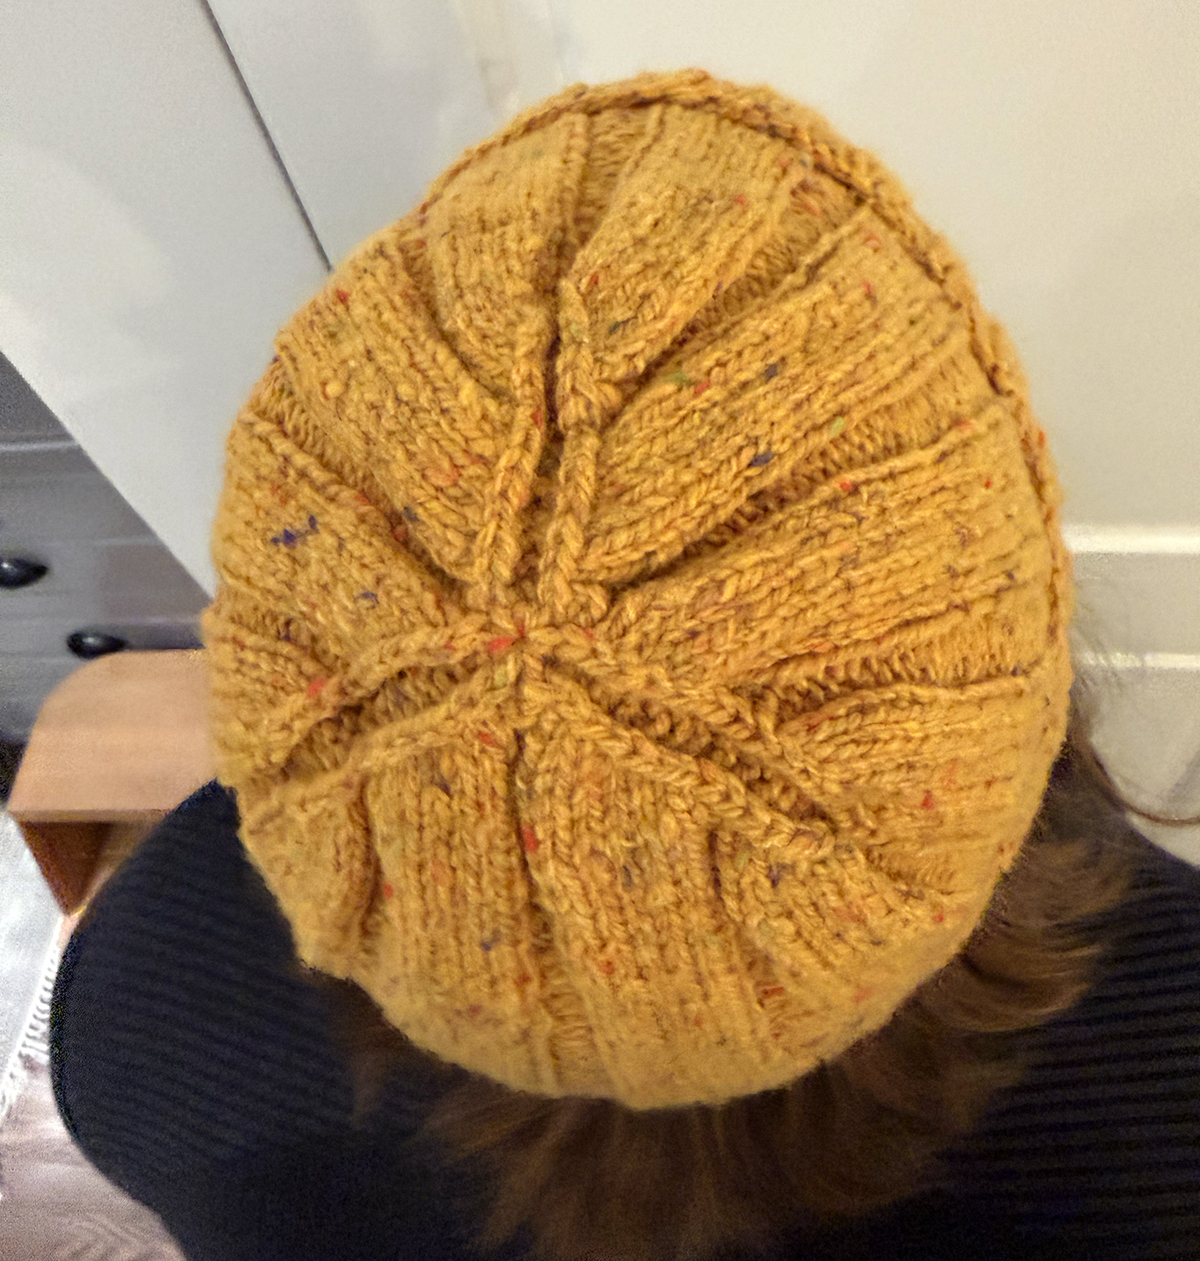
Alternate crown shaping 2
This alternate shaping both maintains the ribbing throughout the crown shaping and accentuates it by creating a sort of three-pointed star with 3 of the 2-stitch-wide purl parts from the previous 6x2 ribbed section. This shaping really only makes sense when making a size hat where the number of stitches is evenly divisible by 24, so I typically only do it on size "small" hats (cast on 96 stitches). You could adjust the needle size and gauge for a yarn that works well at that gauge to make this work for different sizes.

Written out:
Stop the last 6x2 ribbed row 1 stitch early and divide stitches on 3 double pointed needles with stitches evenly divided among the three needles or mark out even sections with stitch markers if decreasing across 2 circular needles or with magic loop. Ensure that each needle transition or marker has a single purl stitch on each side.
- (p1, ssk or skp, k if previous row was knit or p if previous row was purl until 3 stitches are left on the needle/before the next marker, k2tog, p) x3.
- Repeat step 1 until 4 stitches remain on each needle/in each marked section.
- Cut and draw yarn through the remaining 12 stitches 2-3 times. Tie off and weave in the ends.
Additional project notes
- Needle: US 7 - 4.5 mm
- Gauge: 19 stitches and 24 rows = 4 inches in stockinette
- Hats made for me should generally be a small (cast on 96 stitches), and hats made for my partner Matt should generally be a medium (cast on 104 stitches).