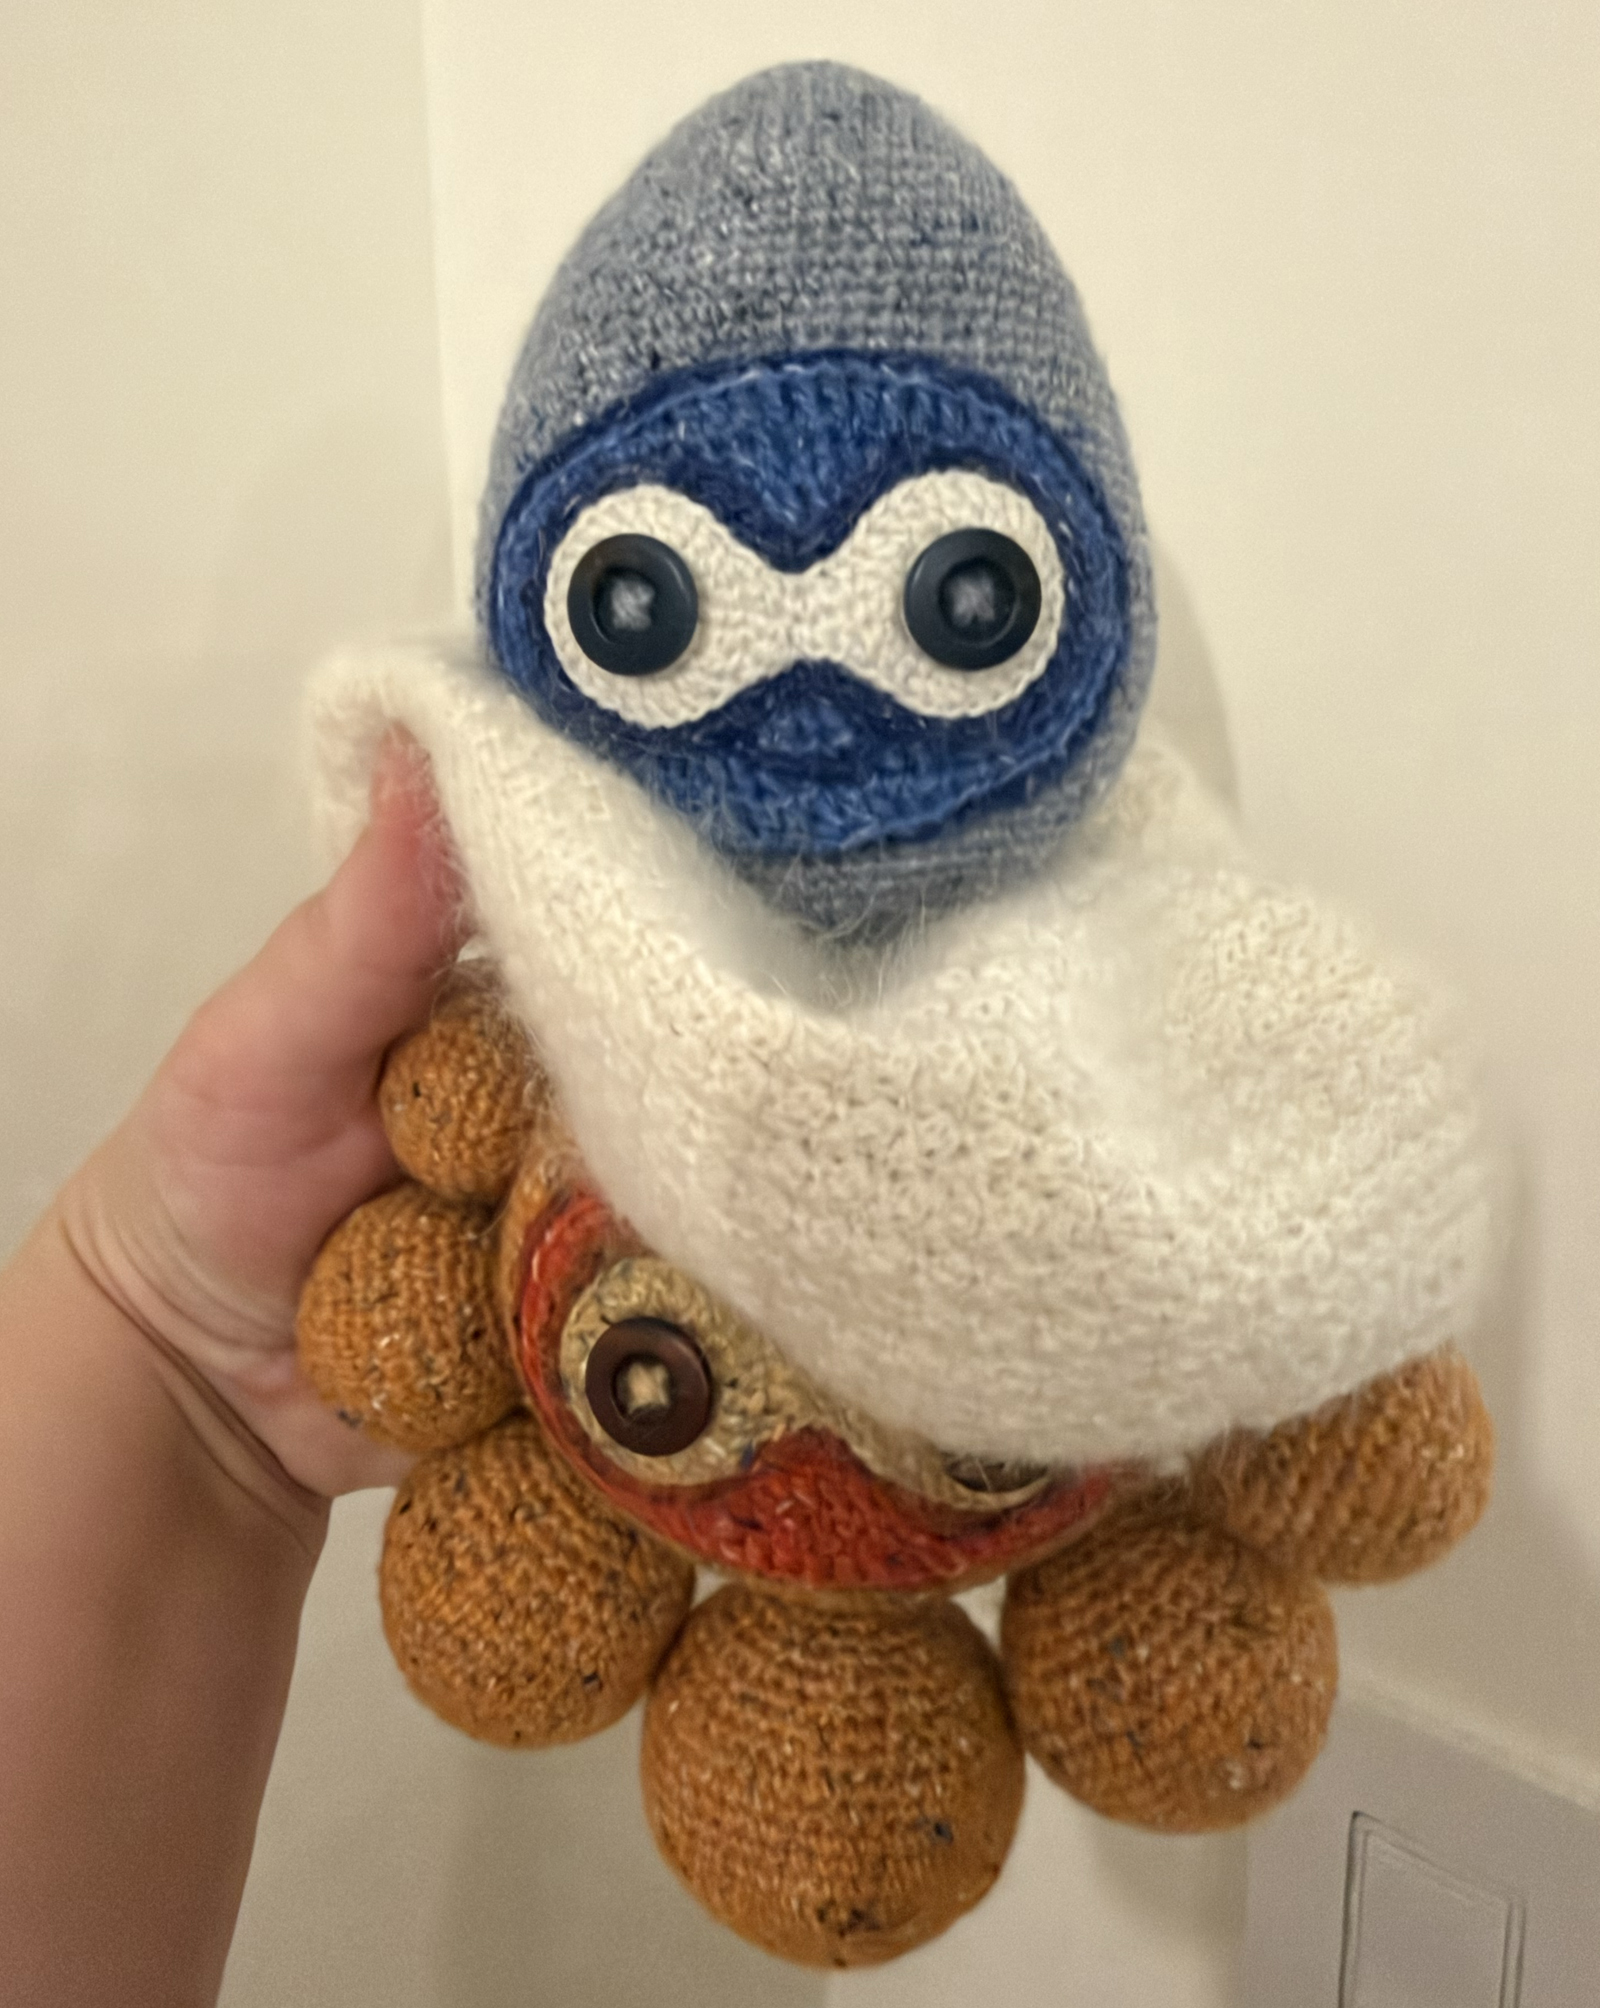
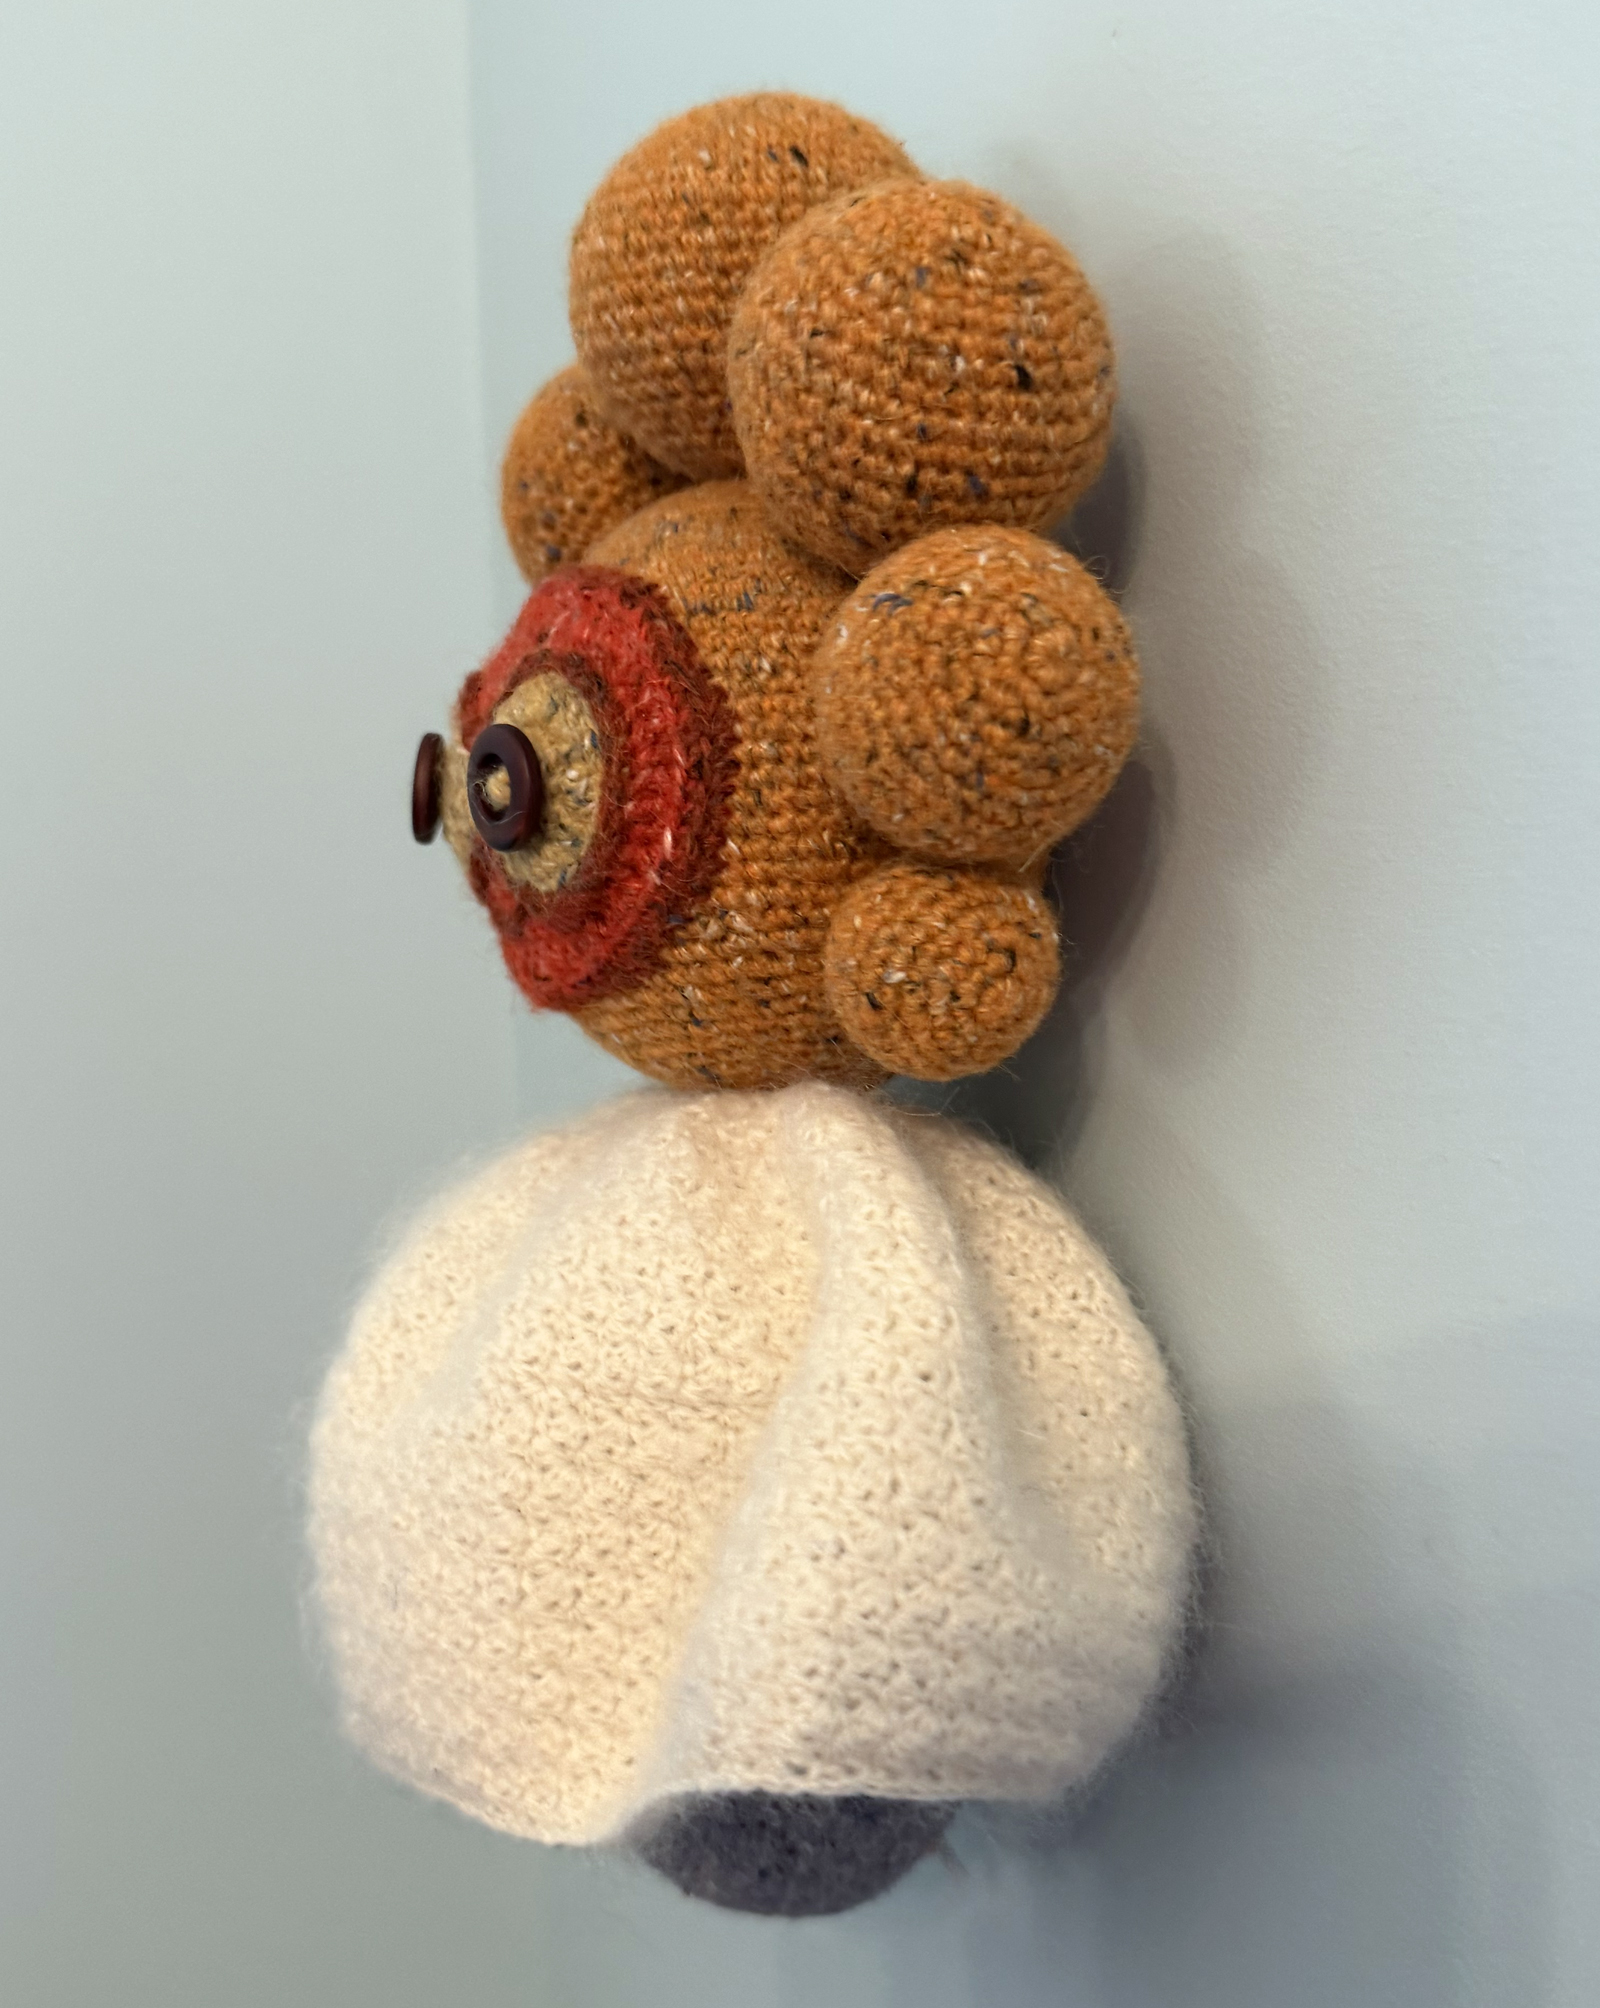
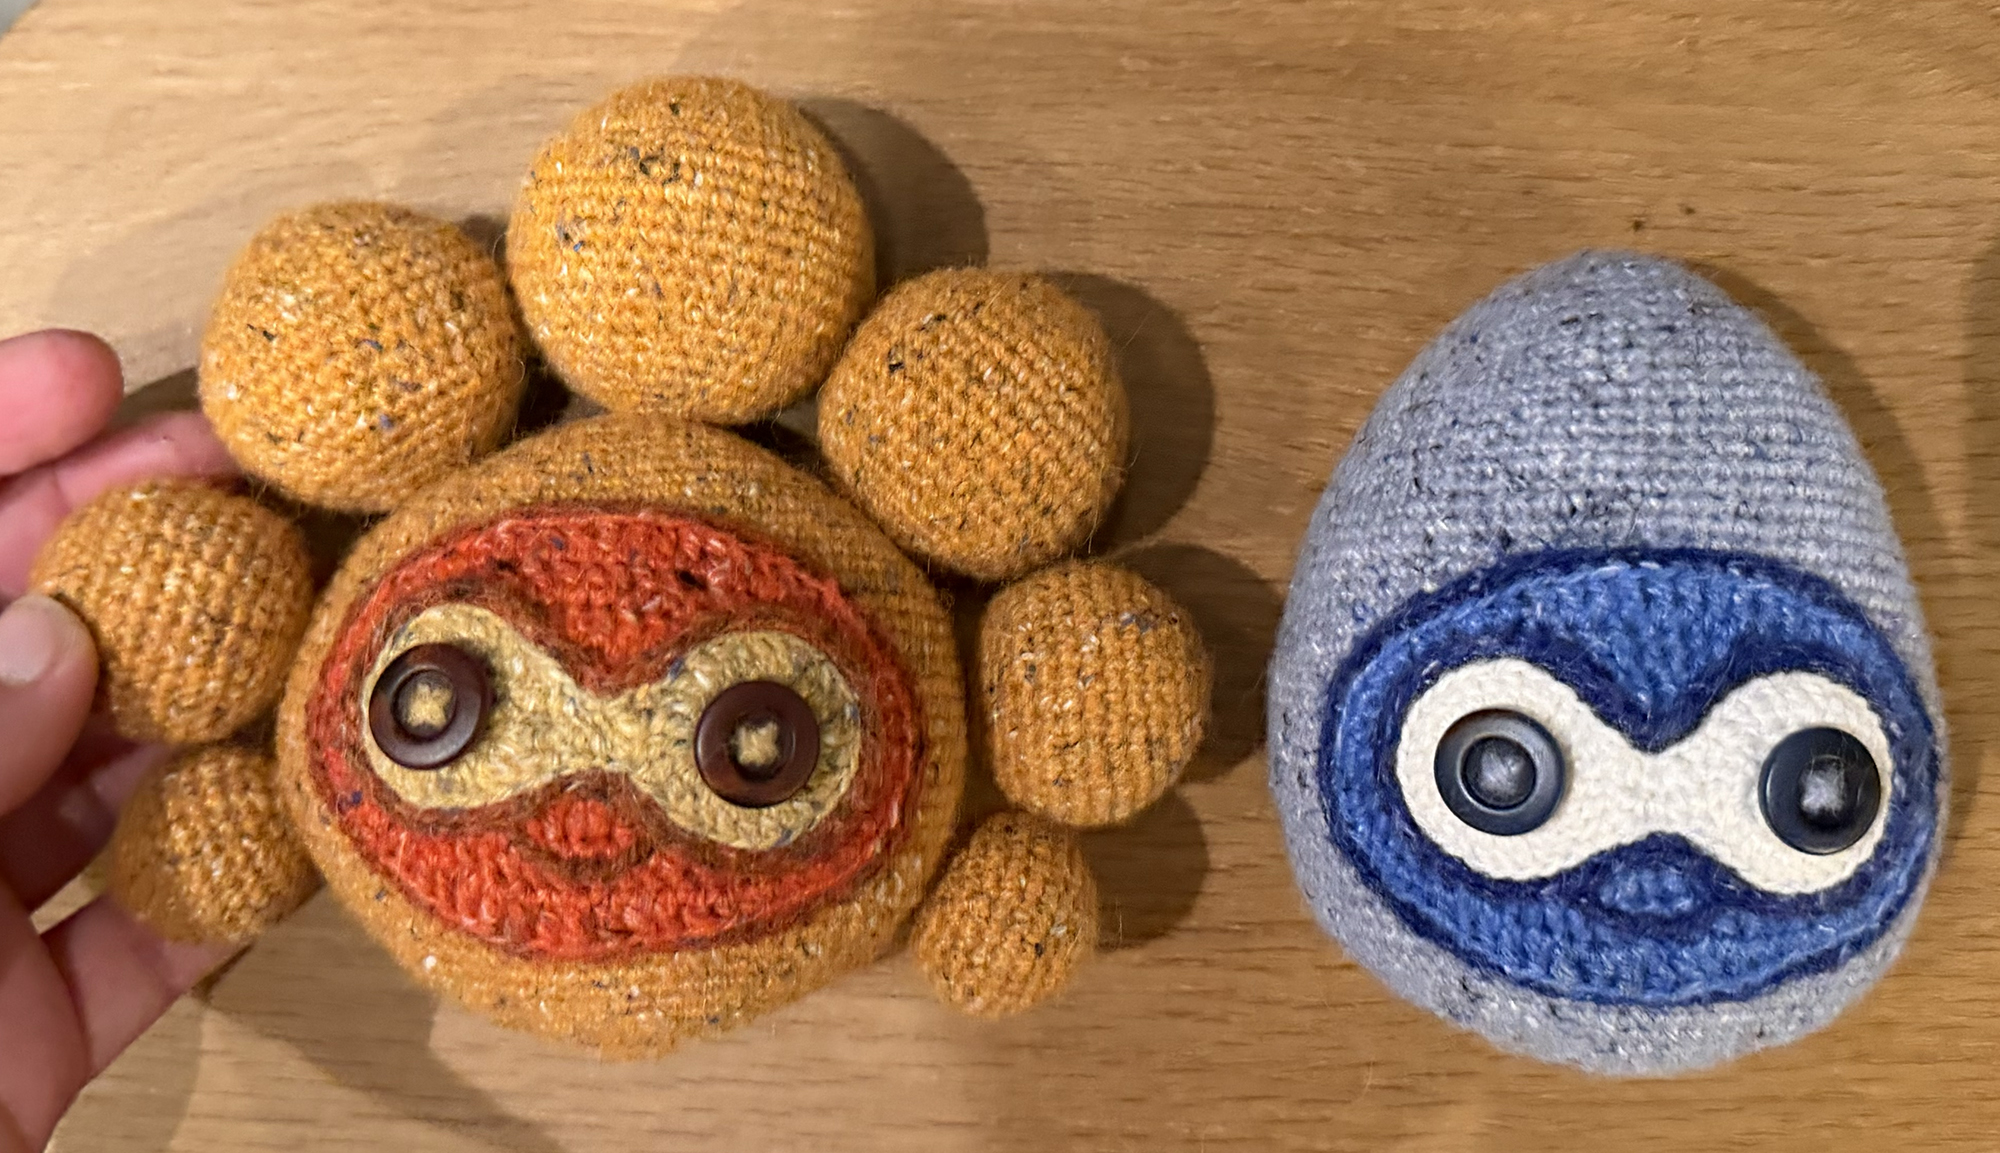
I was really inspired by the Castform Weather Charm object in Pokopia, and wanted to make a crochet version. Here's my pattern for crocheting a wall hanging amigurumi that is about 9.5 inch/24.1 cm tall, 7 inch/17.8 cm wide, and 3.25 inch/8.3 cm deep. (It's my first ever amigurumi pattern!) I would estimate that this is suitable for an adventurous beginner or intermediate crocheter - I was only about a month into my own crochet journey when I designed this, but it's worth noting that I have a lot of experience with other yarn and fiber arts and designing and creating 3D-media.
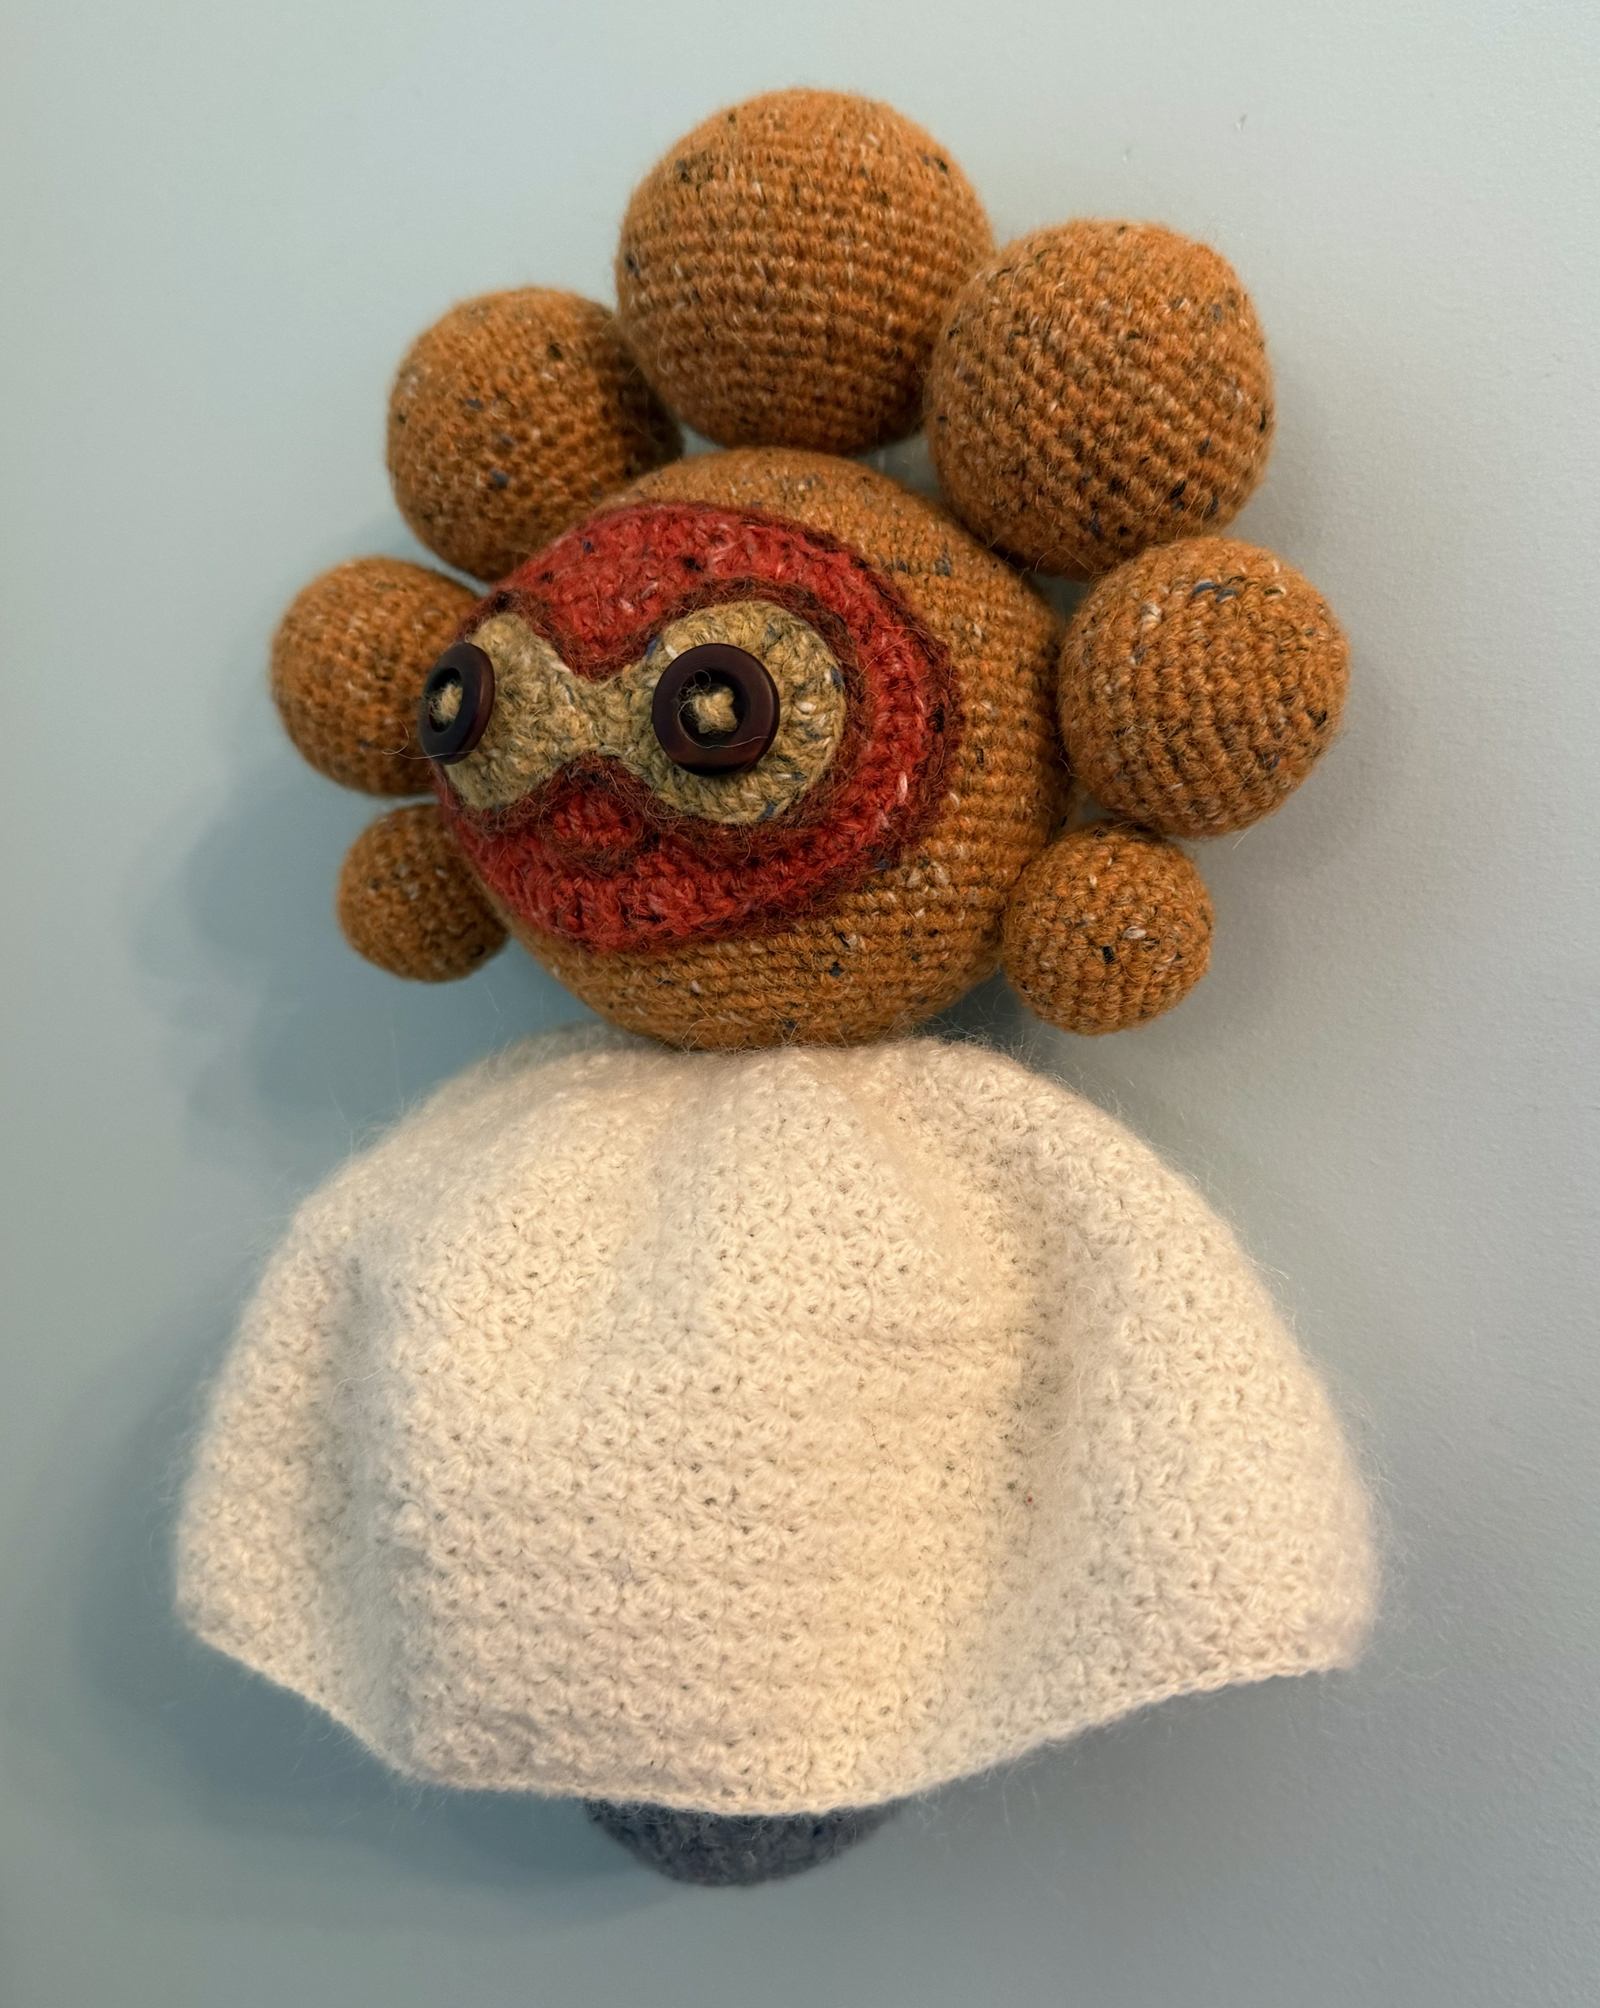
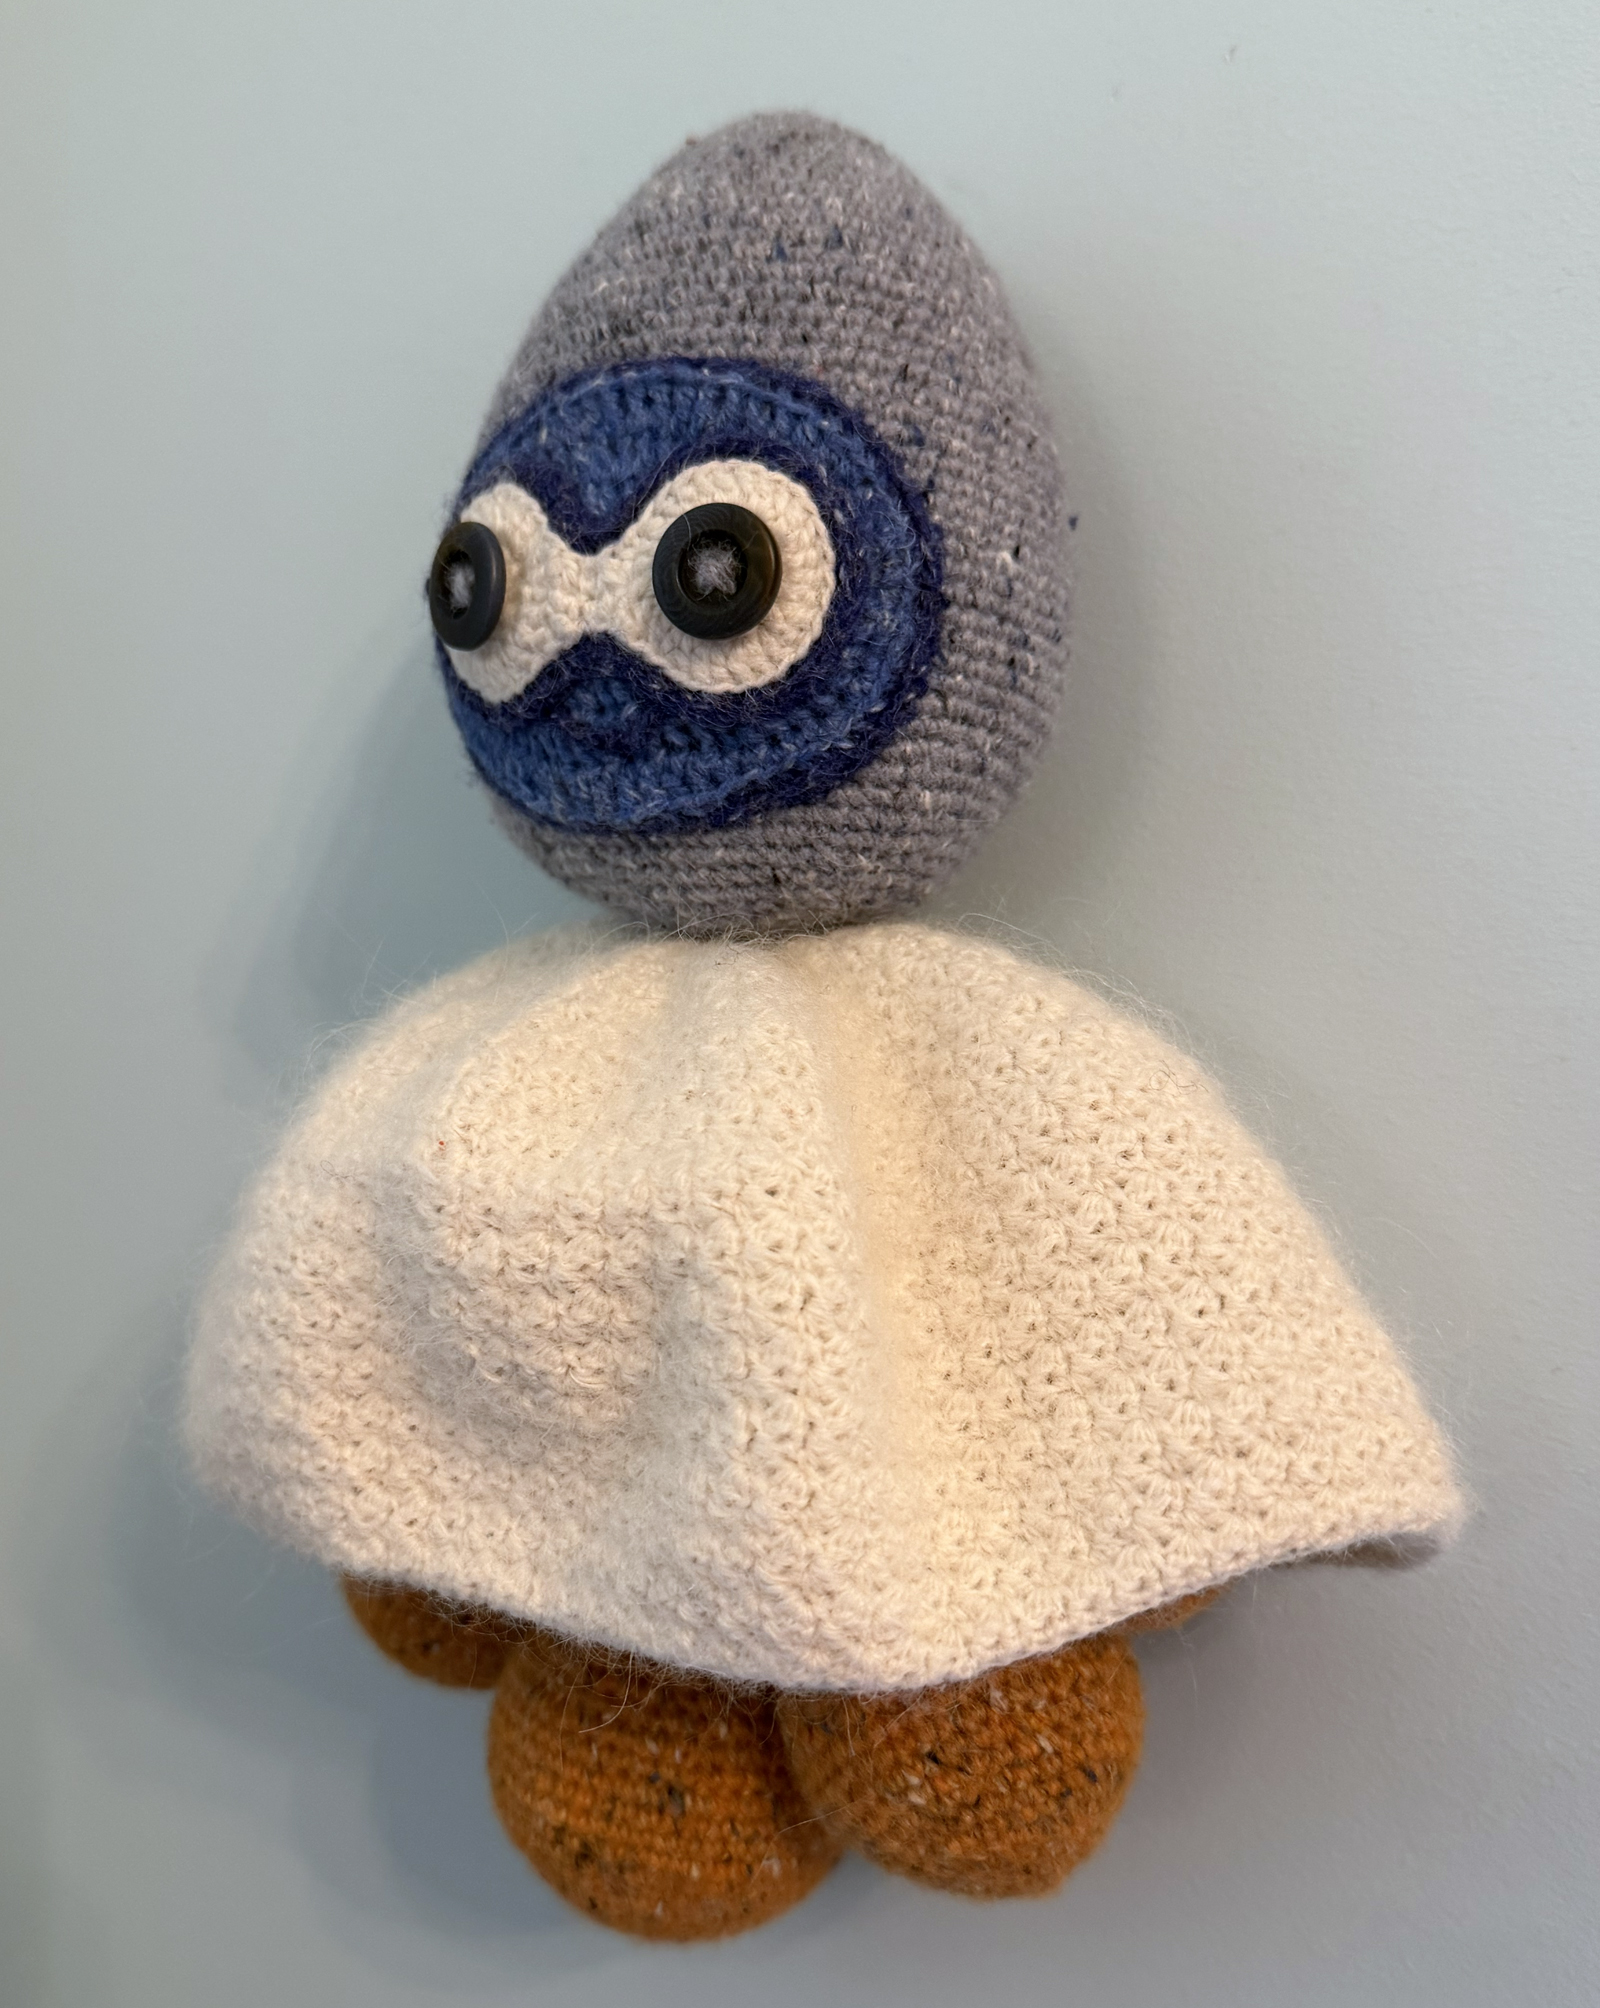
This pattern is also available as a pdf.
Materials & tools
This pattern is designed around DK weight yarn (or equivalent held together) and a 2.0 mm crochet hook (or whatever gives you a good gauge for amigurumi/the buttons - more on the buttons later) for the body, and I used fingering weight yarn and the same 2.0 mm crochet hook for the flippable "dress." The overall absolute yarn size does not matter, and you should pick a hook for the body yarn that gives you a good tight amigurumi gauge and a hook for the flippable "dress" that lets it drape. Your gauge also matters relative to buttons you pick for the eyes, so you may want to pick out buttons after you've made the eye masks or figure out the right hook to get a good gauge for the buttons you want to use before making the rest of the pattern.
In addition to a crochet hook, you also need scissors to cut yarn and a yarn needle for attaching pieces and weaving in ends. You may also want pins to hold pieces in place while sewing them together.
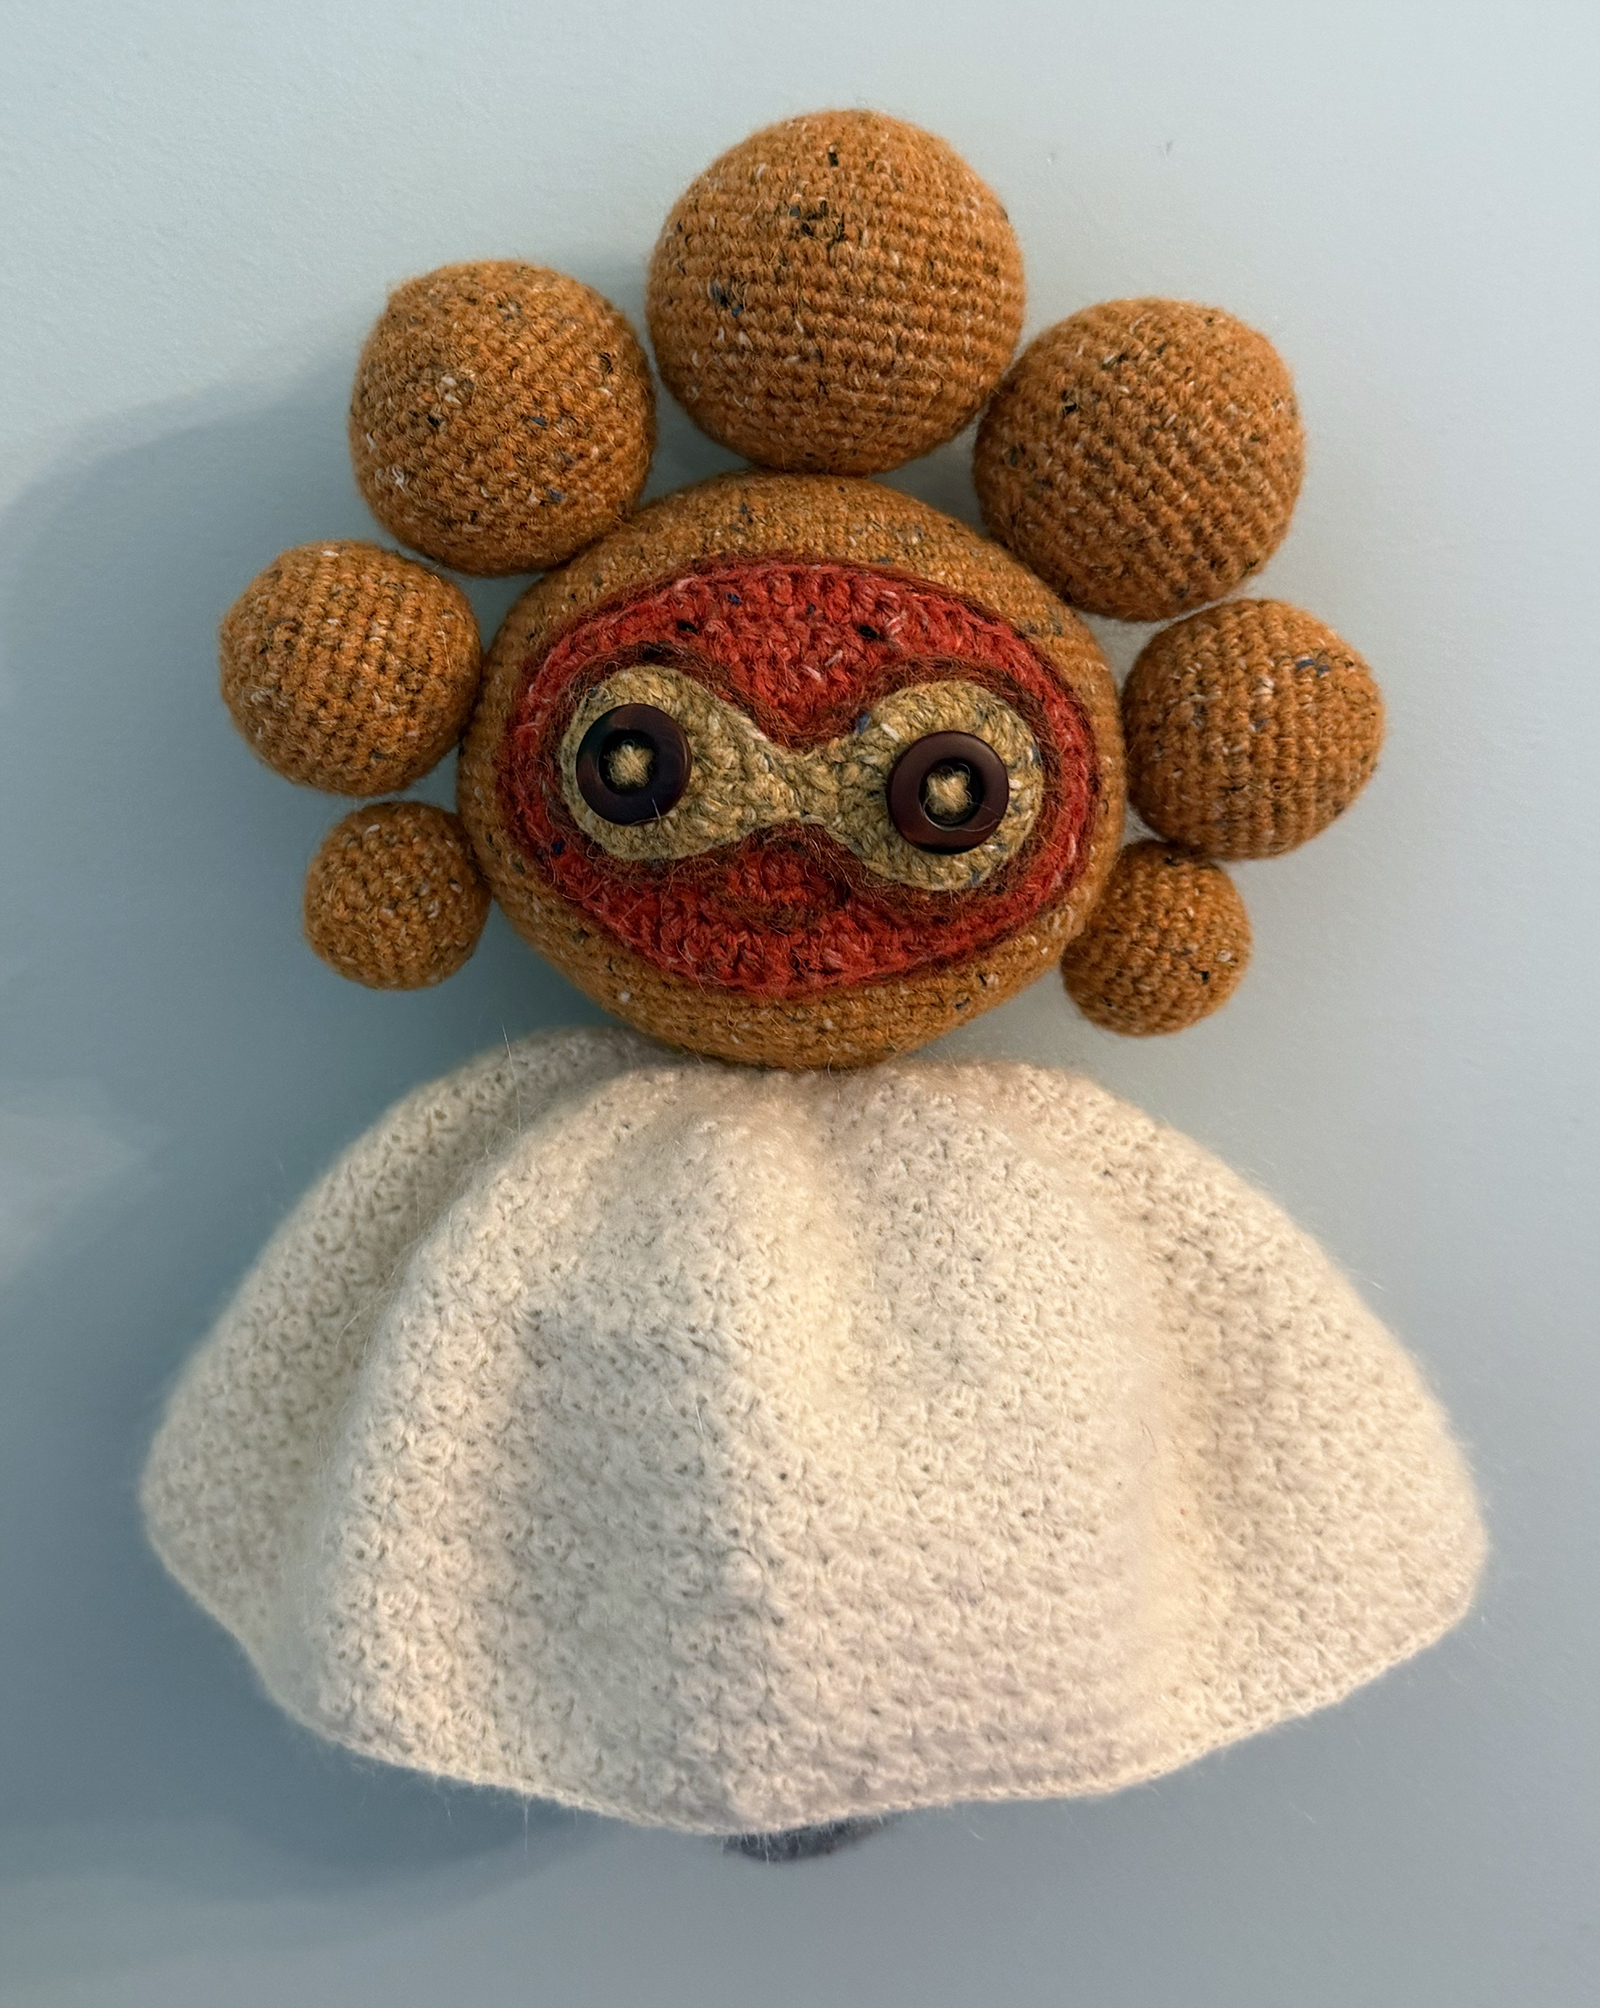
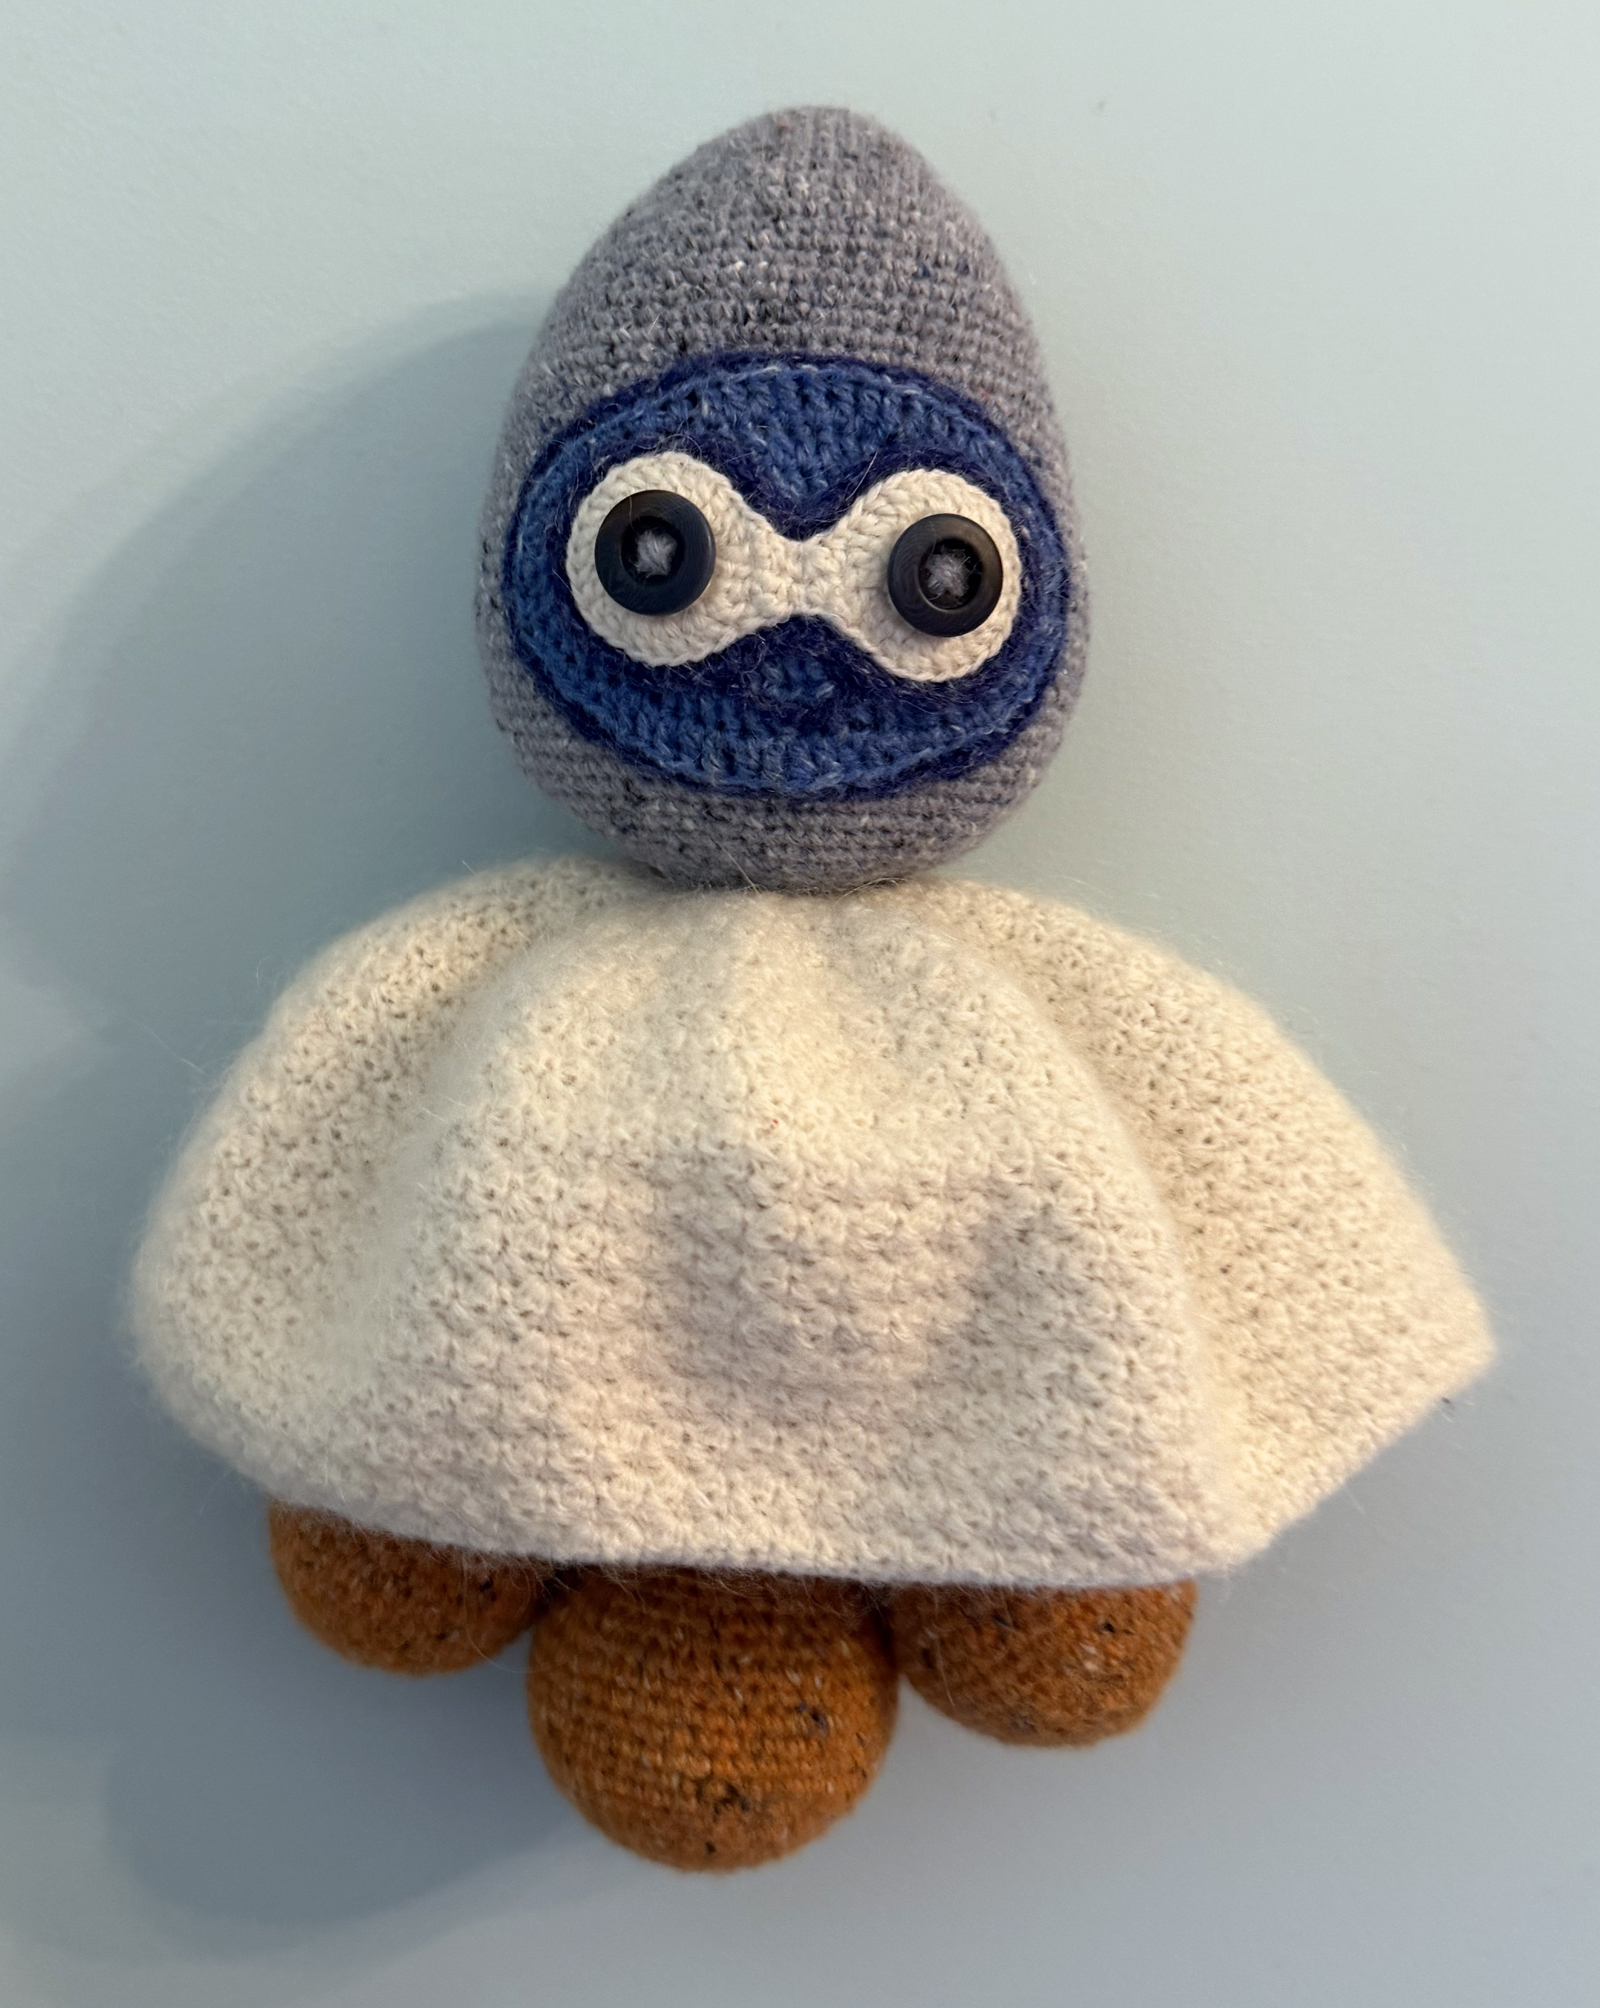
I used yarns I had around for other projects:
- Light blue: Rowan Felted Tweed in 165 Scree, about 90 yards/82.3 meters
- Medium blue: Rowan Felted Tweed in 215 Ciel, about 7 yards/6.4 meters
- White for around eyes: 2 strands Rowan Fine Lace in 944 White + 2 strands Rowan Kidsilk Haze in 612 White held together (Rowan Felted Tweed doesn't come in a pure white, and I wanted a lighter weight, part-mohair yarn for the "dress" so I reused them here by estimating that 4 strands of lace weight is roughly DK weight.), about 11 yards/10 meters of the combined 4-strand yarn (22 yards/20 meters of each of the two yarns)
- Dark blue: Rowan Felted Tweed in 214 Ultramarine, about 7 yards/6.4 meters
- Light orange: Rowan Felted Tweed in 223 Tango, about 160 yards/146.3 meters
- Bright orange: Rowan Felted Tweed in 198 Zinnia, about 7 yards/6.4 meters
- Light yellow: Rowan Felted Tweed in 181 Mineral, about 11 yards/10 meters
- Dark red-brown: Rowan Felted Tweed in 154 Ginger, about 7 yards/6.4 meters
- White for the flippable "dress": 1 strand Rowan Fine Lace in 944 White + 1 strand Rowan Kidsilk Haze in 612 White held together (I wanted a part-mohair yarn that ended up about fingering weight for the flippable "dress," so I used this combination of 2 strands of lace weight to make that), about 120 yards/109.7 meters
Other materials for this project:
- Stuffing, e.g. yarn, fabric, etc. scraps or polyfill
- Two blue 15 mm buttons: I used 15 mm Powder Blue corozo buttons from Merchant and Mills. The vintage wood-look feel of these corozo buttons matches the vintage nautical vibe I get from using a tweed yarn to make this amigurumi.
- Two brown 15 mm buttons: I used 15 mm Townley Brown corozo buttons from Merchant and Mills.
- If you're using a yarn with low tensile strength, you probably want to use coordinating scrap yarn of higher tensile strength, embroidery thread, or regular sewing thread to sew pieces together. You can also use non-coordinating scrap yarn or thread and then stitch the yarn tails around it to hide the non-matching stitches. I used similar colors of linen embroidery thread, but I ended up pulling tight enough that stitches weren't even visible!
- I used about 1 yards/0.9 meters of a light orange linen embroidery thread I had on hand, Studio Flax's Lyster Linen #293 to sew together the sunny side main body/face. FYI, this embroidery thread is roughly a light fingering weight linen.
- I used about 1.5 yards/1.4 meters of a white linen embroidery thread I had on hand, Studio Flax's Lyster Linen #211, to sew both main bodies/faces to the flippable "dress" to sew the entire project together.
Important yarn warnings - please read before proceeding!
Rowan Felted Tweed is pretty different from yarns that are commonly used for amigurumi - cotton, acrylic, and even superwash wools have a lot more tensile strength than Rowan Felted Tweed, so you have to be very, very careful with how to pull things taught. If you pull it too hard or have too much friction against the yarn, it will break. If you use it (or another yarn with low tensile strength), you need to be very gentle and slow when tightening magic rings, finishing loops, and embroidering pieces together. If a break happens, you need to go back a few stitches or so and knot to recombine on a section that hasn't been pulled thin. If I were buying yarn specifically for this project or amigurumi generally, I would almost certainly choose something with more tensile strength. I adore this yarn for other types of projects, and I used it here because I already have a rainbow's worth of colors in the line for a blanket and many of the colors used here would only require a small amount. (Also, luckily, the tweed look ended up being something I really embraced - it really made it feel like a "lost relic!") I would recommend using a DK weight yarn you feel comfortable making amigurumi with!
Rowan Kidsilk Haze, like all mohair/silk blend yarns, has a lovely halo, but it also felts with everything around it nearly immediately. This makes frogging mistakes annoying and difficult.
Stitches & abbreviations
I use US crochet terminology.
- ch - chain: yarn over and pull through the loop on the hook
- slst - slip stitch: place hook in stitch and pull through both stitch and the loop on the hook
- sc - single crochet: place hook in stitch and pull through (2 loops on the hook), yarn over and pull through the loops
- inc - single crochet increase: 2 sc in the same stitch
- dec - single crochet invisible decrease: place hook through the front loop of the first stitch, place hook through the front loop of the second stitch, yarn over and pull through both front loops (2 loops on the hook), yarn over and pull through the loops
- hdc - half double crochet: yarn over, place hook in stitch and pull through (3 loops on the hook), yarn over and pull through all 3 loops
- dc - double crochet: yarn over, place hook in stitch and pull through (3 loops on the hook), yarn over and pull through 2 loops (2 loops left on the hook), yarn over and draw through the last 2 loops
- dc inc - double crochet increase: 2 dc in the same stitch
- 1-dc-in-2-st - 1 double crochet in 2 stitches: yarn over, place hook in the first stitch, yarn over and pull through the first stitch (3 loops on the hook), place hook in the second stitch, yarn over and pull through the second stitch (4 loops on the hook), yarn over and pull through 3 loops (2 hoops left on the hook), yarn over and pull through last 2 loops
- htr - half treble crochet (reminder that this is US htr): yarn over twice, place hook in stitch and pull through (4 loops on the hook), yarn over and pull through 2 loops (3 loops left on the hook), yarn over and draw through the last 3 loops
- tr - treble crochet: yarn over twice, place hook in stitch and pull through (4 loops on the hook), yarn over and pull through 2 loops (3 loops left on the hook), yarn over and pull through 2 loops (2 loops left on the hook), yarn over and draw through the last 2 loops
- crab stitch - insert the your into the next stitch to the right, yarn over, and pull the loop through (2 looks on the hook), yarn over and pull through both of those loops like in single crochet
- BLO - crochet in back loops only
- (...) x $num - repeat instructions in the parenthesis $num times
- {...} - enclosed stitches are all done in the same stitch
Note on shaping
This amigurumi is not entirely based on circular cross-cuts with even increases throughout the round; ovular ones with intentionally uneven increases around the pattern are used for larger pieces so that it lies flatter against a wall. The main body shapes are designed to be wider than they are deep. After the plain single crochet rows, the decrease pattern will technically be off-kilter a bit from the increases. However, when stuffed, the lean is virtually unnoticeable (the spiral nature of crocheting in the round without joining each round is much more noticeable!), so the pattern doesn't account for this as everyone's lean is a bit different.
Note on stuffing - please read before proceeding!
Crocheting with DK weight yarn at a tight gauge creates a very, very stiff fabric, and these shape are designed to be stuffed very firmly to shape this stiff fabric. It is very, very important to stuff this amigurumi very, very firmly to make sure that the shapes pop into place. You will probably need to stuff this more firmly than you are used to when making other amigurumi. It may be annoying to do without using something to help push the stuffing in. This is especially important in the orange oval of the main face/body and the orbs of the sunny side - if they look pointy, it's almost certainly because you aren't stuffing firmly enough!
Instructions
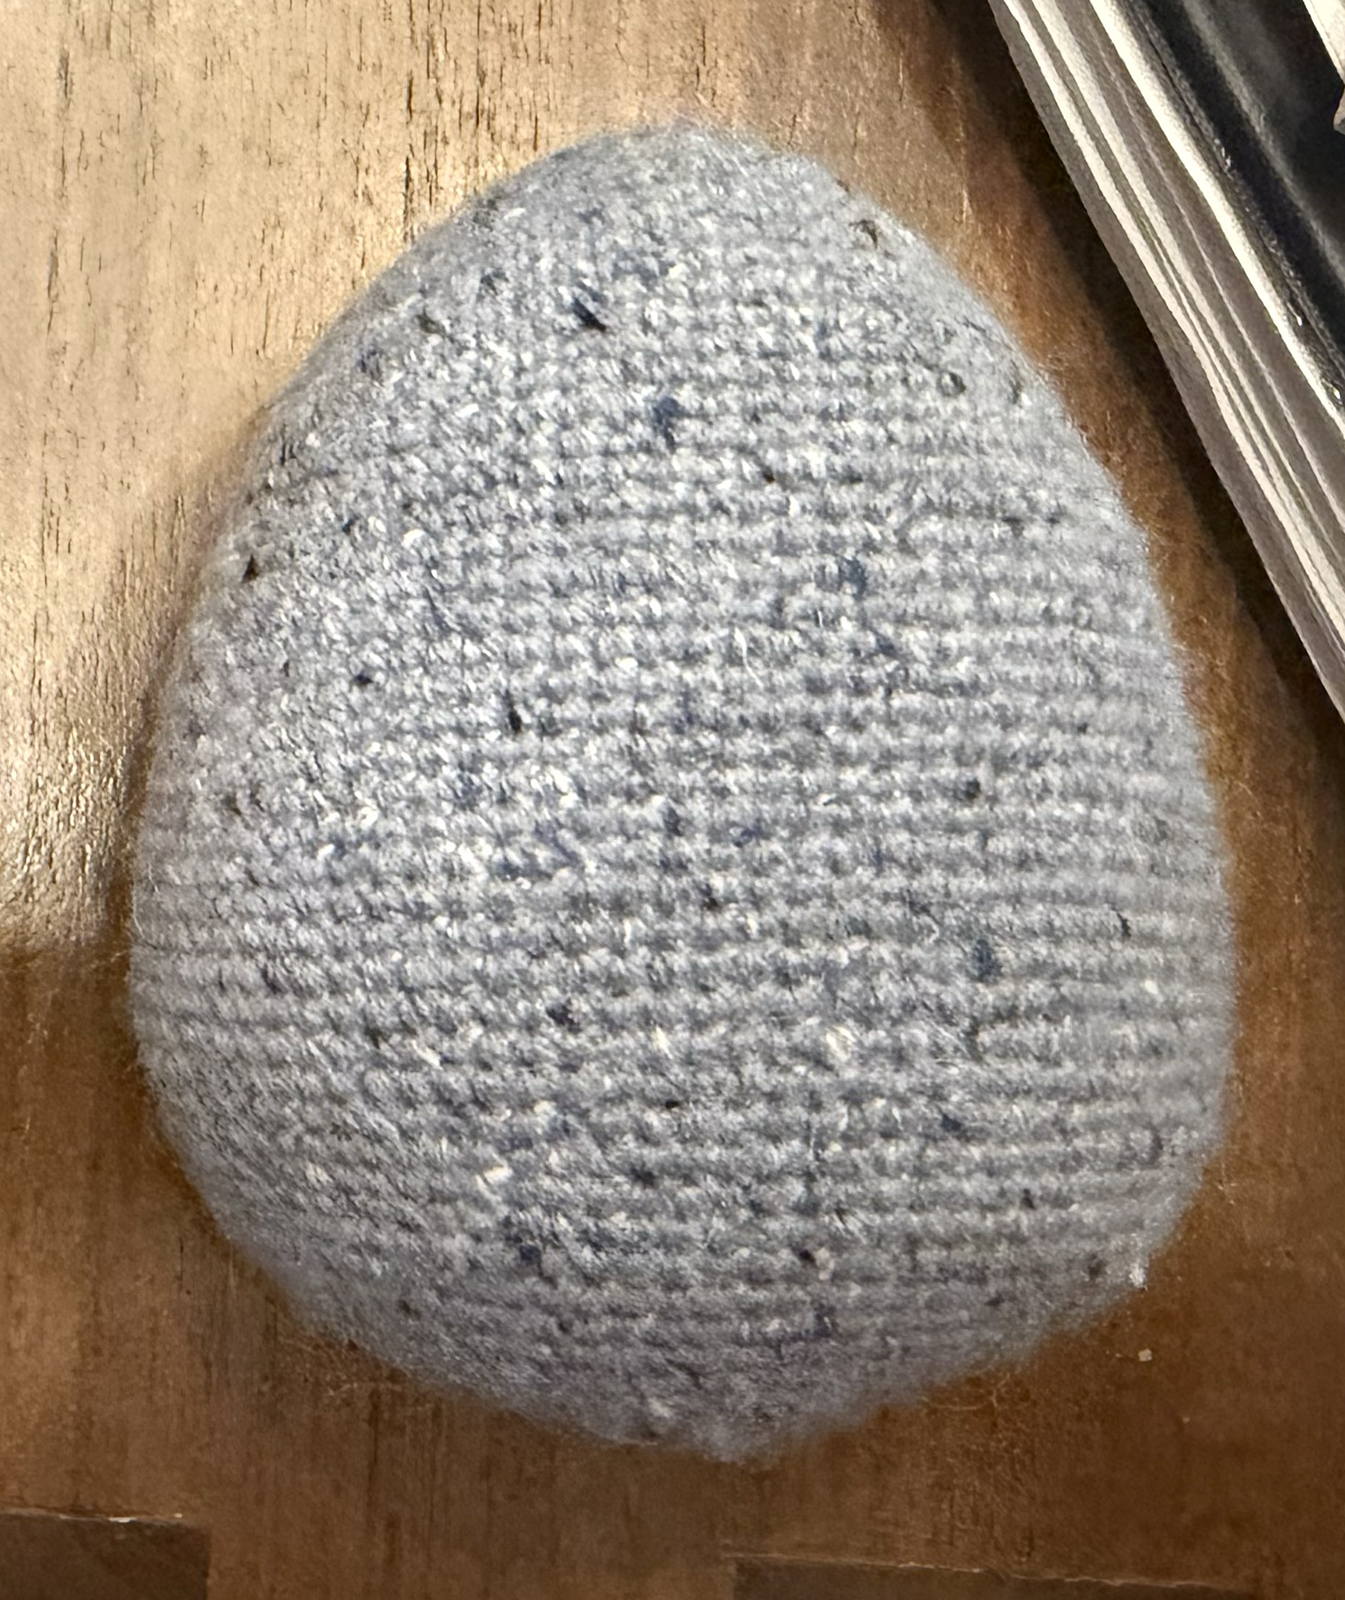
Rainy side light blue teardrop body/face
I made this shape intentionally less front/back pointy than the item in the game.
In light blue:
- Foundation & round 1: In magic ring, make 6 sc. (6)
- Round 2: 6 inc (12)
- Round 3: (sc, inc) x 6 (18)
- Round 4: (sc, inc, sc) x 6 (24)
- Round 5: 5 sc, 2 inc, 5 sc) x 2 (28)
- Round 6: (3 sc, inc, 6 sc, inc, 3 sc) x 2 (32)
- Round 7: (6 sc, inc, 2 sc, inc, 6 sc) x 2 (36)
- Round 8: (5 sc, inc, 6 sc, inc, 5 sc) x 2 (40)
- Round 9: (8 sc, inc, 2 sc, inc, 8 sc) x 2 (44)
- Round 10: (7 sc, inc, 6 sc, inc, 7 sc) x 2 (48)
- Round 11: (10 sc, inc, 2 sc, inc, 10 sc) x 2 (52)
- Round 12: 52 sc (52)
- Round 13: (9 sc, inc, 6 sc, inc, 9 sc) x 2 (56)
- Round 14: 56 sc (56)
- Round 15: (12 sc, inc, 2 sc, inc, 12 sc) x 2 (60)
- Round 16: 60 sc (60)
- Round 17: (11 sc, inc, 6 sc, inc, 11 sc) x 2 (64)
- Round 18: 64 sc (64)
- Round 19: (14 sc, inc, 2 sc, inc, 14 sc) x 2 (68)
- Round 20: 68 sc (68)
- Round 21: (13 sc, inc, 6 sc, inc, 13 sc) x 2 (72)
- Round 22: 72 sc (72)
- Round 23: (16 sc, inc, 2 sc, inc, 16 sc) x 2 (76)
- Rounds 24-25: 76 sc (76)
- Round 26: (15 sc, inc, 6 sc, inc, 15 sc) x 2 (80)
- Rounds 27-28: 80 sc (80)
- Round 29: (18 sc, inc, 2 sc, inc, 18 sc) x 2 (84)
- Rounds 30-36: 84 sc (84)
- Round 37: (18 sc, dec, 2 sc, dec, 18 sc) x 2 (80)
- Rounds 38-39: 80 sc (80)
- Round 40: (15 sc, dec, 6 sc, dec, 15 sc) x 2 (76)
- Round 41: 76 sc (76)
- Round 42: (16 sc, dec, 2 sc, dec, 16 sc) x 2 (72)
- Round 43: (17 sc, dec, 17 sc) x 2 (70)
- Round 44: (13 sc, dec, sc, dec, sc, dec, 14 sc) x 2 (64)
- Round 45: (11 sc, dec, 6 sc, dec, 11 sc) x 2 (60)
- Round 46: (11 sc, dec, sc, dec, sc, dec, 11 sc) x 2 (54)
- Round 47: (8 sc, dec, 5 sc, 2 dec, 8 sc) x 2 (48)
- Round 48: (8 sc, dec, sc, dec, sc, dec, 8 sc) x 2 (42)
- Stuffing: Begin stuffing the form. Remember that you need to stuff this firmly!
- Round 49: (5 sc, 2 dec, 5 sc, dec, 5 sc) x 2 (36)
- Round 50: (5 sc, dec, sc, dec, sc, dec, 5 sc) x 2 (30)
- Stuffing: Stuff the form more. Remember that you need to stuff this firmly!
- Round 51: (4 sc, dec, sc, dec, sc, dec, 3 sc) x 2 (24)
- Round 52: (sc, dec, sc) x 6 (18)
- Stuffing: Finish stuffing the form. Remember that you need to stuff this firmly!
- Round 53: (sc, dec) x 6 (12)
- Round 54: (sc, 2 dec, sc) x 2 (8)
- Finishing: Cut a medium tail (about 4 inches is comfortable for me) and pull yarn through the last loop. Thread a yarn needle with the tail, pull the tail through the front loops of each stitch, and pull tight to close the remaining gap. Knot off to a stitch if you'd like and hide the end. Do not worry too much about how this finishing looks - you will be connecting this bottom to the "dress" and the other bottom which will hide any mess!
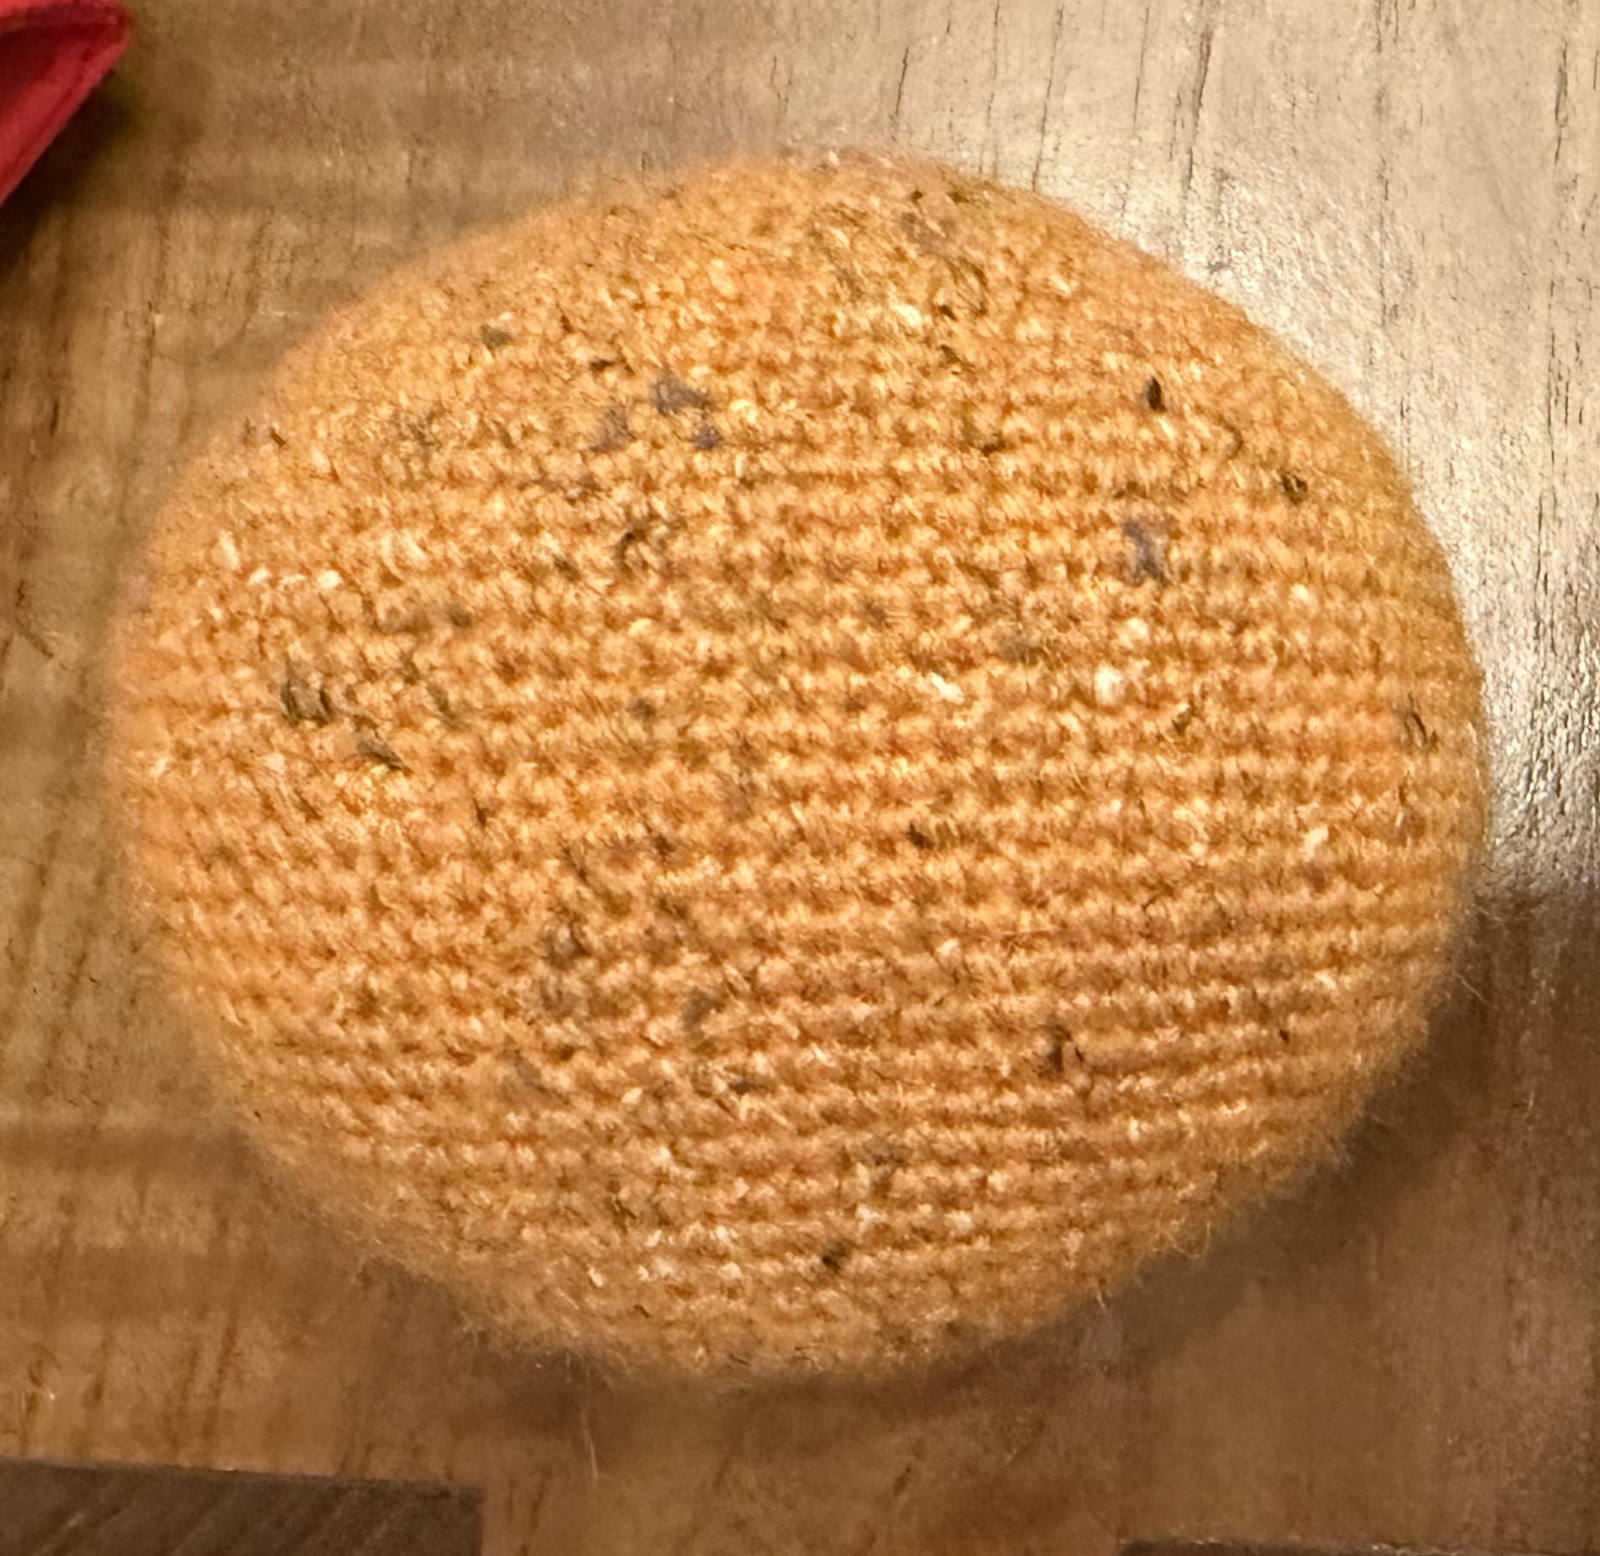
Sunny side light orange oval main body/face
In light orange:
- Foundation & round 1: In magic ring, make 6 sc. (6)
- Round 2: (sc, {4 sc}, sc) x 2 (12)
- Round 3: (sc, 3 inc, 2 sc) x 2 (18)
- Round 4: (2 sc, inc, sc, inc, sc, inc, 2 sc) x 2 (24)
- Round 5: (4 sc, inc, sc, inc, sc, inc, 3 sc) x 2 (30)
- Round 6: (5 sc, inc, sc, inc, sc, inc, 5 sc) x 2 (36)
- Round 7: (5 sc, 2 inc, 5 sc, inc, 5 sc) x 2 (42)
- Round 8: (8 sc, inc, sc, inc, sc, inc, 8 sc) x 2 (48)
- Round 9: (8 sc, inc, 5 sc, 2 inc, 8 sc) x 2 (54)
- Round 10: (11 sc, inc, sc, inc, sc, inc, 11 sc) x 2 (60)
- Round 11: (11 sc, inc, 6 sc, inc, 11 sc) x 2 (64)
- Round 12: (13 sc, inc, sc, inc, sc, inc, 14 sc) x 2 (70)
- Round 13: (17 sc, inc, 17 sc) x 2 (72)
- Round 14: (16 sc, inc, 2 sc, inc, 16 sc) x 2 (76)
- Round 15: 76 sc (76)
- Round 16: (15 sc, inc, 6 sc, inc, 15 sc) x 2 (80)
- Rounds 17-18: 80 sc (80)
- Round 19: (18 sc, inc, 2 sc, inc, 18 sc) x 2 (84)
- Rounds 20-27: 84 sc (84)
- Round 28: (18 sc, dec, 2 sc, dec, 18 sc) x 2 (80)
- Rounds 29-30: 80 sc (80)
- Round 31: (15 sc, dec, 6 sc, dec, 15 sc) x 2 (76)
- Round 32: 76 sc (76)
- Round 33: (16 sc, dec, 2 sc, dec, 16 sc) x 2 (72)
- Round 34: (17 sc, dec, 17 sc) x 2 (70)
- Round 35: (13 sc, dec, sc, dec, sc, dec, 14 sc) x 2 (64)
- Round 36: (11 sc, dec, 6 sc, dec, 11 sc) x 2 (60)
- Round 37: (11 sc, dec, sc, dec, sc, dec, 11 sc) x 2 (54)
- Round 38: (8 sc, dec, 5 sc, 2 dec, 8 sc) x 2 (48)
- Round 39: (8 sc, dec, sc, dec, sc, dec, 8 sc) x 2 (42)
- Stuffing: Begin stuffing the form. Remember that you need to stuff this firmly!
- Round 40: (5 sc, 2 dec, 5 sc, dec, 5 sc) x 2 (36)
- Round 41: (5 sc, dec, sc, dec, sc, dec, 5 sc) x 2 (30)
- Stuffing: Stuff the form more. Remember that you need to stuff this firmly!
- Round 42: (4 sc, dec, sc, dec, sc, dec, 3 sc) x 2 (24)
- Round 43: (sc, dec, sc) x 6 (18)
- Stuffing: Finish stuffing the form. Remember that you need to stuff this firmly!
- Round 44: (sc, dec) x 6 (12)
- Round 45: (sc, 2 dec, sc) x 2 (8)
- Finishing: Cut a medium tail (about 4 inches is comfortable for me) and pull yarn through the last loop. Thread a yarn needle with the tail, pull the tail through the front loops of each stitch, and pull tight to close the remaining gap. Knot off to a stitch if you'd like and hide the end. Do not worry too much about how this finishing looks - you will be connecting this bottom to the "dress" and the other bottom which will hide any messiness!
Sunny side light orange orbs for around the main body/face
Smallest orbs - make two in light orange:
- Foundation & round 1: In magic ring, make 6 sc. (6)
- Round 2: 6 inc (12)
- Round 3: (sc, inc, sc) x 4 (16)
- Round 4: (3 sc, inc) x 4 (20)
- Round 5: (2 sc, inc, 2 sc) x 4 (24)
- Round 6: (5 sc, inc) x 4 (28)
- Rounds 7-8: 24 sc (28)
- Round 9: (5 sc, dec) x 4 (24)
- Round 10: (2 sc, dec, 2 sc) x 4 (20)
- Stuffing: Begin stuffing the form. Remember that you should stuff this firmly!
- Round 11: (3 sc, dec) x 4 (16)
- Stuffing: Finish stuffing the form. Remember that you should stuff this firmly!
- Round 12: (sc, dec, sc) x 4 (12)
- Round 13: 6 dec (6)
- Finishing: Cut a long tail (about 6 inches is comfortable for me) and pull yarn through the last loop. Thread a yarn needle with the tail, pull the tail through the front loops of each stitch, and pull tight to close the remaining gap. With the yarn needle, pull the yarn through the center of the gap you've just closed and out somewhere in the circle between rounds 11 and 12.
Second smallest orbs - make two in light orange:
- Foundation & round 1: In magic ring, make 6 sc. (6)
- Round 2: 6 inc (12)
- Round 3: (sc, inc, sc) x 4 (16)
- Round 4: (3 sc, inc) x 4 (20)
- Round 5: (2 sc, inc, 2 sc) x 4 (24)
- Round 6: (5 sc, inc) x 4 (28)
- Round 7: (3 sc, inc, 3 sc) x 4 (32)
- Round 8: (7 sc, inc) x 4 (36)
- Rounds 9-11: 36 sc (36)
- Round 12: (7 sc, dec) x 4 (32)
- Round 13: (3 sc, dec, 3 sc) x 4 (28)
- Round 14: (5 sc, dec) x 4 (24)
- Round 15: (2 sc, dec, 2 sc) x 4 (20)
- Stuffing: Begin stuffing the form. Remember that you should stuff this firmly!
- Round 16: (3 sc, dec) x 4 (16)
- Stuffing: Finish stuffing the form. Remember that you should stuff this firmly!
- Round 17: (sc, dec, sc) x 4 (12)
- Round 18: 6 dec (6)
- Finishing: Cut a long tail (about 6 inches is comfortable for me) and pull yarn through the last loop. Thread a yarn needle with the tail, pull the tail through the front loops of each stitch, and pull tight to close the remaining gap. With the yarn needle, pull the yarn through the center of the gap you've just closed and out somewhere in the circle between rounds 16 and 17.
Second largest orbs - make two in light orange:
- Foundation & round 1: In magic ring, make 6 sc. (6)
- Round 2: 6 inc (12)
- Round 3: (sc, inc) x 6 (18)
- Round 4: (sc, inc, sc) x 6 (24)
- Round 5: (5 sc, inc) x 4 (28)
- Round 6: (3 sc, inc, 3 sc) x 4 (32)
- Round 7: (7 sc, inc) x 4 (36)
- Round 8: (4 sc, inc, 4 sc) x 4 (40)
- Round 9: (9 sc, inc) x 4 (44)
- Rounds 10-13: 44 sc (44)
- Round 14: (9 sc, dec) x 4 (40)
- Round 15: (4 sc, dec, 4 sc) x 4 (36)
- Round 16: (7 sc, dec) x 4 (32)gg
- Round 17: (3 sc, dec, 3 sc) x 4 (28)
- Stuffing: Begin stuffing the form. Remember that you should stuff this firmly!
- Round 18: (5 sc, dec) x 4 (24)
- Stuffing: Stuff the form more. Remember that you should stuff this firmly!
- Round 19: (sc, dec, sc) x 6 (18)
- Stuffing: Finish stuffing the form if needed, i.e. there's still space. Remember that you should stuff this firmly!
- Round 20: (sc, dec) x 6 (12)
- Round 21: 6 dec (6)
- Finishing: Cut a long tail (about 6 inches is comfortable for me) and pull yarn through the last loop. Thread a yarn needle with the tail, pull the tail through the front loops of each stitch, and pull tight to close the remaining gap. With the yarn needle, pull the yarn through the center of the gap you've just closed and out somewhere in the circle between rounds 19 and 20.
Largest orb - make one in light orange:
- Foundation & round 1: In magic ring, make 6 sc. (6)
- Round 2: 6 inc (12)
- Round 3: (sc, inc) x 6 (18)
- Round 4: (sc, inc, sc) x 6 (24)
- Round 5: (5 sc, inc) x 4 (28)
- Round 6: (3 sc, inc, 3 sc) x 4 (32)
- Round 7: (7 sc, inc) x 4 (36)
- Round 8: (4 sc, inc, 4 sc) x 4 (40)
- Round 9: (9 sc, inc) x 4 (44)
- Round 10: (5 sc, inc, 5 sc) x 4 (48)
- Round 11: (11 sc, inc) x 4 (52)
- Rounds 12-16: 52 sc (52)
- Round 17: (11 sc, dec) x 4 (48)
- Round 18: (5 sc, dec, 5 sc) x 4 (44)
- Round 19: (9 sc, dec) x 4 (40)
- Round 20: (4 sc, dec, 4 sc) x 4 (36)
- Stuffing: Begin stuffing the form. Remember that you should stuff this firmly!
- Round 21: (7 sc, dec) x 4 (32)
- Round 22: (3 sc, dec, 3 sc) x 4 (28)
- Stuffing: Stuff the form more. Remember that you should stuff this firmly!
- Round 23: (5 sc, dec) x 4 (24)
- Stuffing: Finish stuffing the form if needed, i.e. there's still space. Remember that you should stuff this firmly!
- Round 24: (sc, dec, sc) x 6 (18)
- Round 25: (sc, dec) x 6 (12)
- Round 26: 6 dec (6)
- Finishing: Cut a long tail (about 6 inches is comfortable for me) and pull yarn through the last loop. Thread a yarn needle with the tail, pull the tail through the front loops of each stitch, and pull tight to close the remaining gap. With the yarn needle, pull the yarn through the center of the gap you've just closed and out somewhere in the circle between rounds 24 and 25.
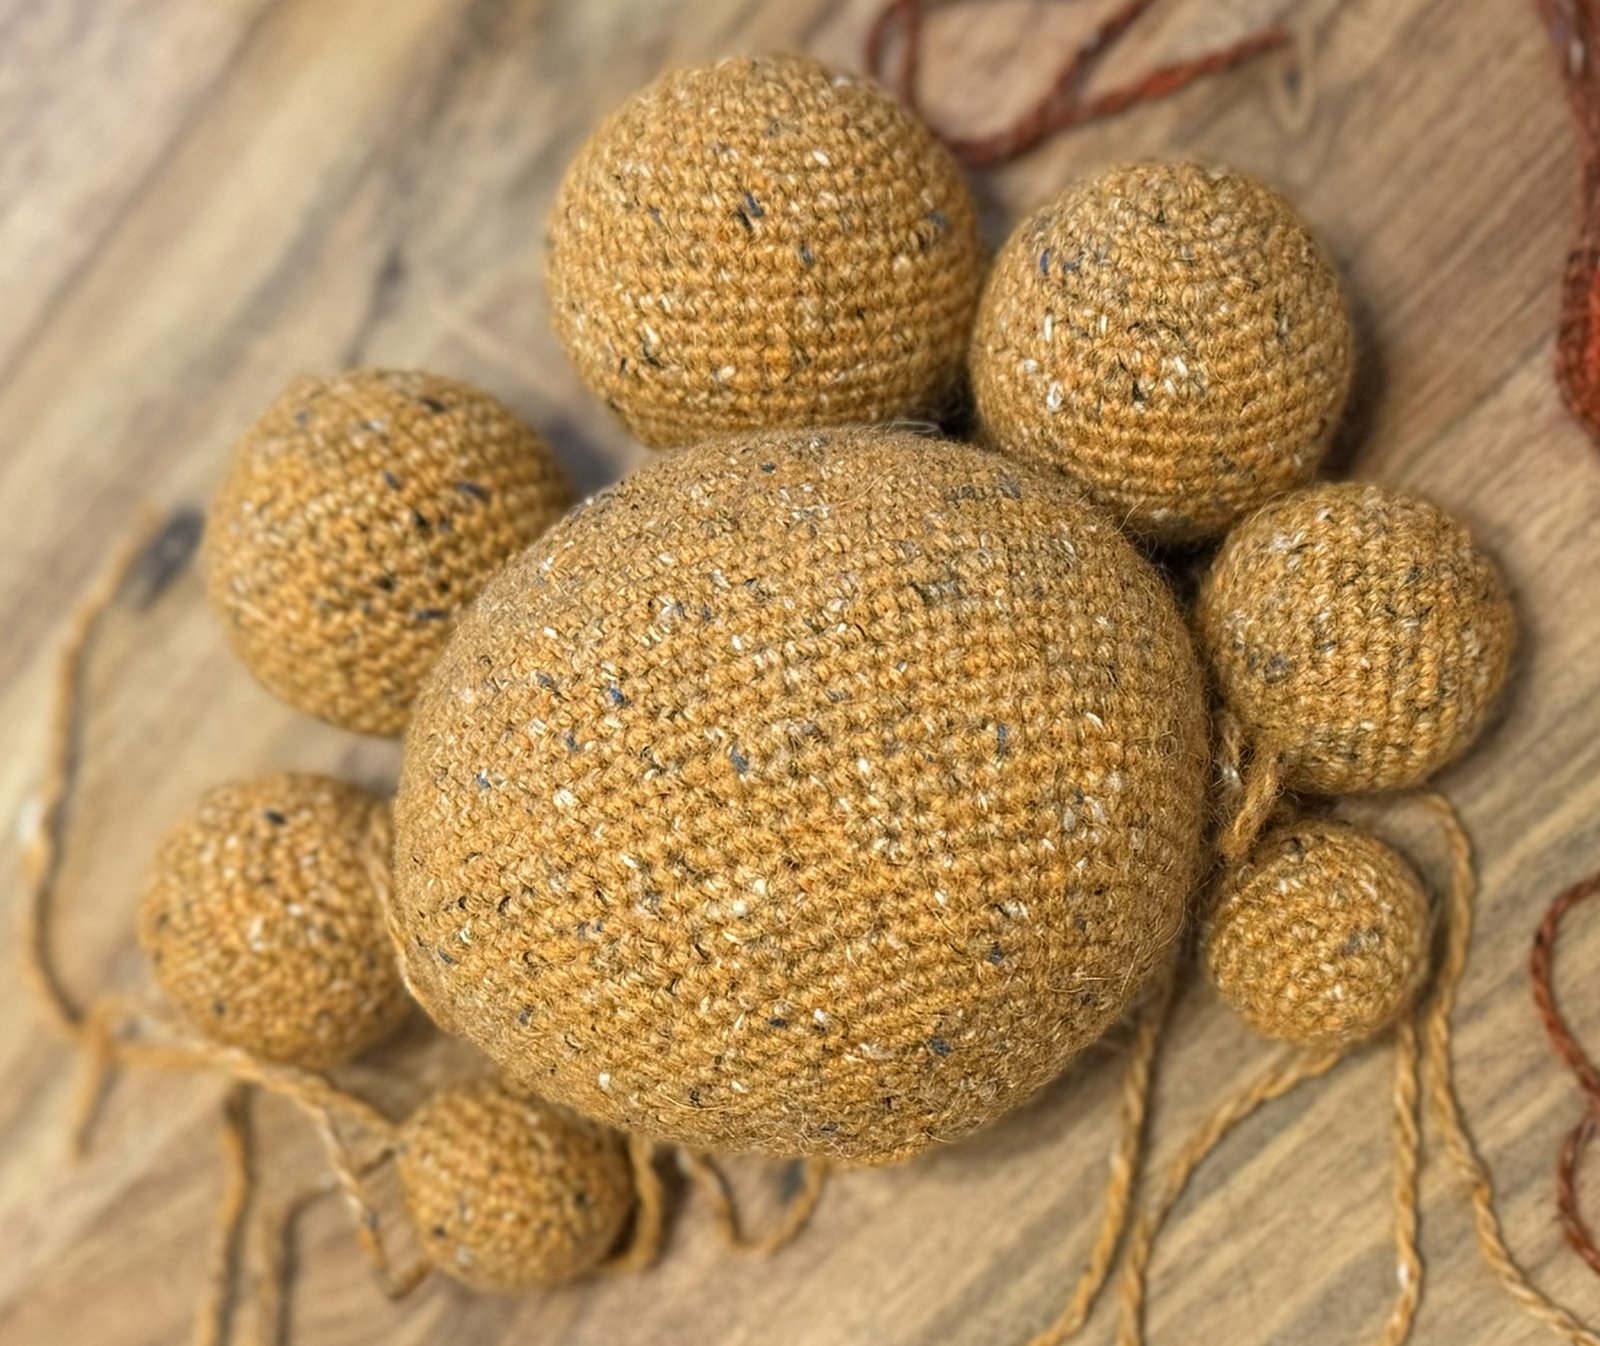
Attaching the orbs to the main body/face for the sunny side
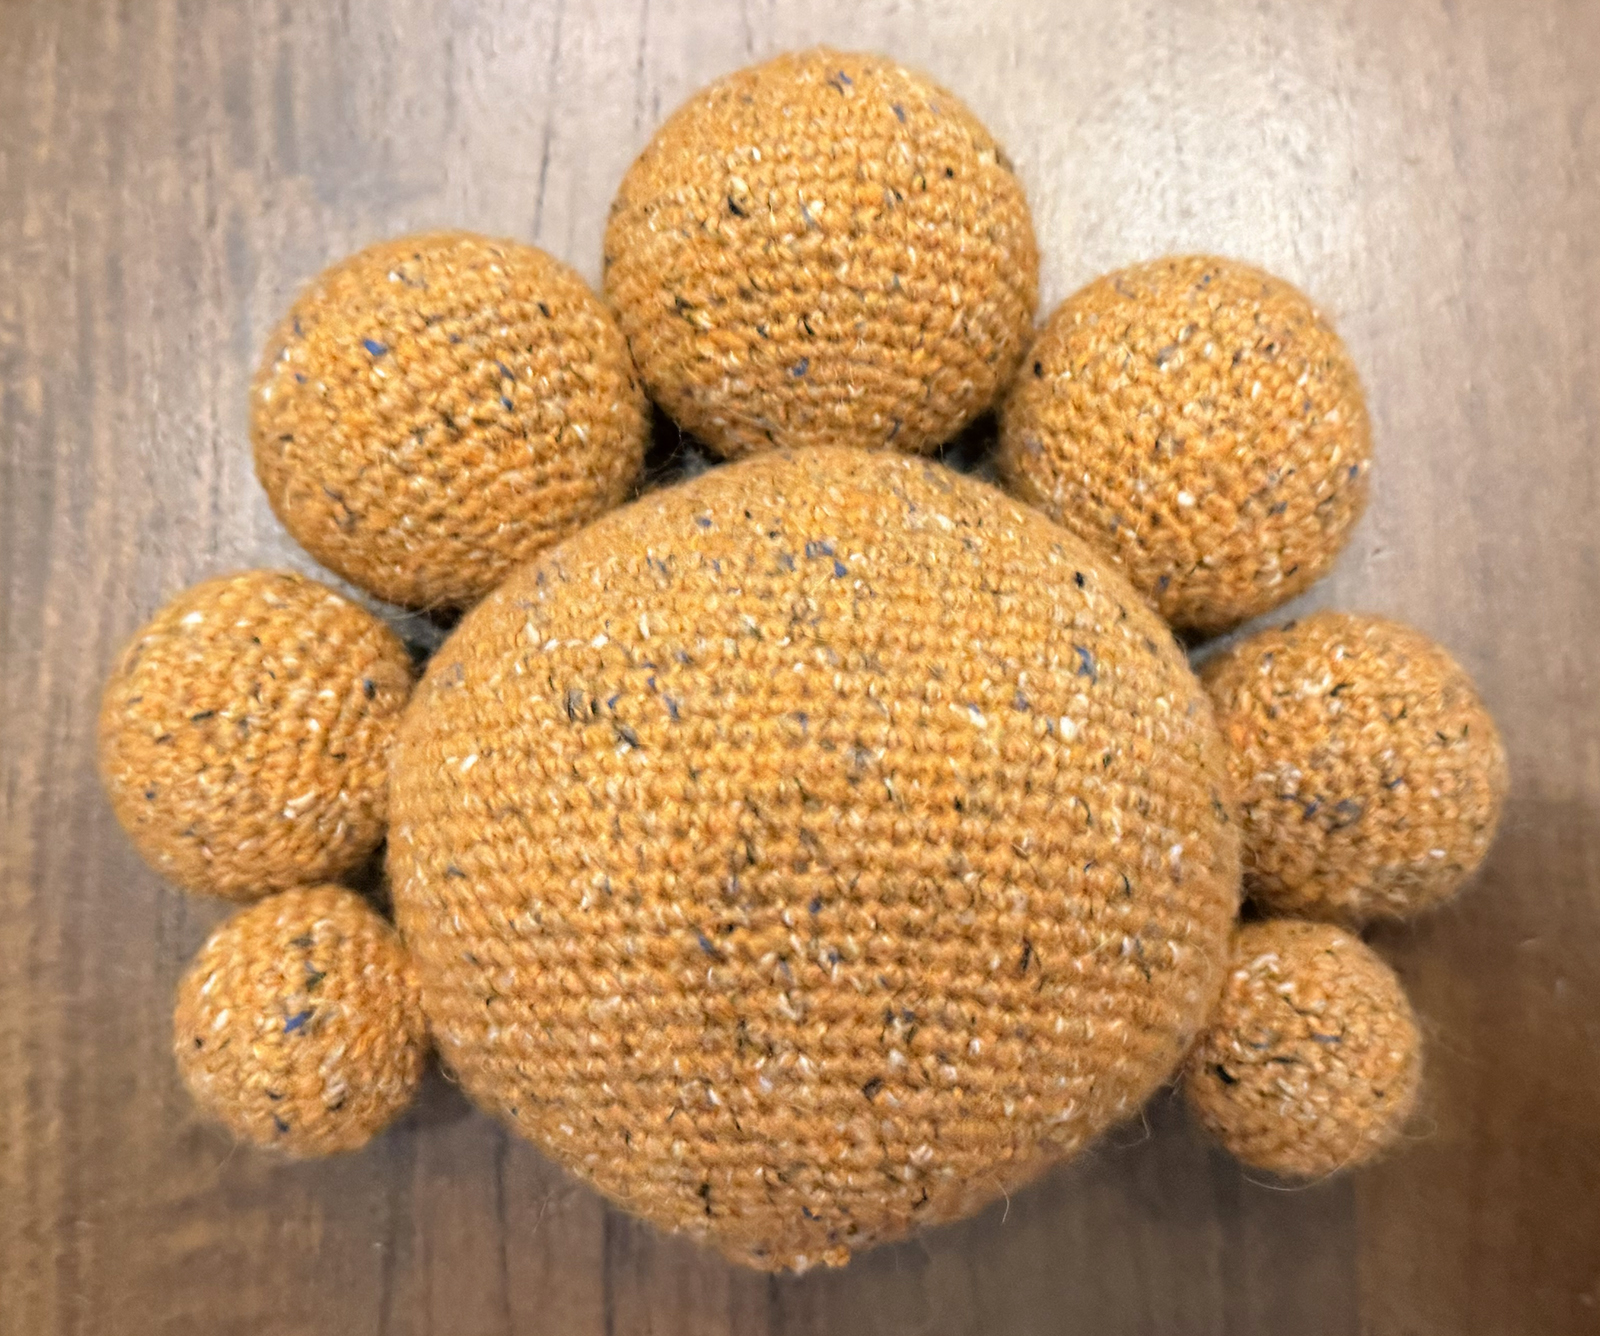
Arrange the orbs around the main body/face: place the largest one at the center of the top then place the orbs in decreasing size out from each side of the largest orb.
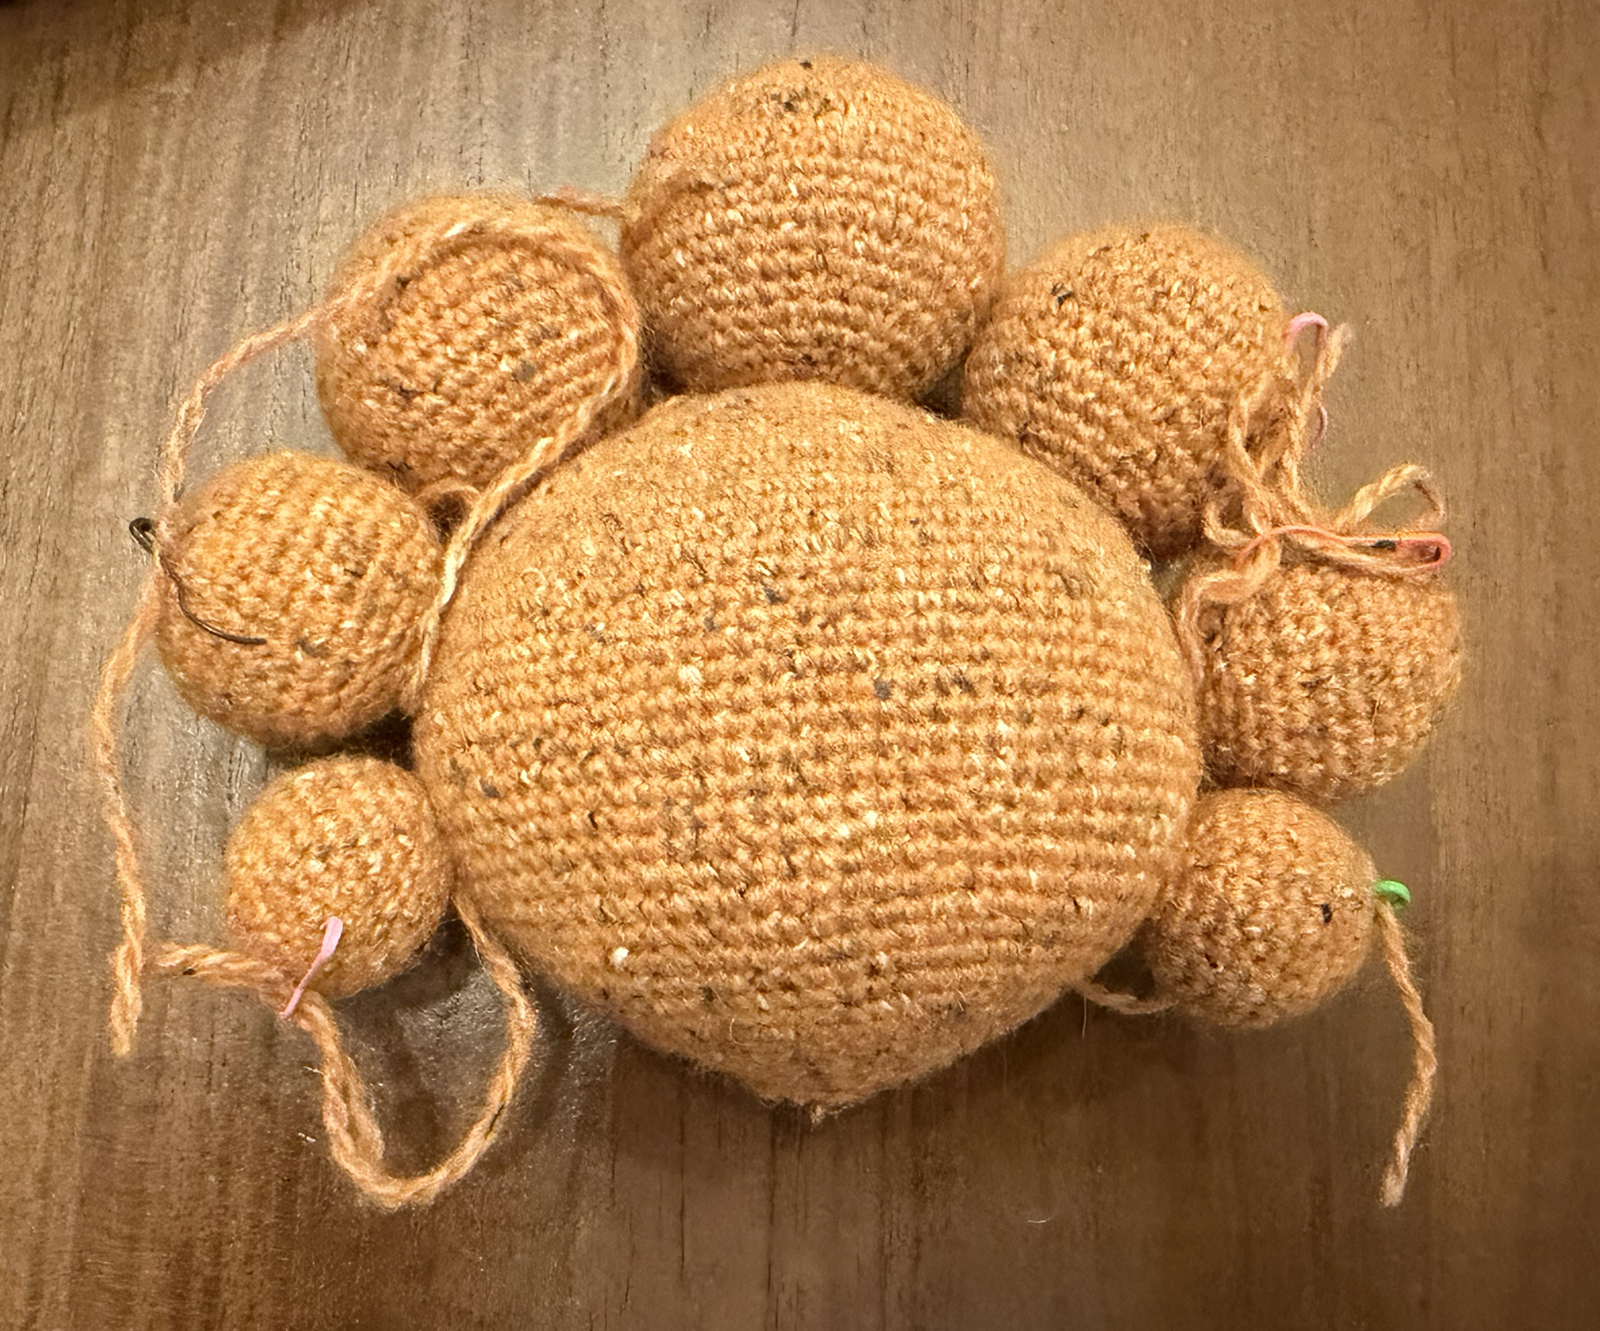
Materials note: if you are using a yarn with low tensile strength like Rowan Felted Tweed, you likely cannot pull the pieces together quite as tight as you'd like. (If you're very careful, you will be able to get them tight enough to connect well, but even if you're very careful, the yarn may break through the friction intrinsic in pulling it through many stitches at less-than-ideal angles.) If you're expecting this to be played with or bumped into often, even careful stitches keeping the pieces together a bit loosely might not be strong enough (even if you do lots of stitches to connect). Instead of just attaching with the yarn tail, I highly recommend you can use coordinating scrap yarn, embroidery thread, or sewing thread to sew pieces together. If you pull your stitches tight enough - something you can do with yarn/threads of high tensile strength - you may not even see them at all. If you do see them and it looks too different, you can embroider with the yarn tail in the light orange yarn used in the orbs and sunny side main body/face around those threads to hide those stitches - this will create a sturdier, but still seamless finish. I used similar colors of linen embroidery thread, but I ended up pulling tight enough that stitches weren't even visible!
Attach the largest orb and second largest orbs to the main body/face by sewing the stitches in the 3rd to last round to stitches on the main body/face.
Attach the second smallest and smallest orbs to the main body/face by sewing the stitches in the 2nd to last round to stitches on the main body/face.
Hide the ends.
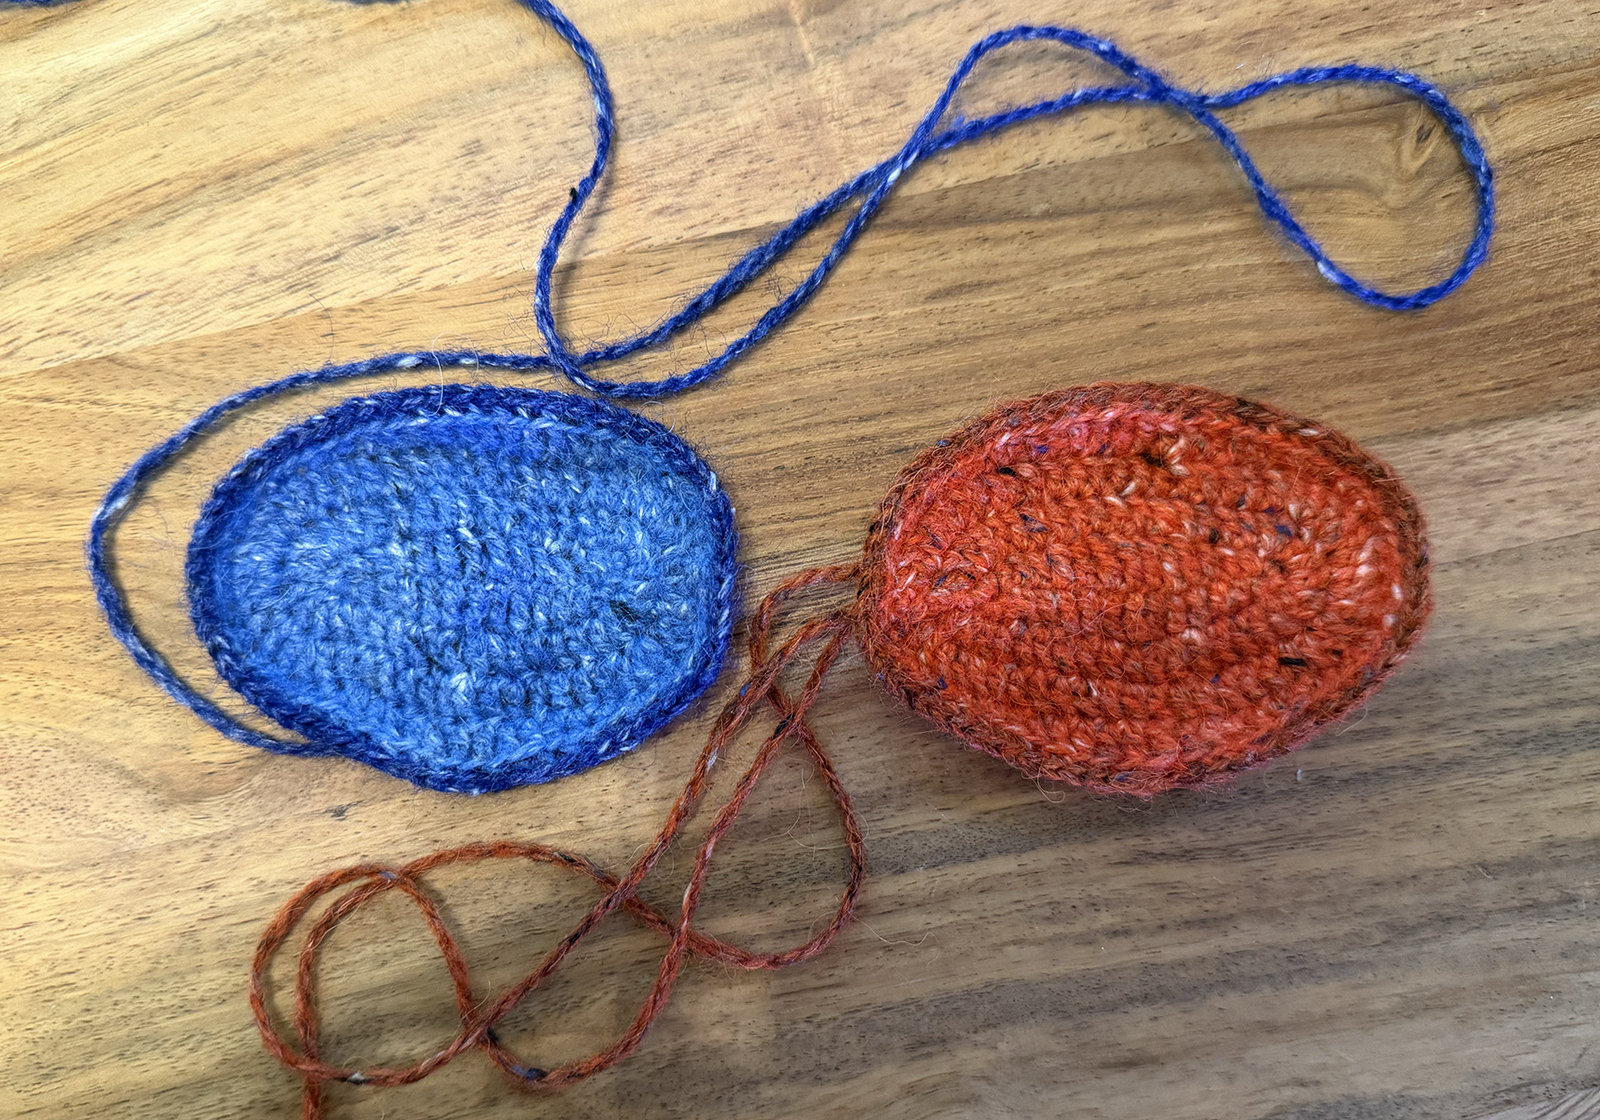
Face ovals
Make two, one in medium blue (main color) with dark blue (contrast edge color) and one in bright orange (main color) with dark red-brown (contrast edge color):
- Foundation: In main color (medium blue or bright orange), make a slip knot, ch 13.
- Round 1: ch 1 (this turning chain does not count as a stitch). Place {2 sc, hdc} in the back bump of the 2nd chain stitch from the hook (we will work the back of the chain first along the top and then the front of the chain second along the bottom so there are no gaps). 2 dc, 2 htr, 3 tr, 2 htr, 2 dc along the back bumps of the chain. Place {hdc, 4 sc, hdc} in the last back bump of the chain. Continue around by working in the front of the chain, starting in the 2nd stitch (we just worked into the 1st stitch through the back, which is equivalent to working in the 1st front stitch): 2 dc, 2 htr, 3 tr, 2 htr, 2 dc, {hdc, 2 sc}. slst into the 1st sc to join. (34)
- Round 2: Start of round is the 1st sc of last round (where slst to join went through): chain 3 (counts as a dc stitch) and dc into same stitch as slip stitch, dc inc, 13 dc, 4 dc inc, 13 dc, 2 dc inc. slst into the front of the 3rd chain (which is the top of what counts as the 1st dc) to join. (42)
- Round 3: Start of round is the 1st sc of last round (where slst to join went through): chain 3 (counts as a dc stitch) and dc into same stitch as slip stitch, 2 dc inc, 15 dc, 6 dc inc, 15 dc, 3 dc inc. slst into the front of the 3rd chain (which is the top of what counts as the 1st dc) to join. (54)
- Round 4: Start of round is the 1st sc of last round (where slst to join went through): ((sc, inc) x 3, 2 hdc, 3 dc, x5 htr, 3 dc, 2 hdc, (inc, sc) x 3) x 2 (62)
- Cut yarn and pull yarn end through the first sc in the previous round to join. Hide the ends on the back side.
- Contrast edge: Place hook through the back loop of a stitch near the bottom side of the mask, and pull a loop through in the contrast color yarn (bright blue or dark red-brown, respectively) to join. BLO sc the entire way around. Cut a long tail for embroidering later (I left about 28 inches to be safe); pull tail through the last loop and invisibly join.
Eye masks
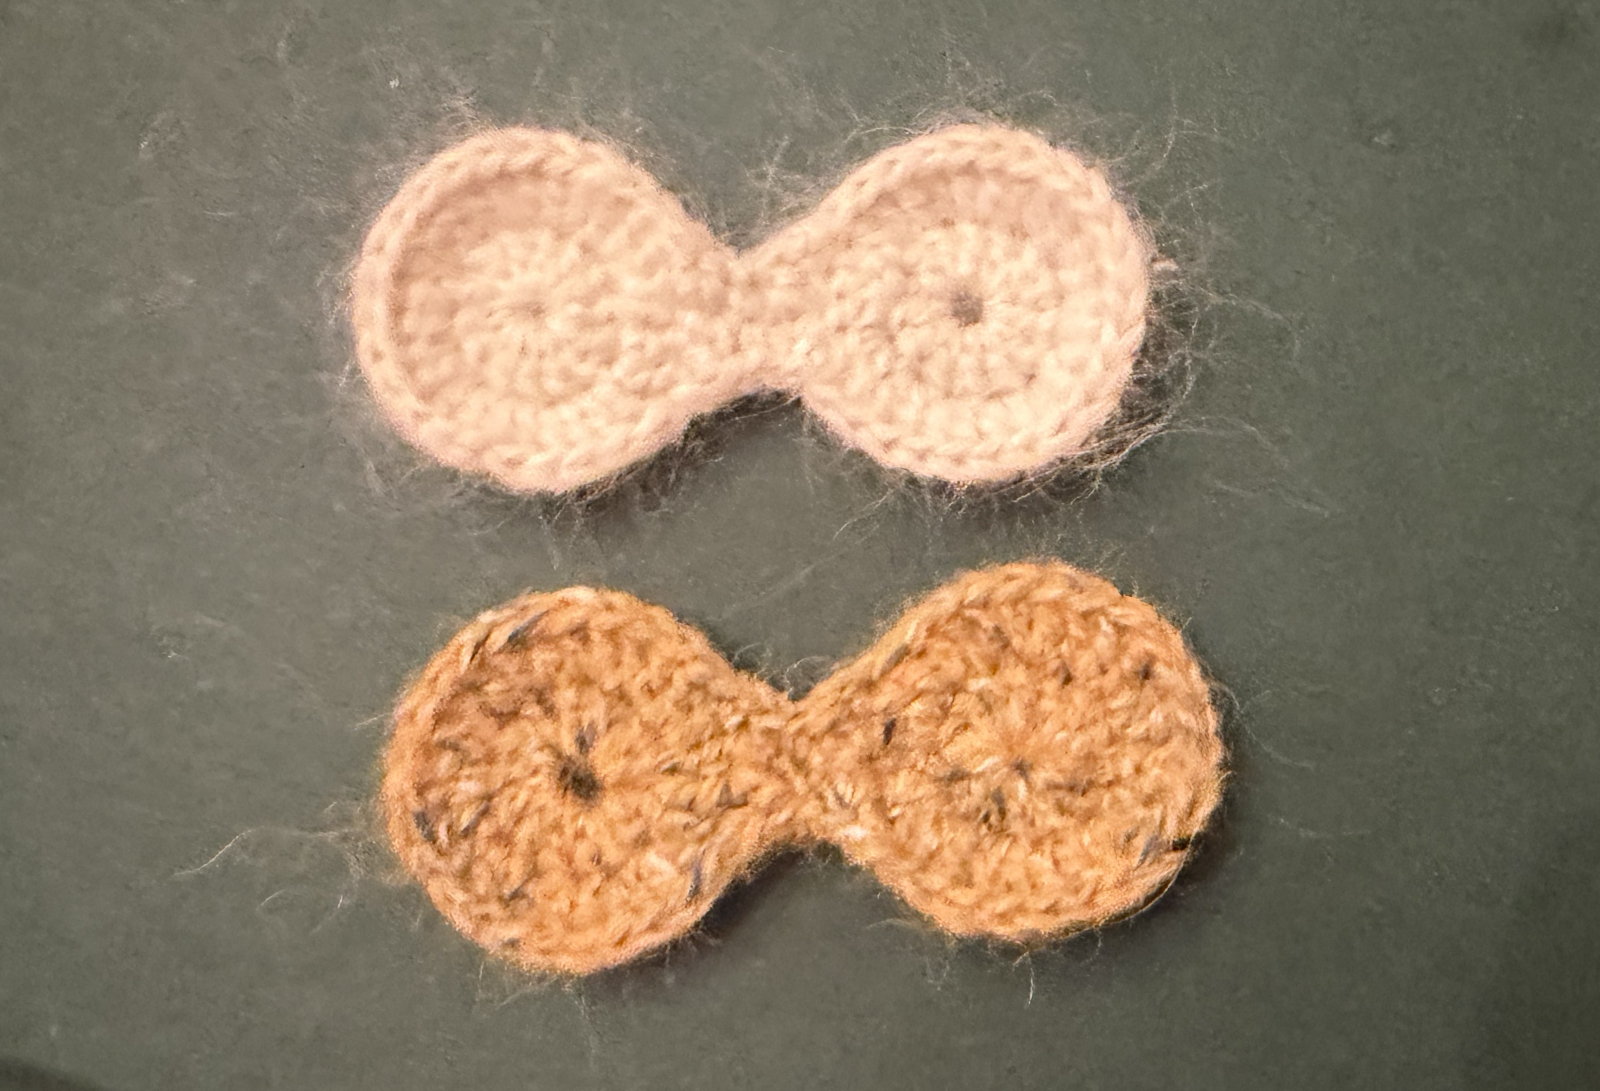
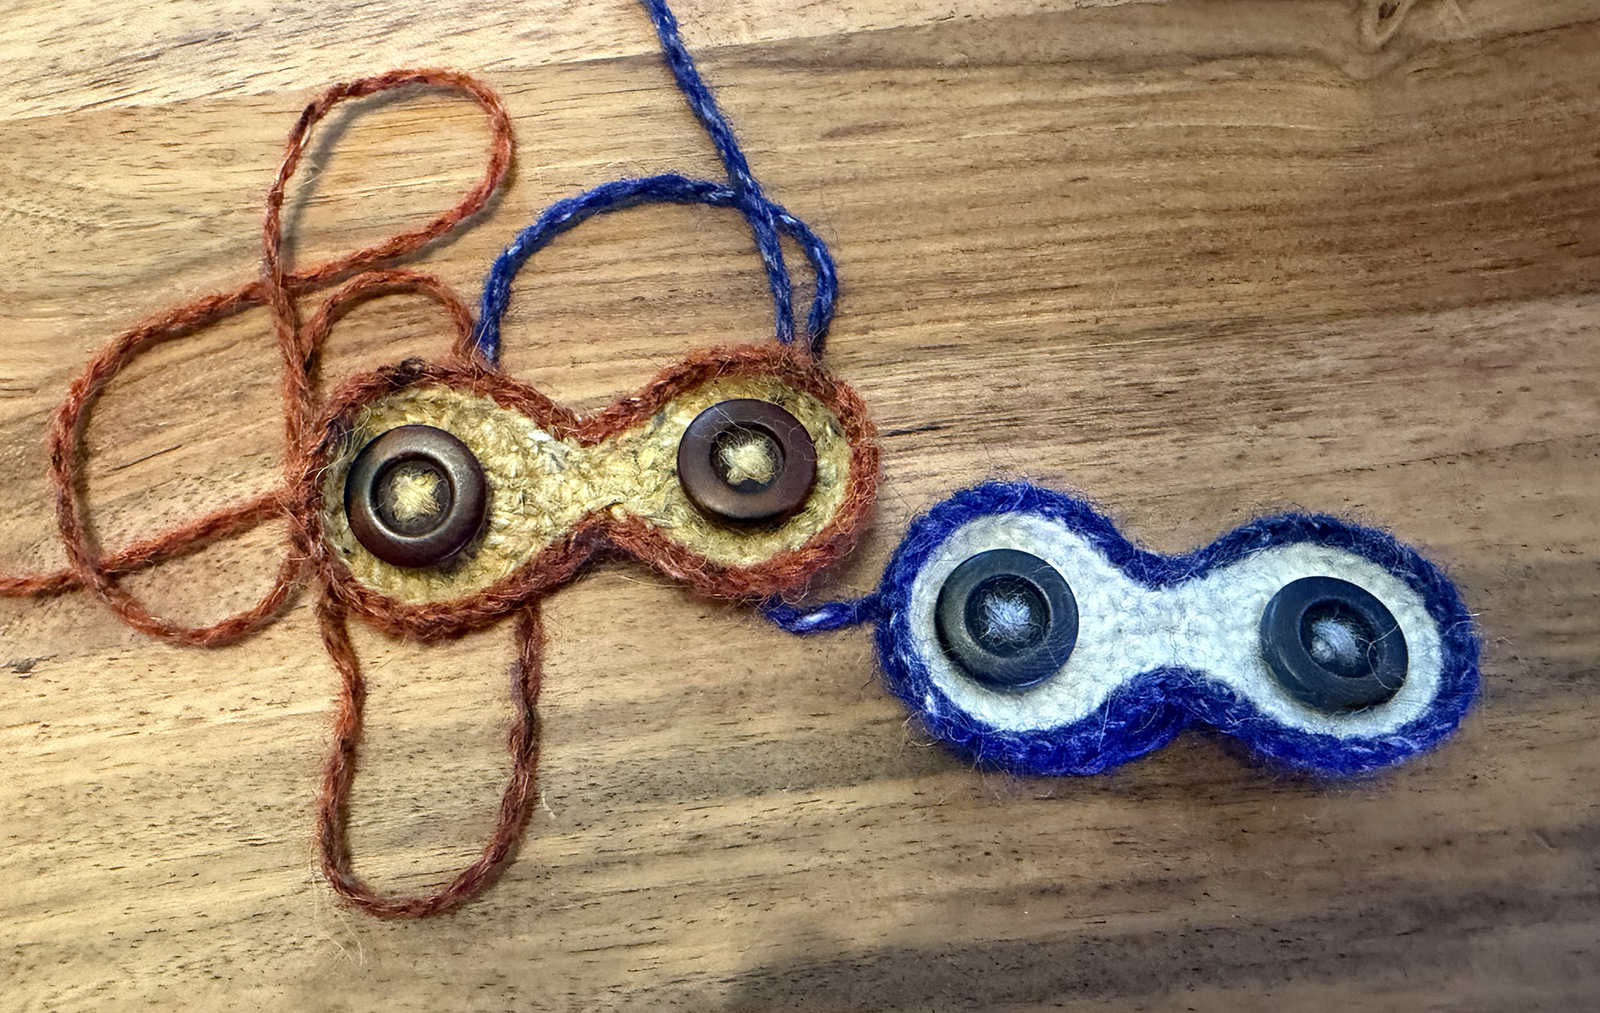
I am calling the figure-8-shaped portion behind the two eye buttons the "eye mask" because without the button eyes, it looks a bit like an eye mask for sleeping in bright places.
Make two, one in white (main color) with dark blue (contrast edge color) and one in light yellow (main color) with dark red-brown (contrast edge color):
- Foundation 1: In main color (white or light yellow), make a slip knot, ch 2.
- Round 1: Place {13 dc} in the back bump of the 1st chain stitch (2nd back bump from hook). slst into the 1st dc to join. (13)
- Round 2: Start of round is the 1st dc of last round (where slst to join went through): ch 2, 13 dc inc. slst into the 1st dc in 1st dc inc to connect. This creates the first of two circles that make up the eye mask. (26)
- Foundation 2: ch 9. If you chain very tightly, make an extra stitch, i.e. ch 10, and if that stitch is not needed, it will be hidden behind the eye mask when attached to other pieces. Place stitch markers in the front loop and the back bump of the 3rd chain stitch (3rd stitch regardless of whether you ch 9 or ch 10).
- Round 3: Place {13 dc} into the back bump of the 8th chain stitch (9th if chain 10, 2nd back bump from hook either way). Making sure to keep the chain attached to the first circle behind the 13 dc, slst into the 1st dc to join. Do not worry if the hole in the center is bigger here (this is likely as you're not starting in a chain loop next to a slip knot) - as long as you stitch evenly, the rounds will end up the same size and the eye will cover the hole completely. This begins the second circle of the eye mask. (26 stitches, chain, 13 stitches)
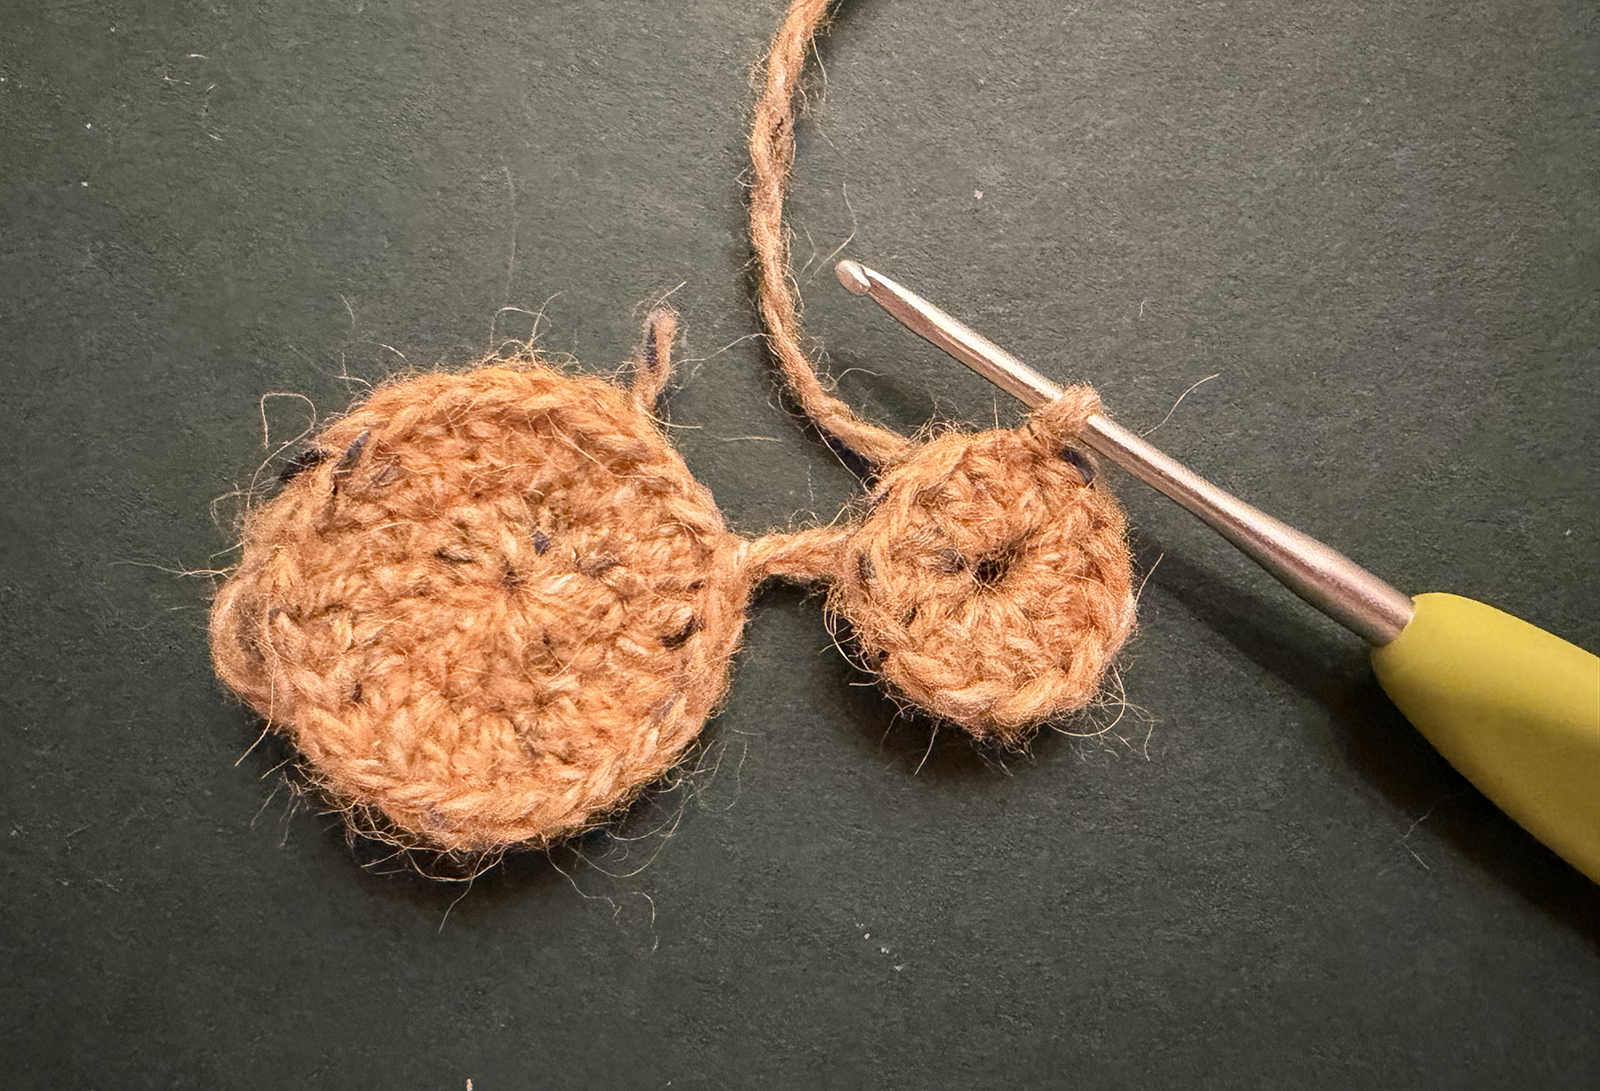
- Round 4: Start of round is the 1st dc of last round (where slst to join went through): ch 2, 13 dc inc (last dc inc in the stitch where the chain that started this round goes through). slst into the 1st dc in 1st dc inc to connect. This creates the second circle of the eye mask. (26 stitches, chain, 26 stitches)
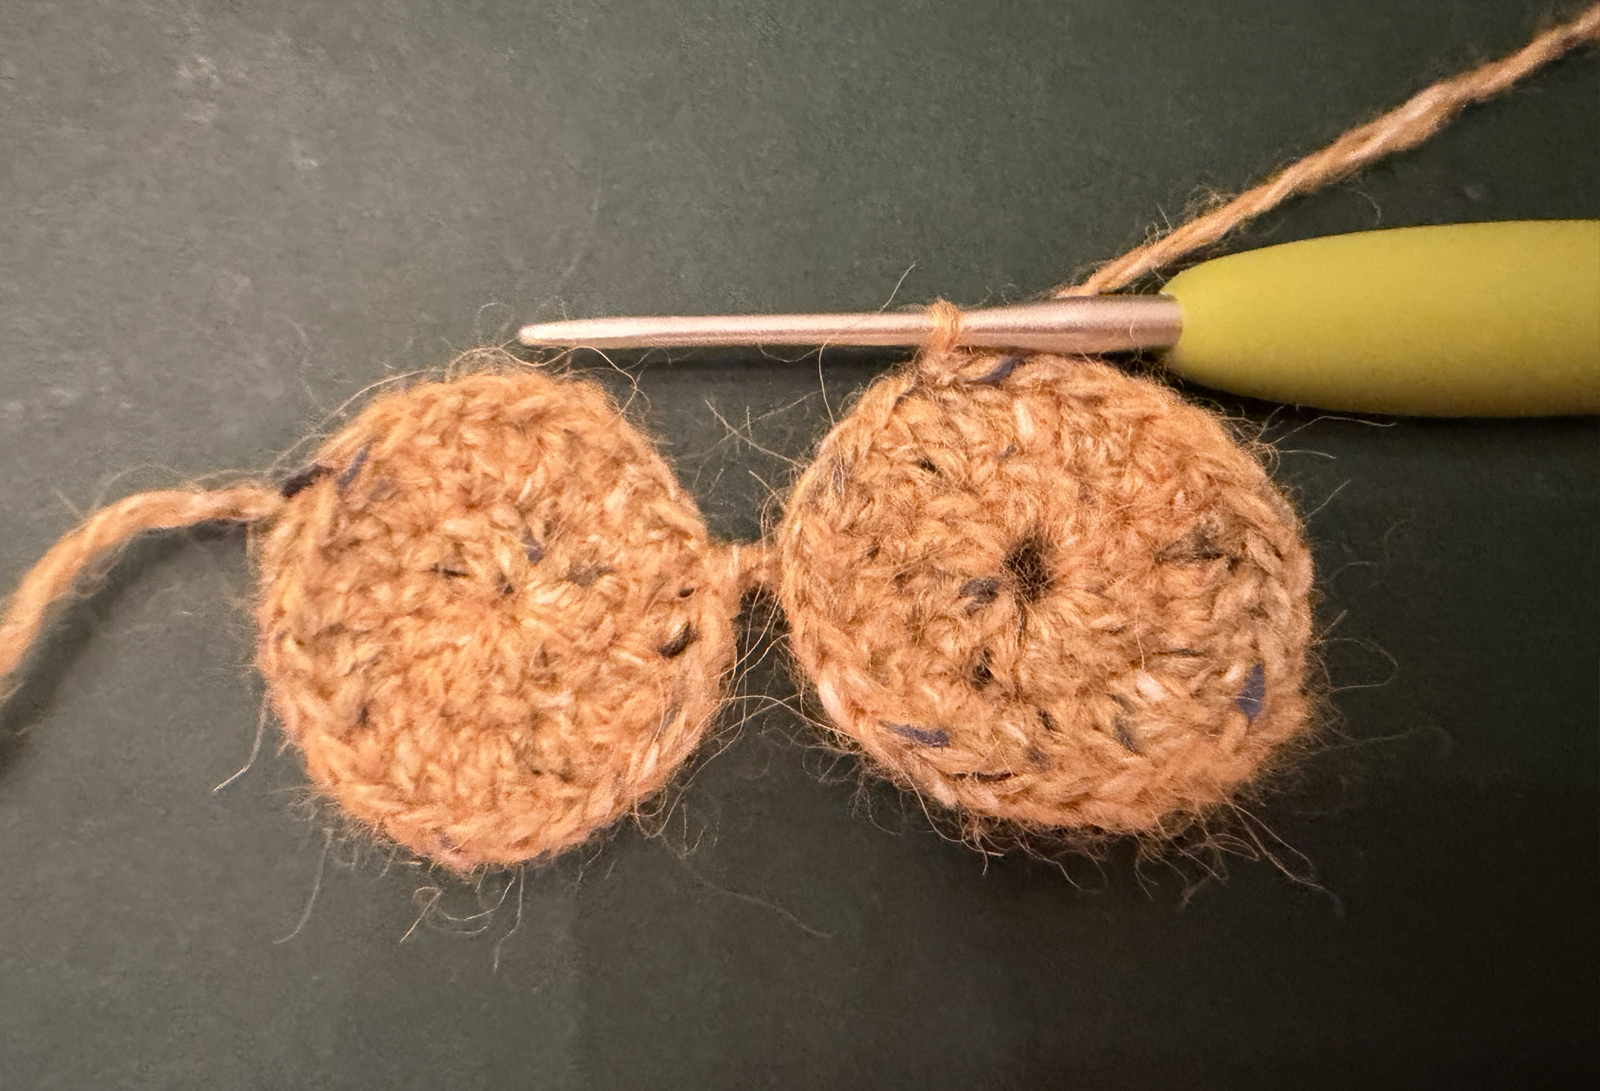
- Round 5: Start of round is the 1st dc of last round (where slst to join went through): sc, 1-dc-in-2-st in the next stitch and the marked back loop of the 3rd stitch in the chain connecting the two circles held together as one stitch to work in, sc in the next back bump on the chain towards the first circle, 1-dc-in-2-st in the back bump of the chain closest to the first circle and the next stitch in the first circle after the chain connecting the circles, sc in the next stitch on the first circle.
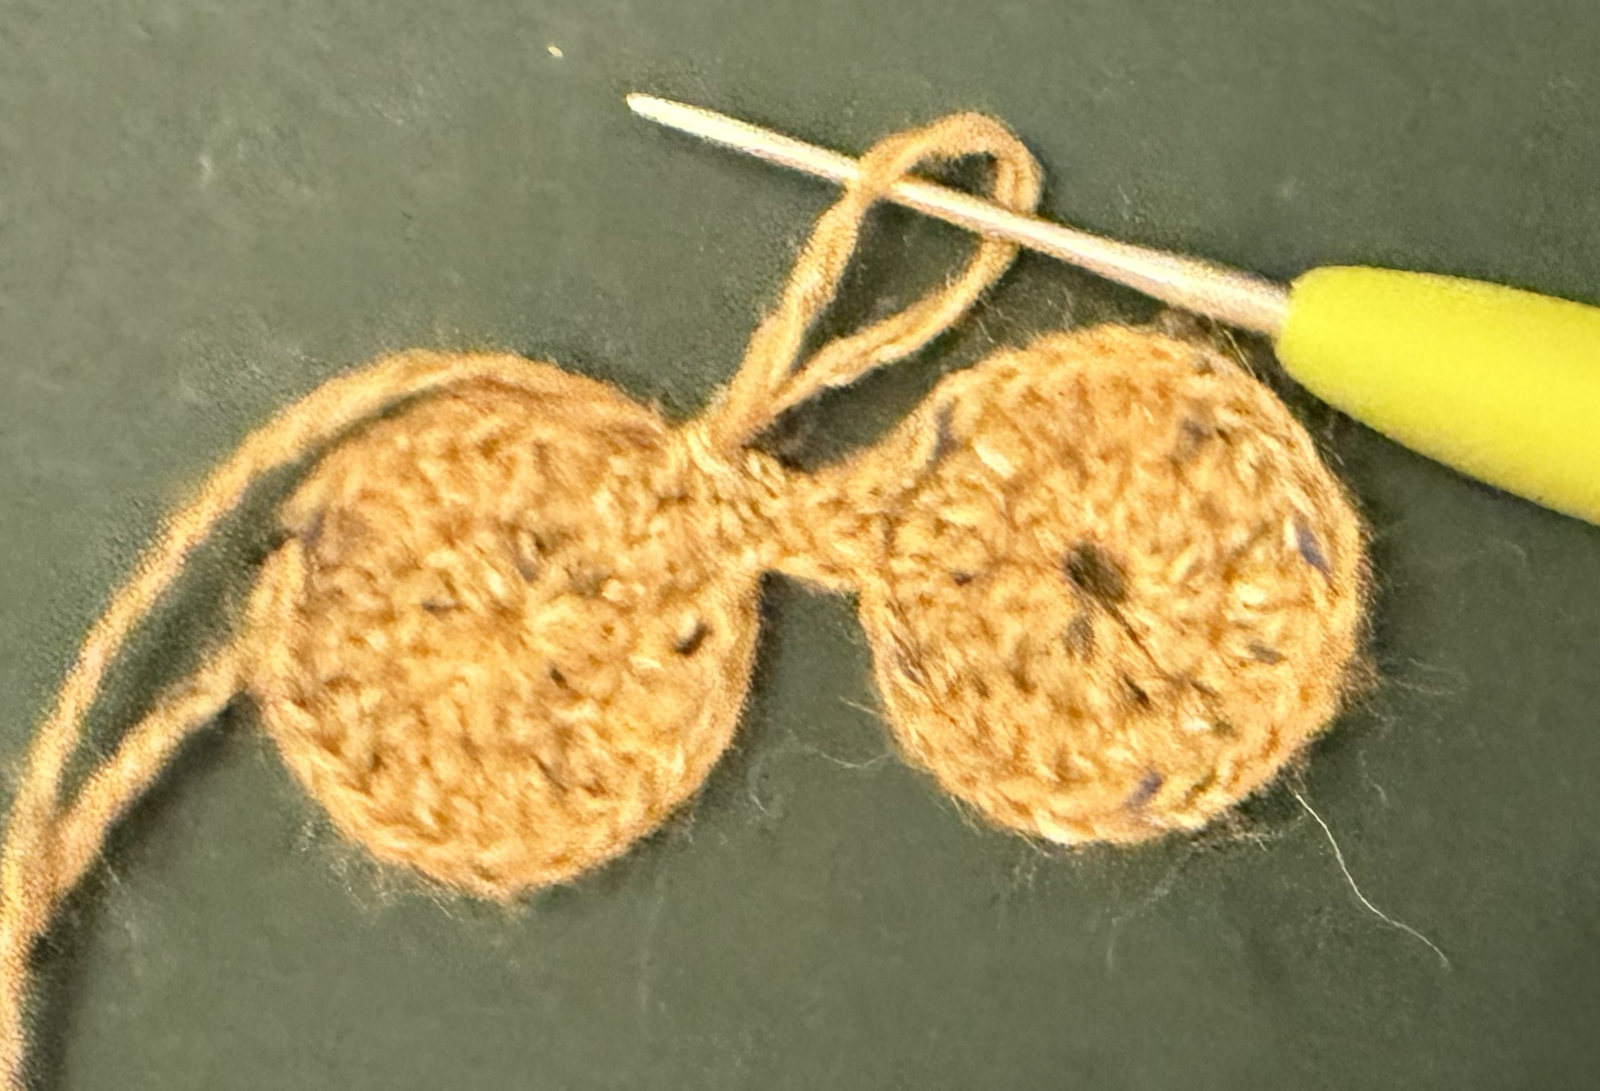
- Cut yarn, pull yarn end through the last loop you made. With a yarn needle, pull the yarn end under the next stitch from front to back and then back through the back loop of the stitch it originated from. Hide the ends on the back of the eye mask.
- Round 6: With a yarn needle, pull yarn through the stitch 3 stitches before the chain to the second circle.
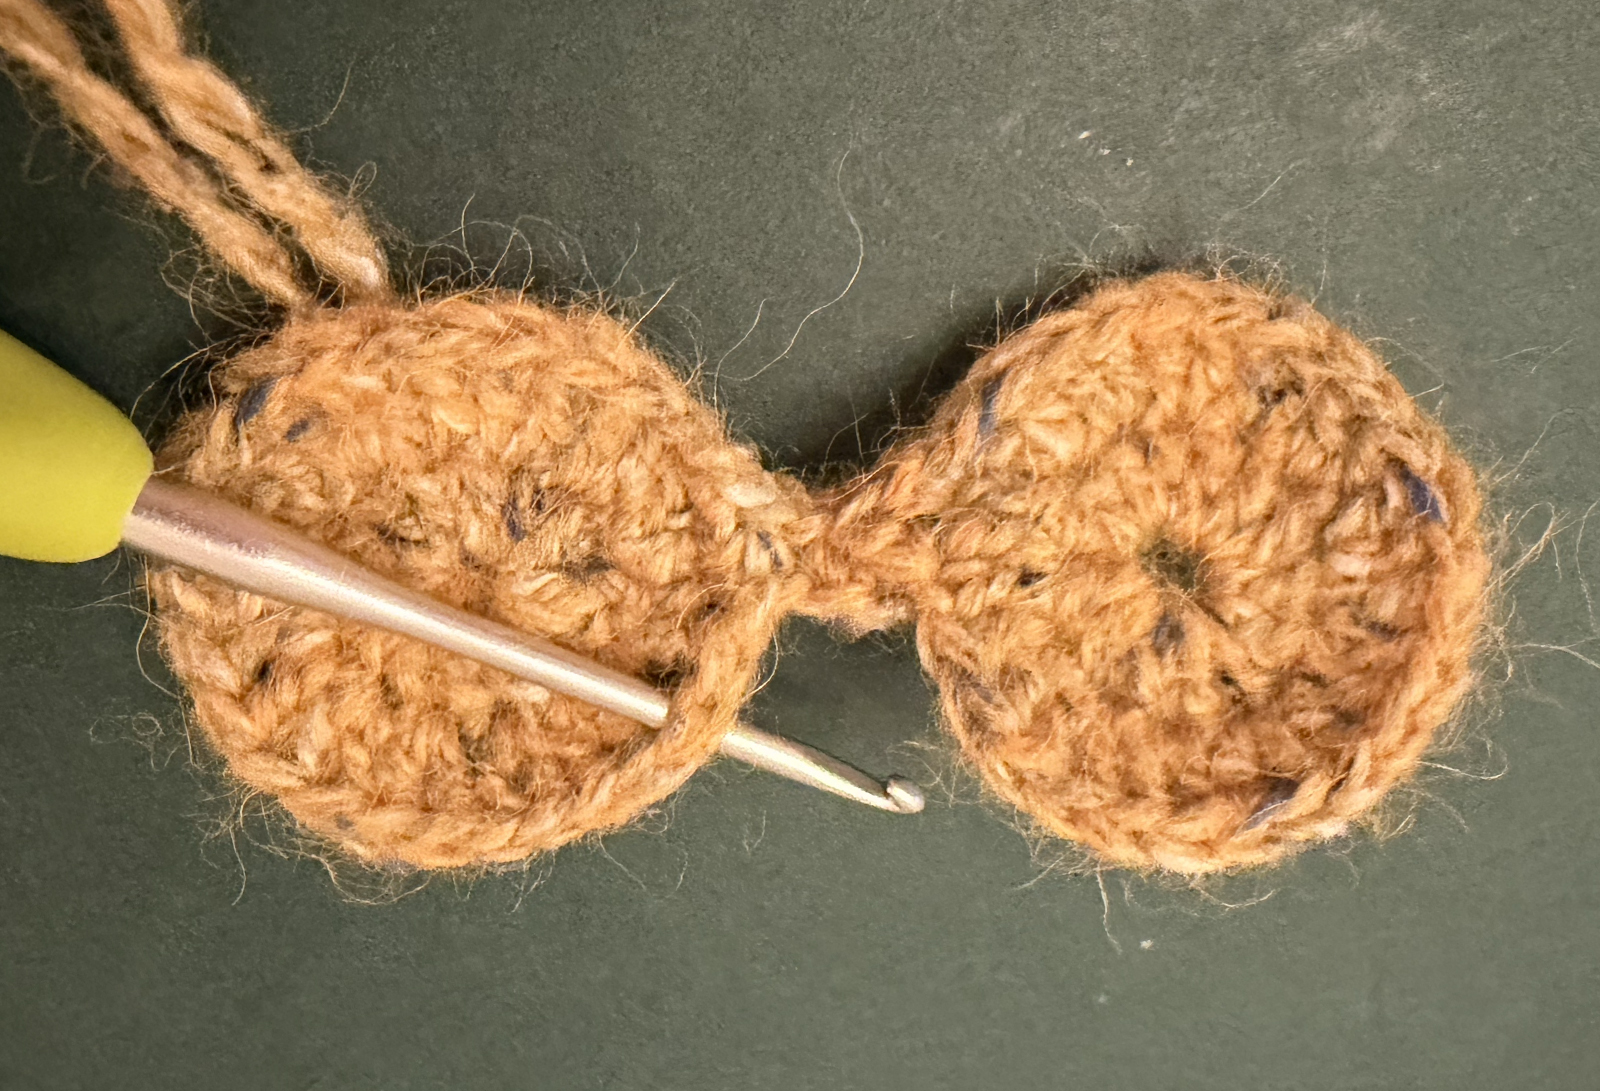
Put hook into the stitch 2 stitches before the chain to the second circle and sc into that stitch, 1-dc-in-2-st in the next stitch and the front loop in the 1st chain stitch (closest to first circle) connecting the two circles held together as one stitch to work in, sc in the next front loop in the chain towards the second circle, 1-dc-in-2-st in the marked front loop of the 3rd chain stitch of the chain closest to the first circle and the next stitch in the second circle after the chain connecting the circles, sc in the next stitch on the second circle. - Cut yarn, pull yarn end through the last loop you made. With a yarn needle, pull the yarn end under the next stitch from front to back and then back through the back loop of the stitch it originated from. Hide the ends on the back of the eye mask.
- Contrast edge: Place hook through the back loop of a stitch near the bottom side of the mask, and pull a loop through in the contrast color yarn (bright blue or dark red-brown, respectively) to join. BLO sc the entire way around. Cut a long tail for embroidering later (I left 30 inches to be safe since I backstitched the masks to the ovals, 18 inches should be enough if you're attaching these in the usual way amigurumi pieces are attached); pull tail through the last loop and invisibly join.
Assembling the bodies/faces
Affix the appropriate 4-holed buttons now in the center of each circle with an x-stitch - dark blue buttons stitched with light blue yarn on the white mask and brown buttons stitched with light yellow yarn on the light yellow mask. Alternatively, embroider the eyes.
Materials note: if you're using Rowan Felted Tweed or another yarn with low tensile strength, embroider slowly and be careful not to pull too hard or the yarn will break. This may happen even if you're careful, as pulling yarn through stitches has some unavoidable friction that weakens the yarn. If a break happens, tie it off out of view, hide the ends, and start with a fresh piece.
Attach the appropriate eye mask to the ovals with their yarn tails. The mask should be centered both vertically and horizontally on the ovals. Embroider the white eye mask with blue buttons onto the medium blue oval, and embroider the light yellow eye mask with brown buttons onto the bright orange oval. I embroidered the eye masks onto the ovals in backstitch placed on the inside edge of the contrast edge border, i.e. between the last main color round and the contrast edge round. This stitch choice creates more of a raised edge than the usual way of embroidering crocheted pieces together, though that will also work well.
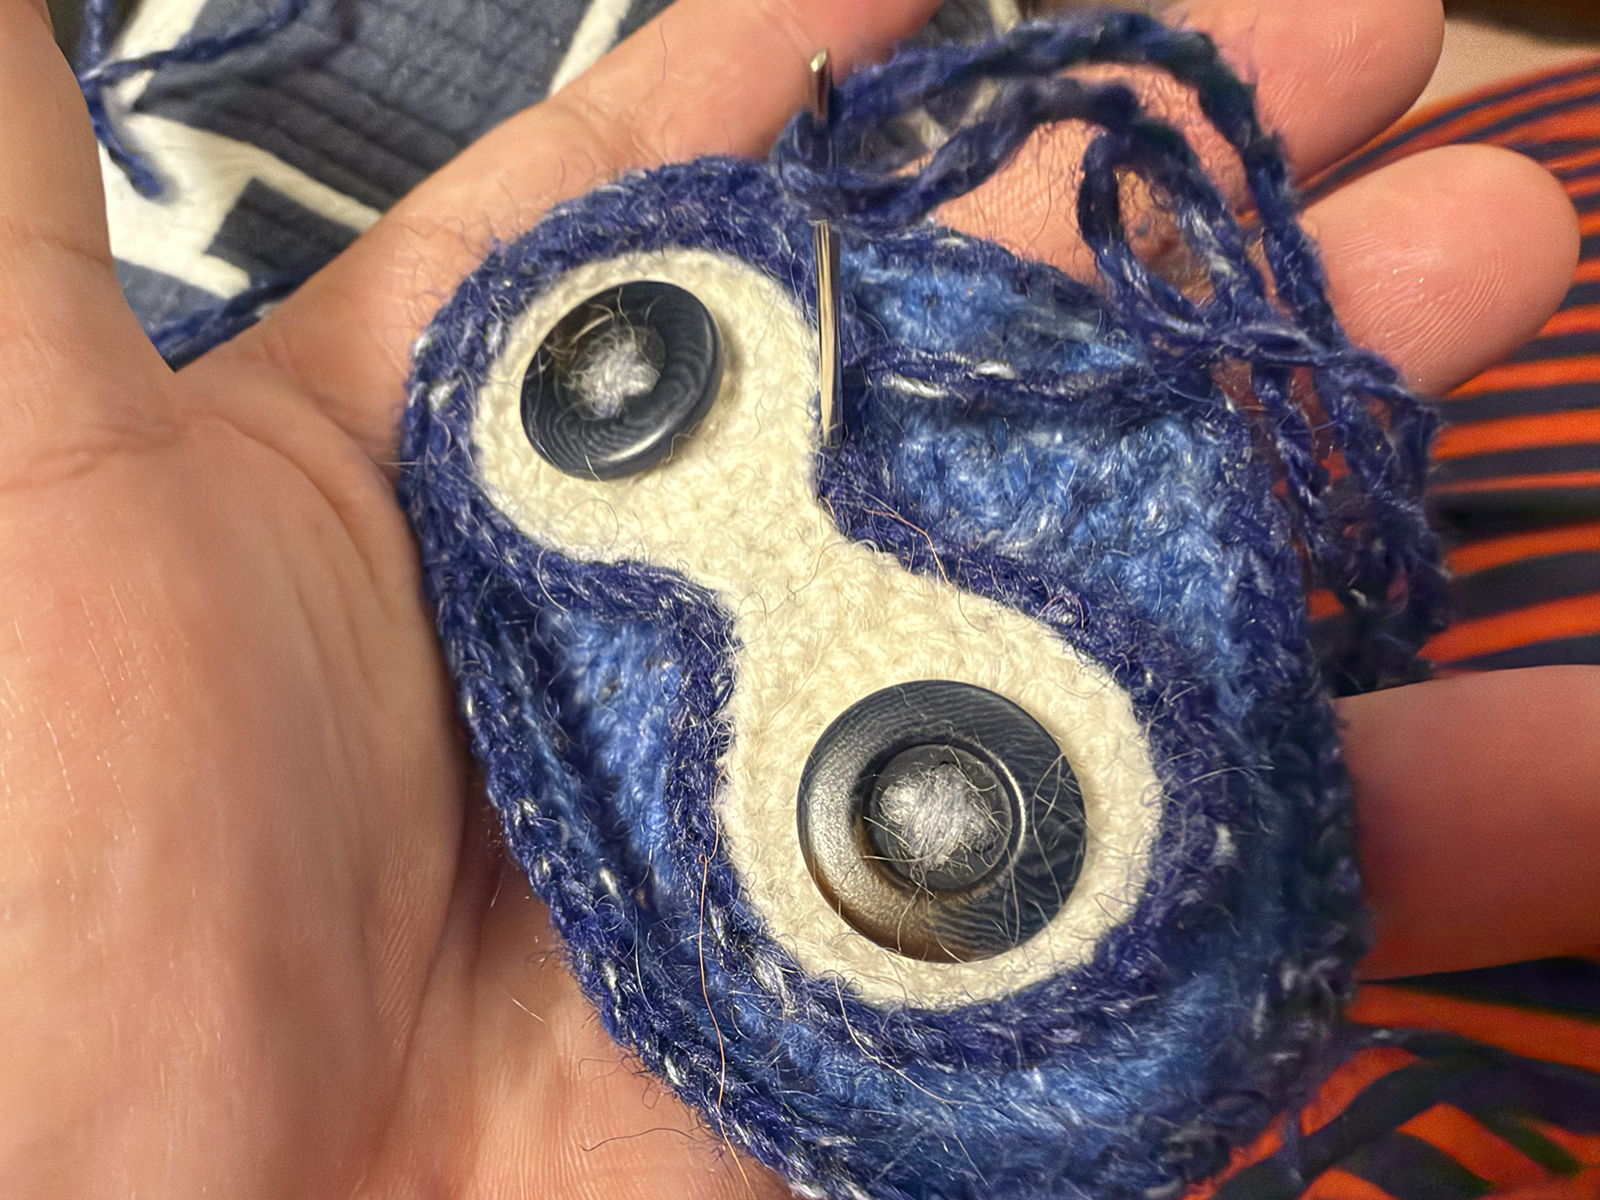
Embroider the smile below the eye mask on each oval. Use dark blue yarn for the smile on the medium blue oval and dark red-brown yarn for the smile on the bright orange oval. I used stem stitch to create a rope-like texture.
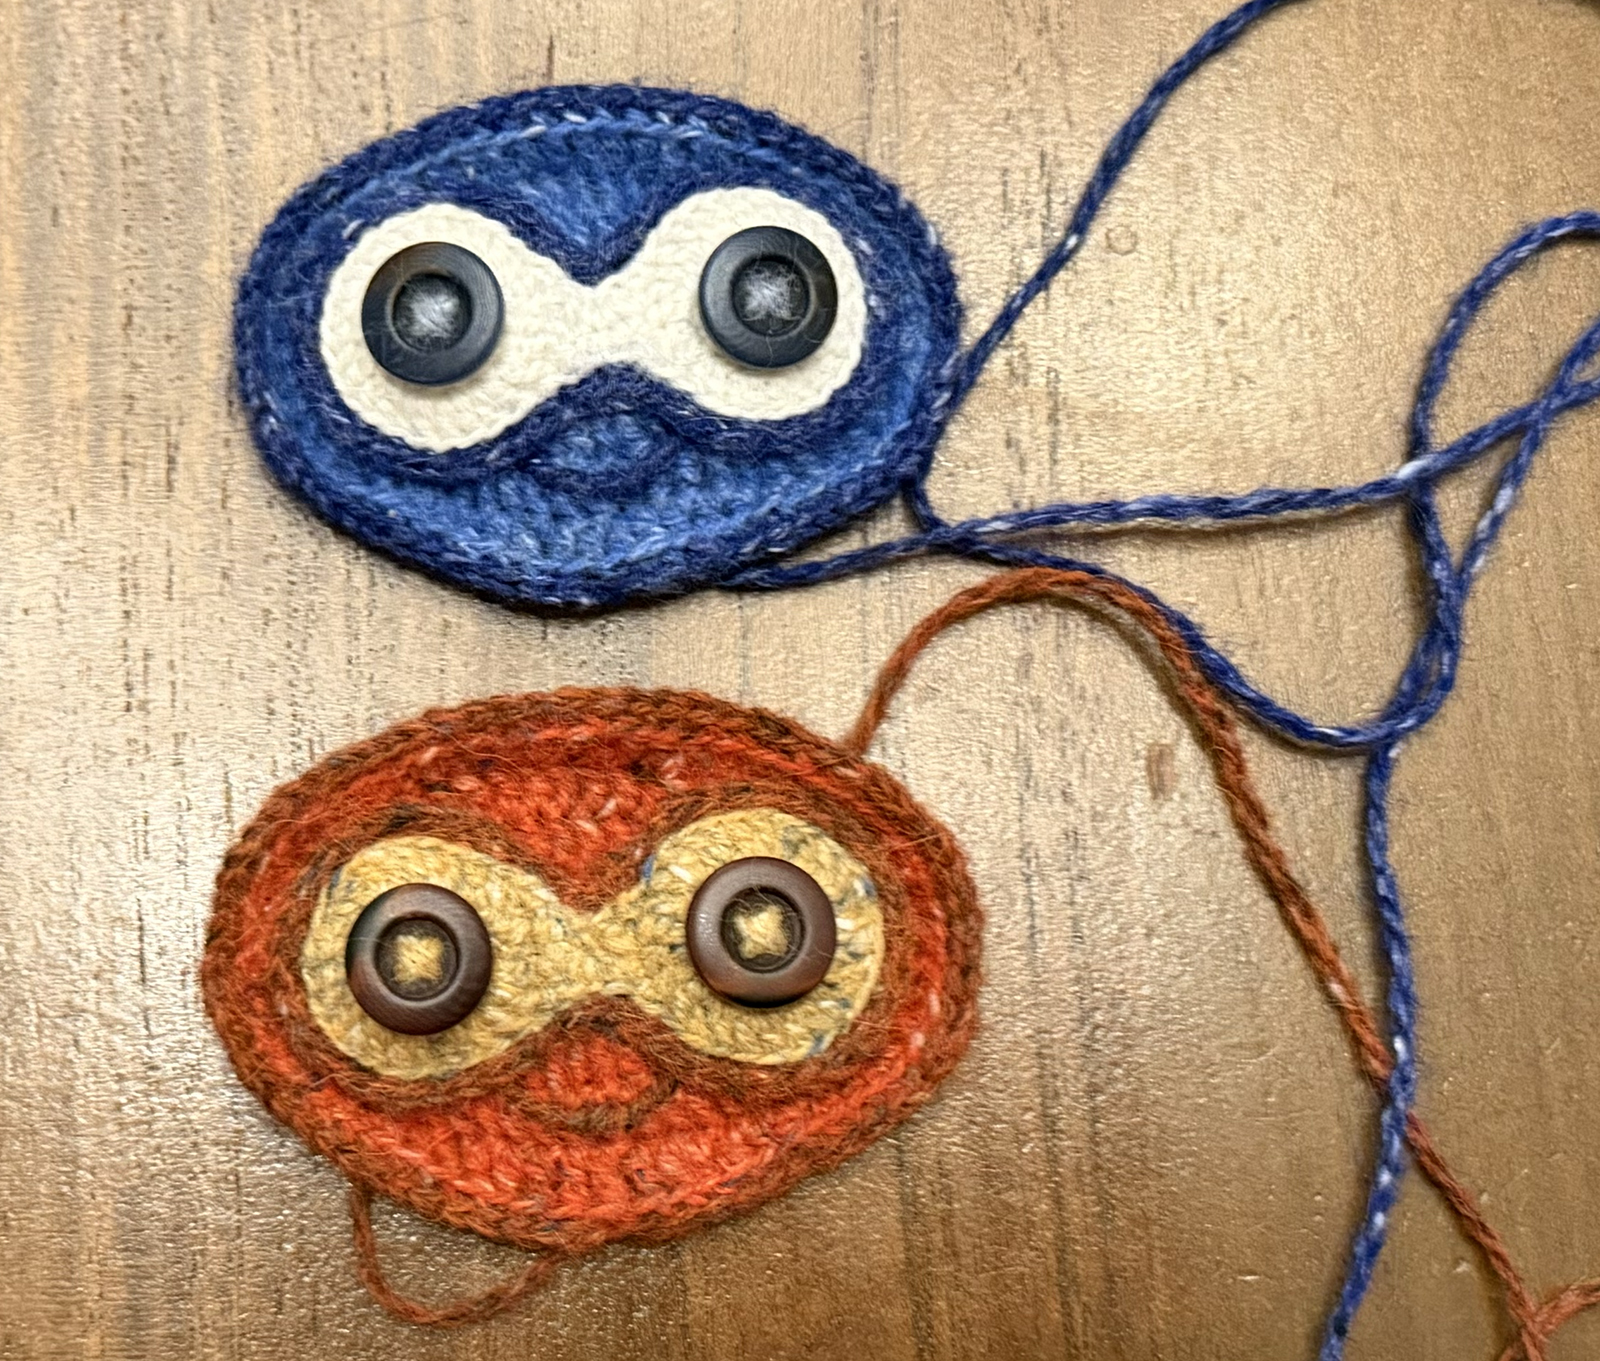
Attach the appropriate oval to the appropriate main body/face. Embroider the medium blue oval onto the light blue body with dark blue yarn, placing the oval asymmetrically towards the bottom so the bottom side of the oval is evenly surrounded by the oval at the bottom of the teardrop main body/face. Embroider the bright orange oval onto the light orange body with dark red-brown yarn, placing the oval symmetrically in the middle of the main oval surrounded by the orbs.
Flippable "dress"
When I designed this, I was not very far along in my own crochet journey, but nonetheless, I decided I wanted to make the flippable "dress" in Suzette stitch, which reverses beautifully. As far as I can tell, Suzette stitch circles aren't documented elsewhere. Please pay attention to the start of round instructions - it may feel a little weird to functionally go "back" a stitch to start the round, but it ensures the Suzette stitch pattern lines up.
In the white fingering weight yarn:
- Foundation & round 1: In magic ring, make (sc, dc) x 6. slst into the first sc, , and turn. (12)
- Round 2: Start of round here on out will always be the sc you slipped into at the end of last round (Note: this is a little weird as it's slightly behind the turn. Trust the process!) - ch 1 (chain at the beginning of the round never counts as a stitch), ({sc, dc, sc, dc}, sk) x 6. slst into the first sc and turn. (24)
- Round 3: ch 1, ({sc, dc, sc}, sk, {dc, sc, dc}, sk) x 6. (Note: all stitches are made in single crochet stitches and all skips are the double crochet stitches from here on out.) slst into the first sc and turn. (36)
- Round 4: ch 1, ({sc, dc}, sk, {sc, dc, sc}, sk, {dc, sc, dc}, sk) x 6. slst into the first sc and turn. (48)
- Round 5: ch 1, (({sc, dc}, sk) x 2, {sc, dc, sc}, sk, {dc, sc, dc}, sk, ({sc, dc}, sk) x 2) x 4. slst into the first sc and turn. (56)
- Round 6: ch 1, (({sc, dc}, sk) x 3, {sc, dc, sc}, sk, {dc, sc, dc}, sk, ({sc, dc}, sk) x 4, {sc, dc, sc}, sk, {dc, sc, dc}, sk, ({sc, dc}, sk) x 3) x 2. slst into the first sc and turn. (64)
- Round 7: ch 1, (({sc, dc}, sk) x 3, {sc, dc, sc}, sk, {dc, sc, dc}, sk, ({sc, dc}, sk) x 3) x 4. slst into the first sc and turn. (72)
- Round 8: ch 1, (({sc, dc}, sk) x 2, {sc, dc, sc}, sk, {dc, sc, dc}, sk, {sc, dc}, sk, {sc, dc, sc}, sk, {dc, sc, dc}, sk, ({sc, dc}, sk) x 2) x 4. slst into the first sc and turn. (88)
- Round 9: ch 1, (({sc, dc}, sk) x 5, {sc, dc, sc}, sk, {dc, sc, dc}, sk, ({sc, dc}, sk) x 8, {sc, dc, sc}, sk, {dc, sc, dc}, sk, ({sc, dc}, sk) x 5) x 2. slst into the first sc and turn. (96)
- Round 10: ch 1, ({sc, dc}, sk) x 48. slst into the first sc and turn. (96)
- Round 11: ch 1, (({sc, dc}, sk) x 2, {sc, dc, sc}, sk, {dc, sc, dc}, sk, ({sc, dc}, sk) x 2) x 8. slst into the first sc and turn. (112)
- Round 12: ch 1, ({sc, dc}, sk) x 56. slst into the first sc and turn. (112)
- Round 13: ch 1, (({sc, dc}, sk) x 3, {sc, dc, sc}, sk, {dc, sc, dc}, sk, ({sc, dc}, sk) x 4, {sc, dc, sc}, sk, {dc, sc, dc}, sk, ({sc, dc}, sk) x 3) x 4. slst into the first sc and turn. (128)
- Round 14: ch 1, ({sc, dc}, sk) x 64. slst into the first sc and turn. (128)
- Round 15: ch 1, (({sc, dc}, sk) x 7, {sc, dc, sc}, sk, {dc, sc, dc}, sk, ({sc, dc}, sk) x 7) x 4. slst into the first sc and turn. (136)
- Round 16: ch 1, ({sc, dc}, sk) x 68. slst into the first sc and turn. (136)
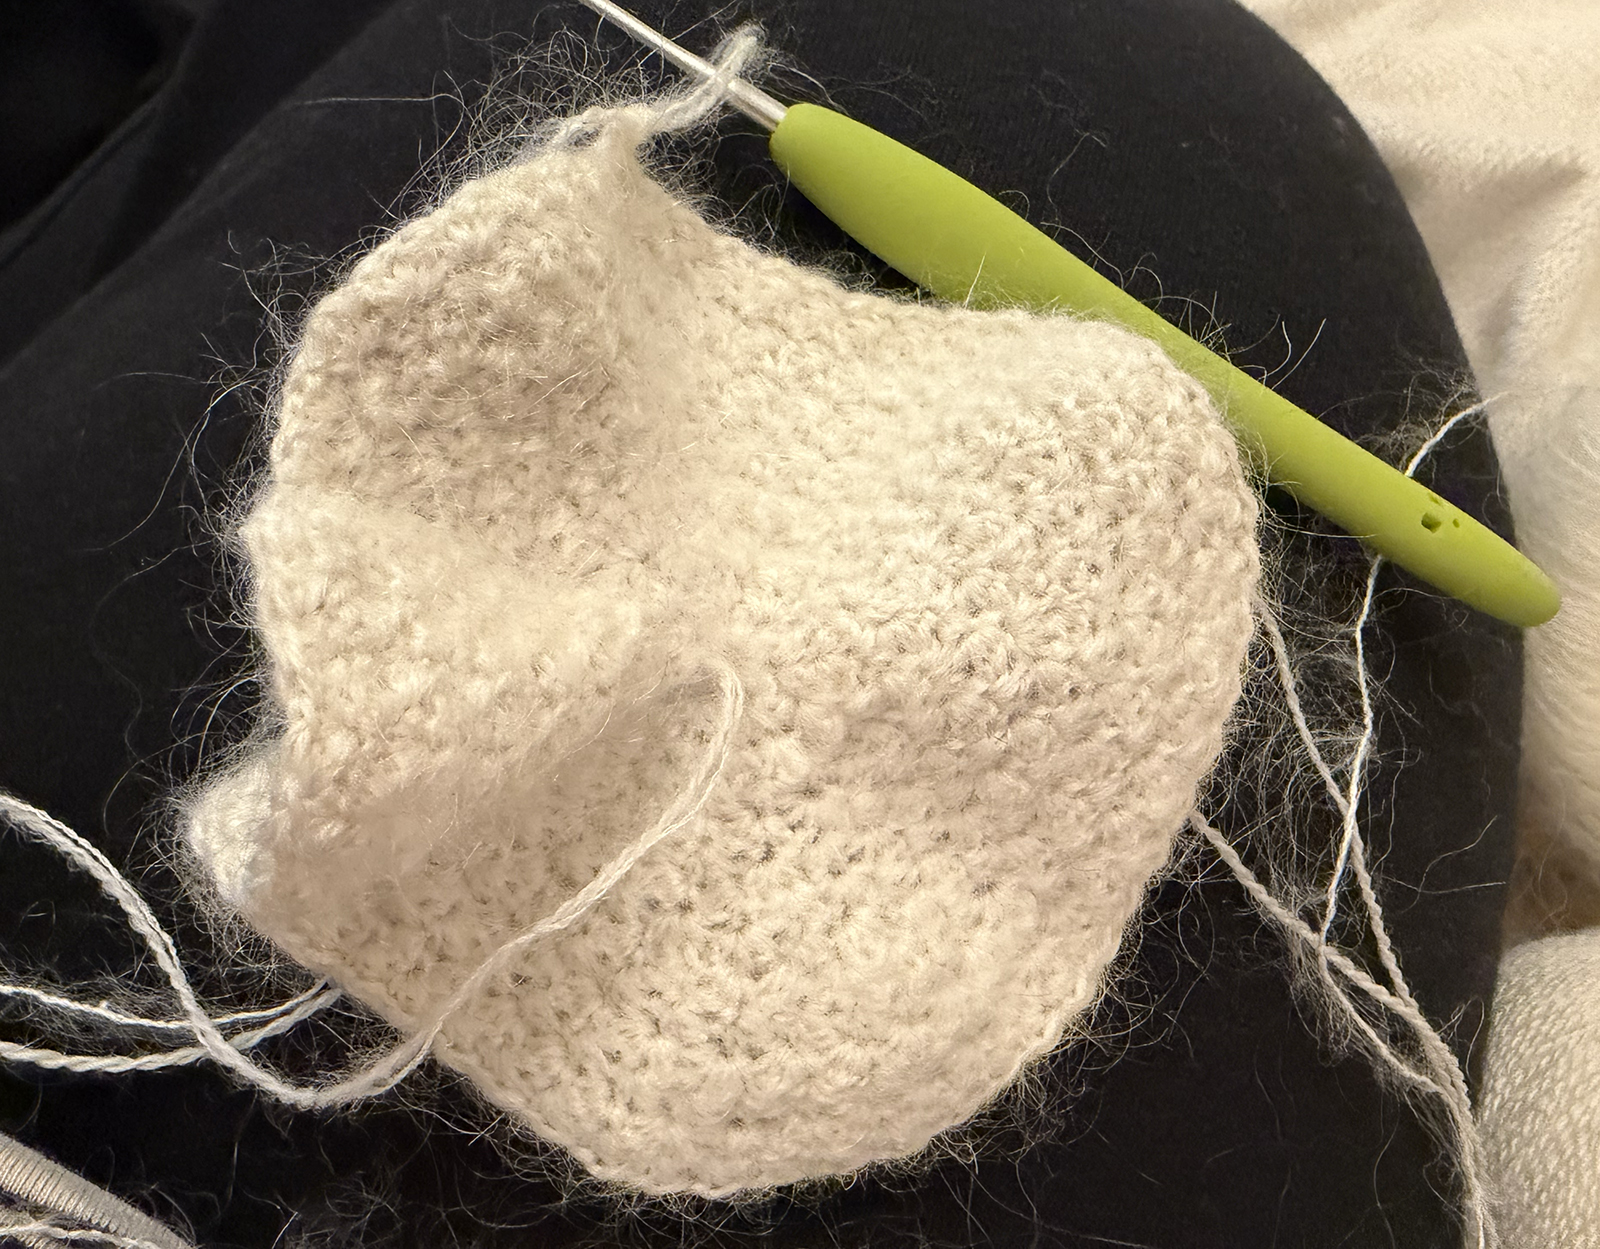
- Round 17: ch 1, (({sc, dc}, sk) x 3, {sc, dc, sc}, sk, {dc, sc, dc}, sk, ({sc, dc}, sk) x 7, {sc, dc, sc}, sk, {dc, sc, dc}, sk, ({sc, dc}, sk) x 3) x 4. slst into the first sc and turn. (152)
- Rounds 18-19: ch 1, ({sc, dc}, sk) x 76. slst into the first sc and turn. (152)
- Round 20: ch 1, (({sc, dc}, sk) x 9, {sc, dc, sc}, sk, {dc, sc, dc}, sk, ({sc, dc}, sk) x 16, {sc, dc, sc}, sk, {dc, sc, dc}, sk, ({sc, dc}, sk) x 9) x 2. slst into the first sc and turn. (160)
- Rounds 21-23: ch 1, ({sc, dc}, sk) x 80. slst into the first sc and turn. (160)
- Round 24: ch 1, (({sc, dc}, sk) x 9, {sc, dc, sc}, sk, {dc, sc, dc}, sk, ({sc, dc}, sk) x 9) x 4. slst into the first sc and turn. (168)
- Rounds 25-28: ch 1, ({sc, dc}, sk) x 84. slst into the first sc and turn. (168)
- Round 29: ch 1, (({sc, dc}, sk) x 10, {sc, dc, sc}, sk, {dc, sc, dc}, sk, ({sc, dc}, sk) x 18, {sc, dc, sc}, sk, {dc, sc, dc}, sk, ({sc, dc}, sk) x 10) x 2. slst into the first sc and turn. (176)
- Rounds 30-36: ch 1, ({sc, dc}, sk) x 88. slst into the first sc and turn. (176)
- Size check: Hold the flippable "dress" over both faces/bodies and make sure it covers the amount of face/body you want. If it doesn't, crochet additional rounds according to the stitch pattern for rounds 30-36 until it feels like the right length to you.
- Round 37: ch 1, crab stitch in every stitch (all 176 stitches - both single and double crochets)
- Finishing: Cut the yarn, pull the loop, and hide the ends.
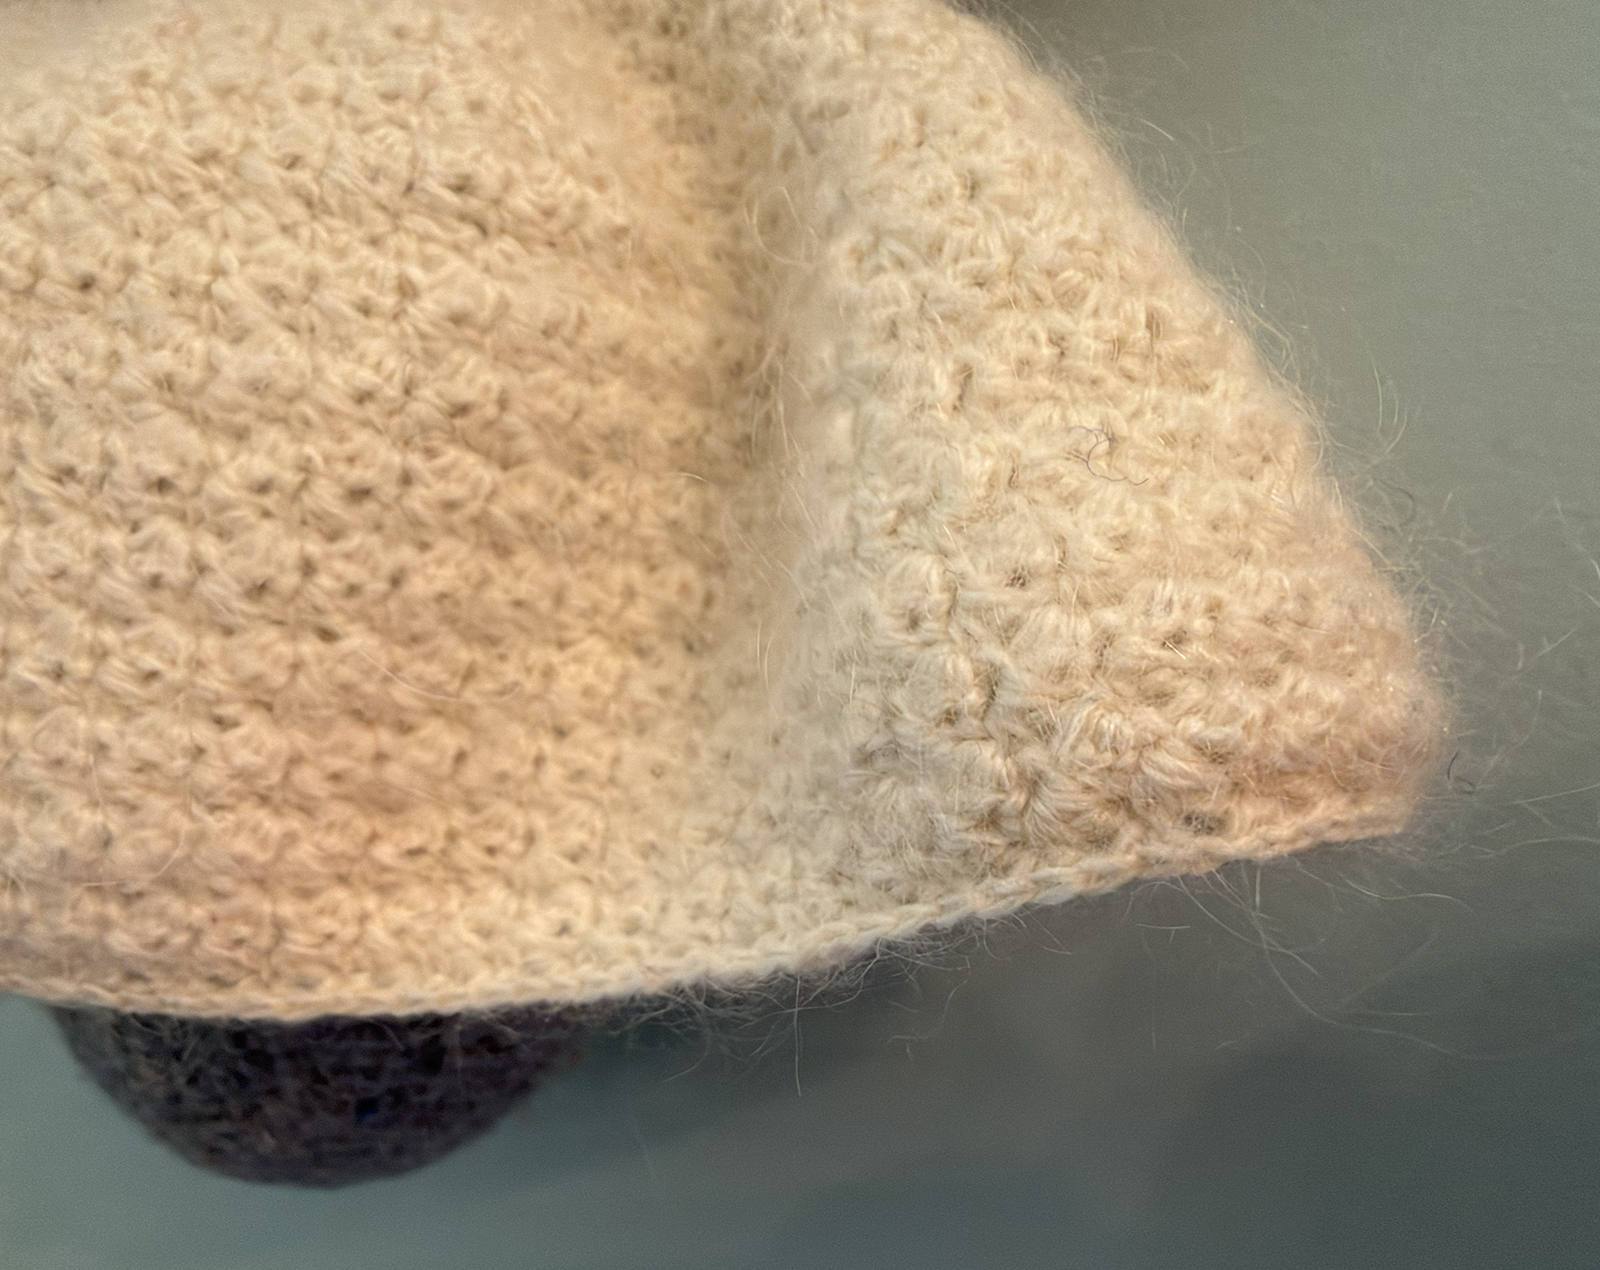
Note: For completely arbitrary aesthetic reasons, I only held the Rowan Kidsilk Haze with the Rowan Fine Lace through the end of round 36. I did the crab stitch of round 37 in only the Rowan Fine Lace.
Attaching the flippable "dress" to the bodies/faces
It's much easier to attach the flippable "dress" to the bodies/faces roughly to get the pieces together then do a second pass to attach more evenly and precisely further out. If you try to do it all at once, it's significantly harder to hold everything in the right place and get a sturdy attachment.
With the fingering weight white yarn or a coordinating white scrap yarn, embroidery thread, or sewing thread, attach the stitches in the flippable "dress" at round 3 to the center of the bottom of one of the bodies/faces. I used a white linen embroidery thread. Since this is the rough first pass, you do not need to be a perfectionist about the placement of the stitches, but make sure the start of round (thicker than the rest of the circle) is placed in the center of the back side when attaching.
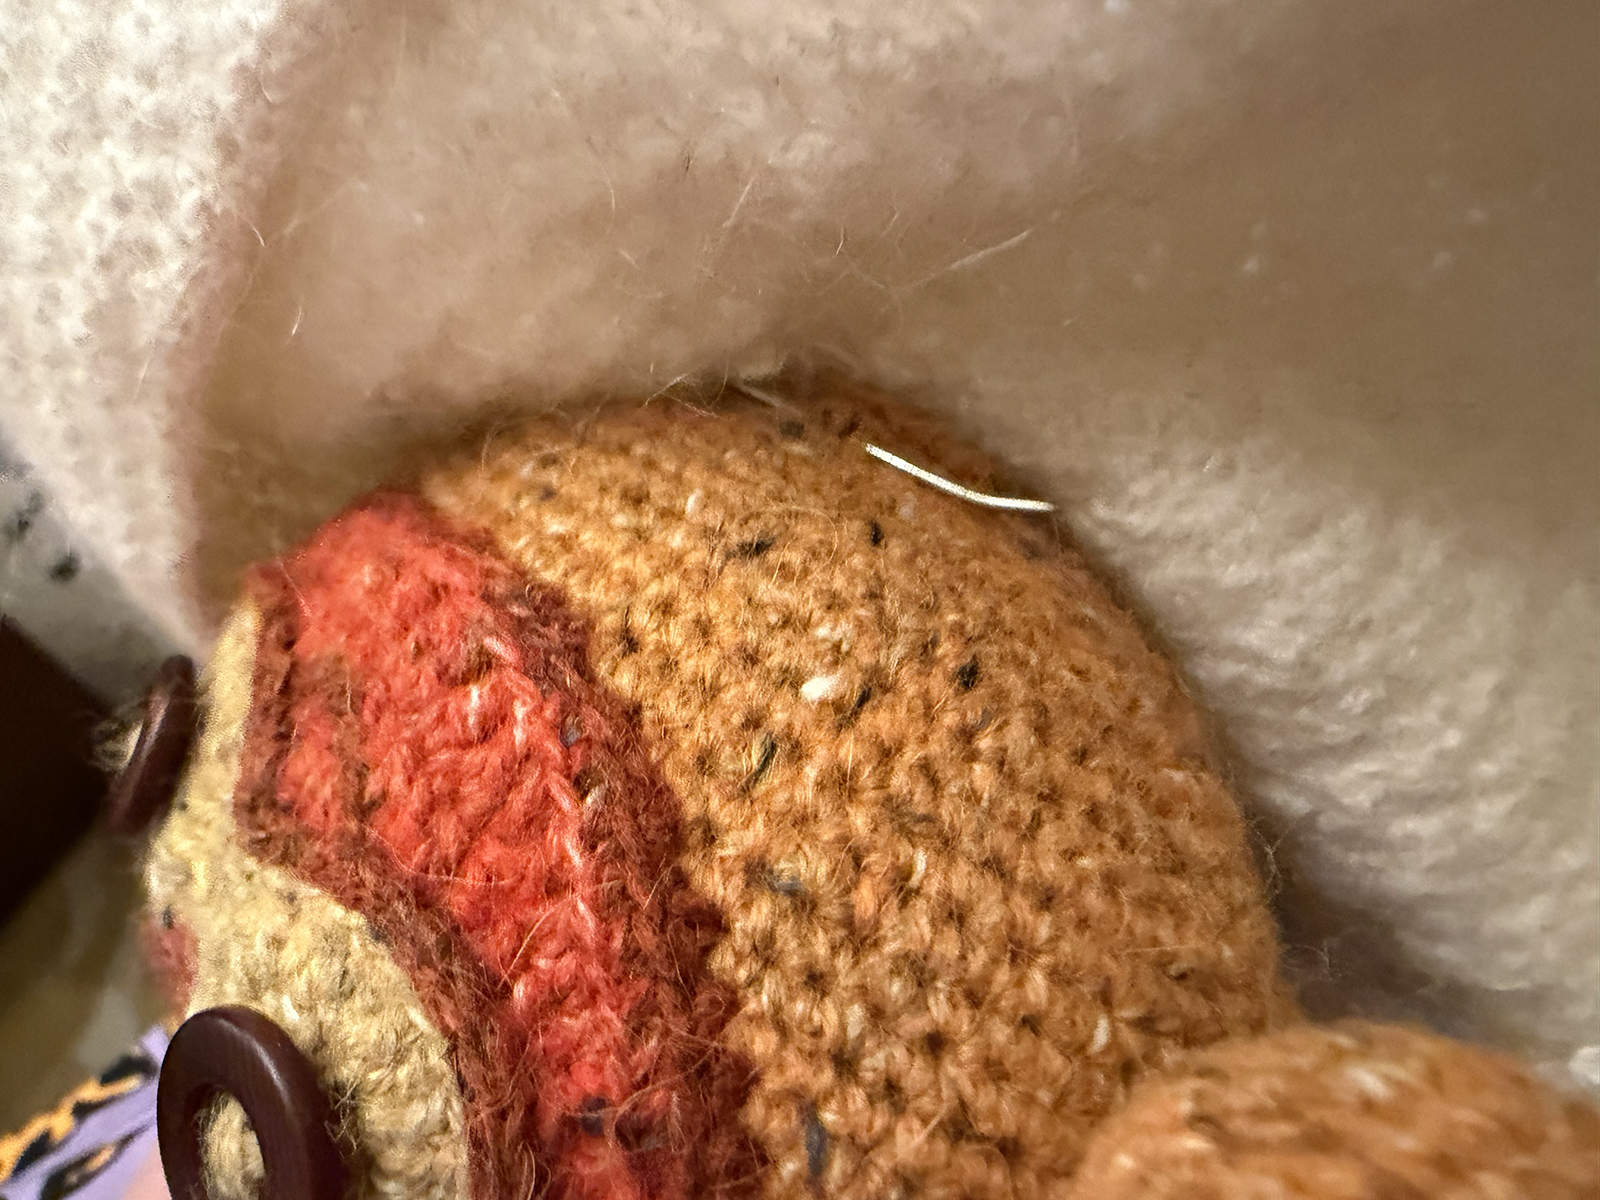
Pull the sewing stitches tight, tie off, and hide the ends before repeating the process to attach the other side of the flippable "dress" to the other main body/face. Make sure to align the faces to face the same direction and the start of round seam to the back again.
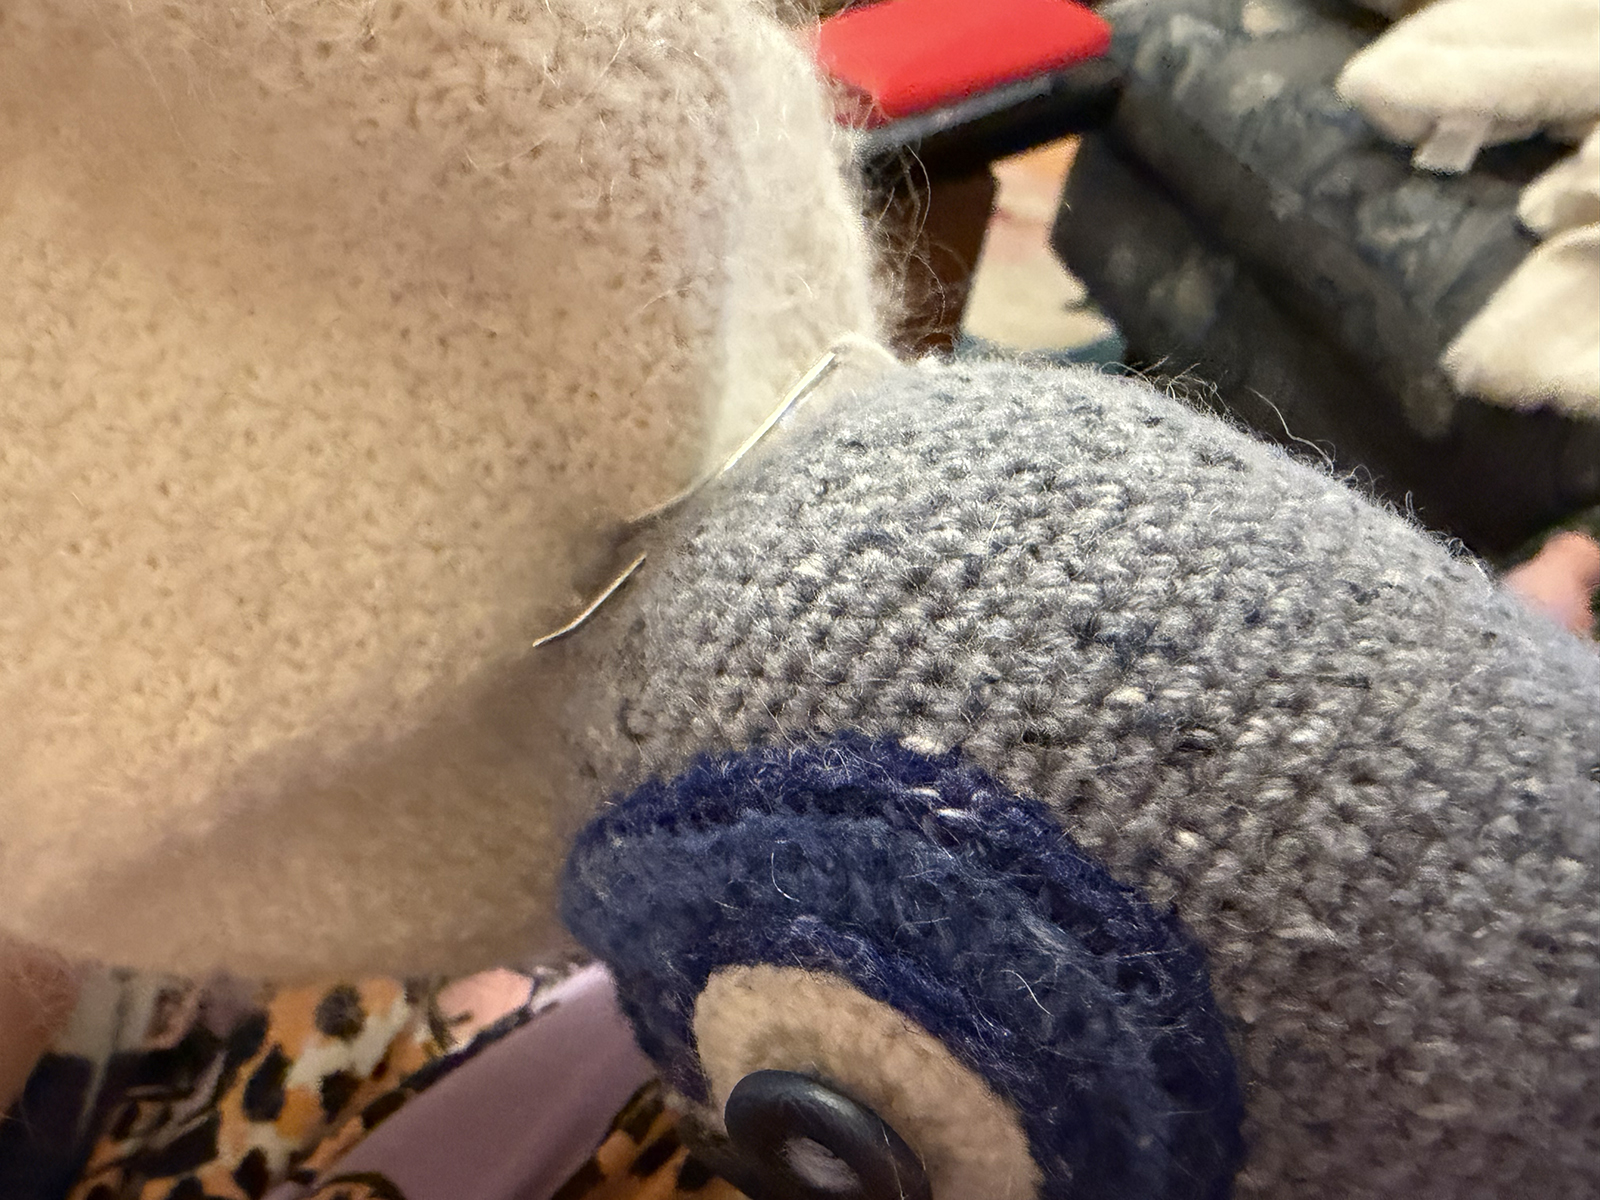
Once you've finished the rough attachment that gets all the pieces together, sew the stitches in round 4 of flippable "dress" to both bodies and faces more carefully. In this round of sewing, I stitched through the sunny side body/face, then through the dress, then through the rainy side body/face, then back through the dress, then through the sunny side body/face again, etc. instead of attaching to one body at a time.
Pull the sewing stitches tight, tie off, and hide the ends.
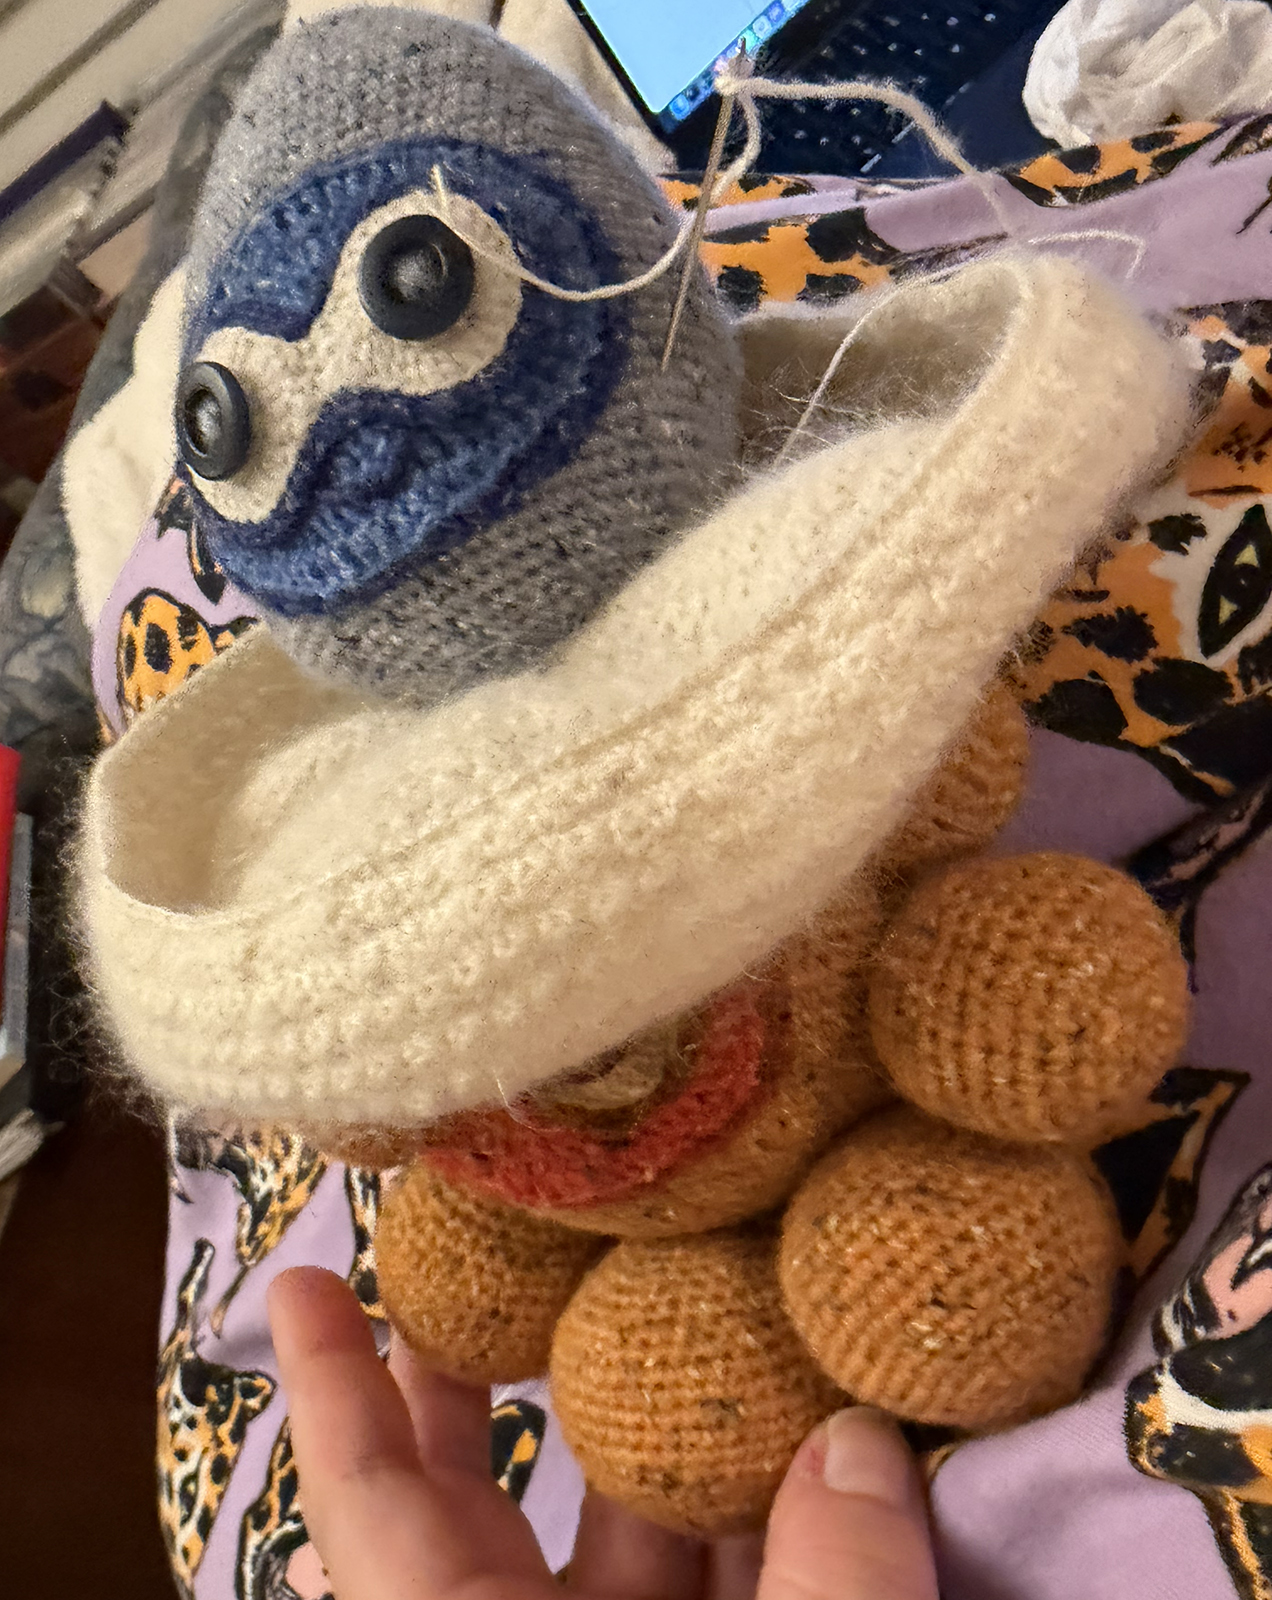
Hanging loops
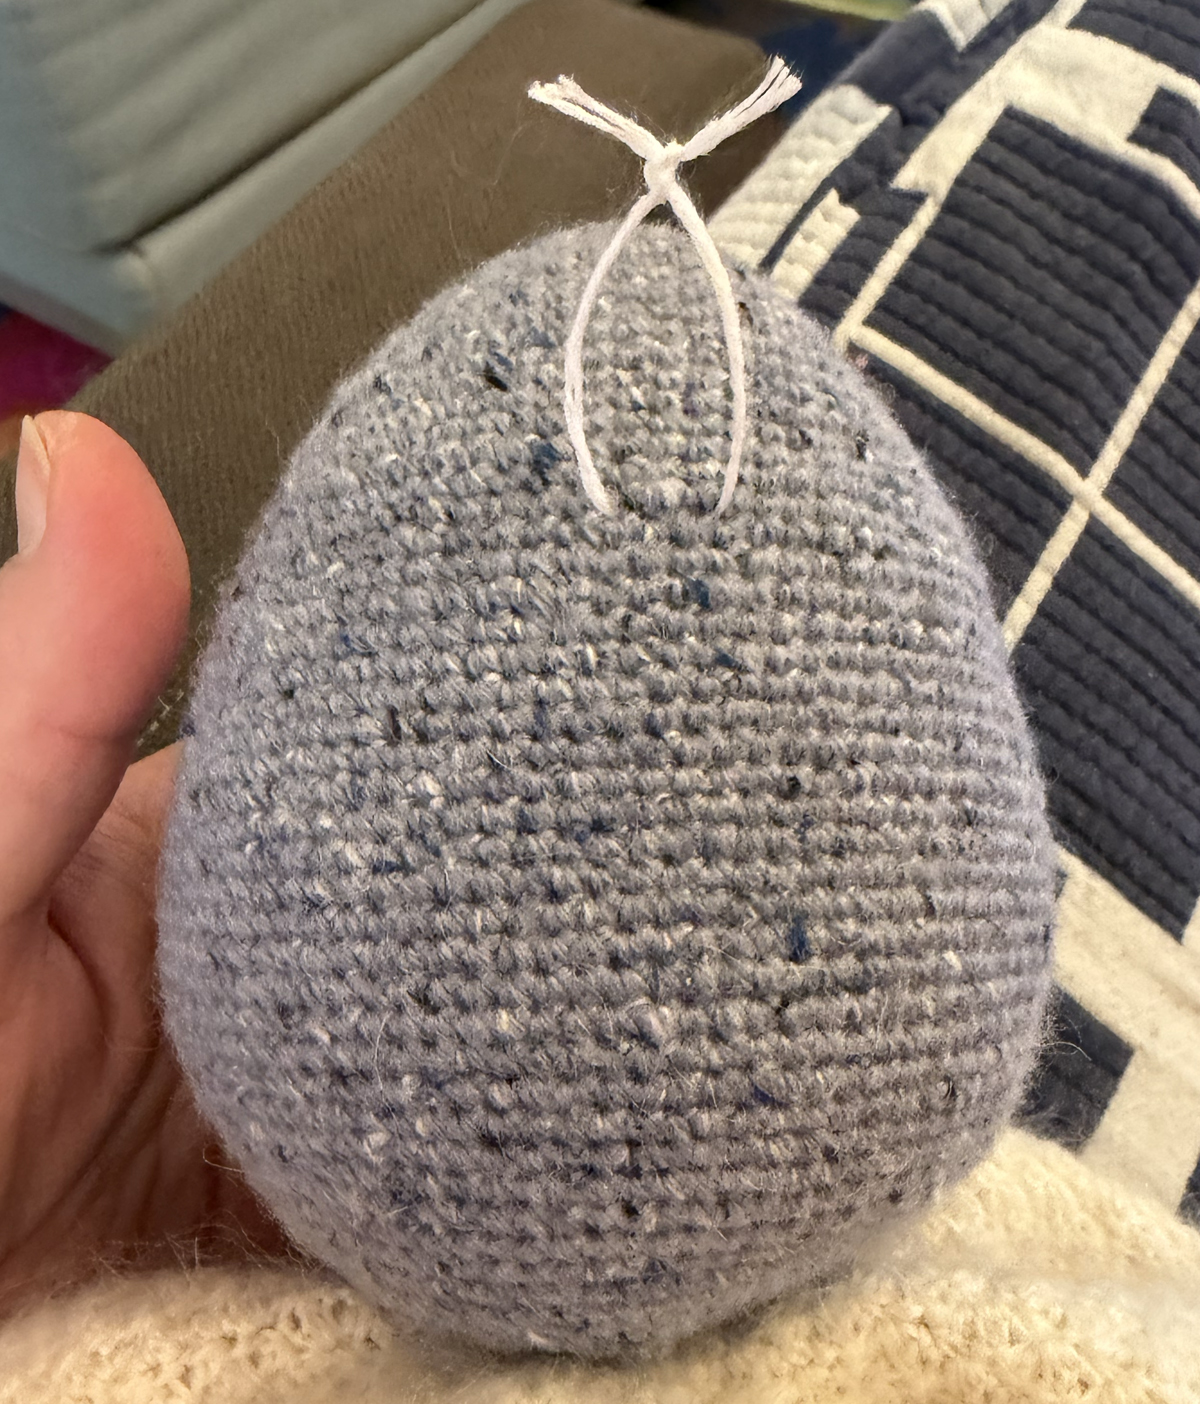
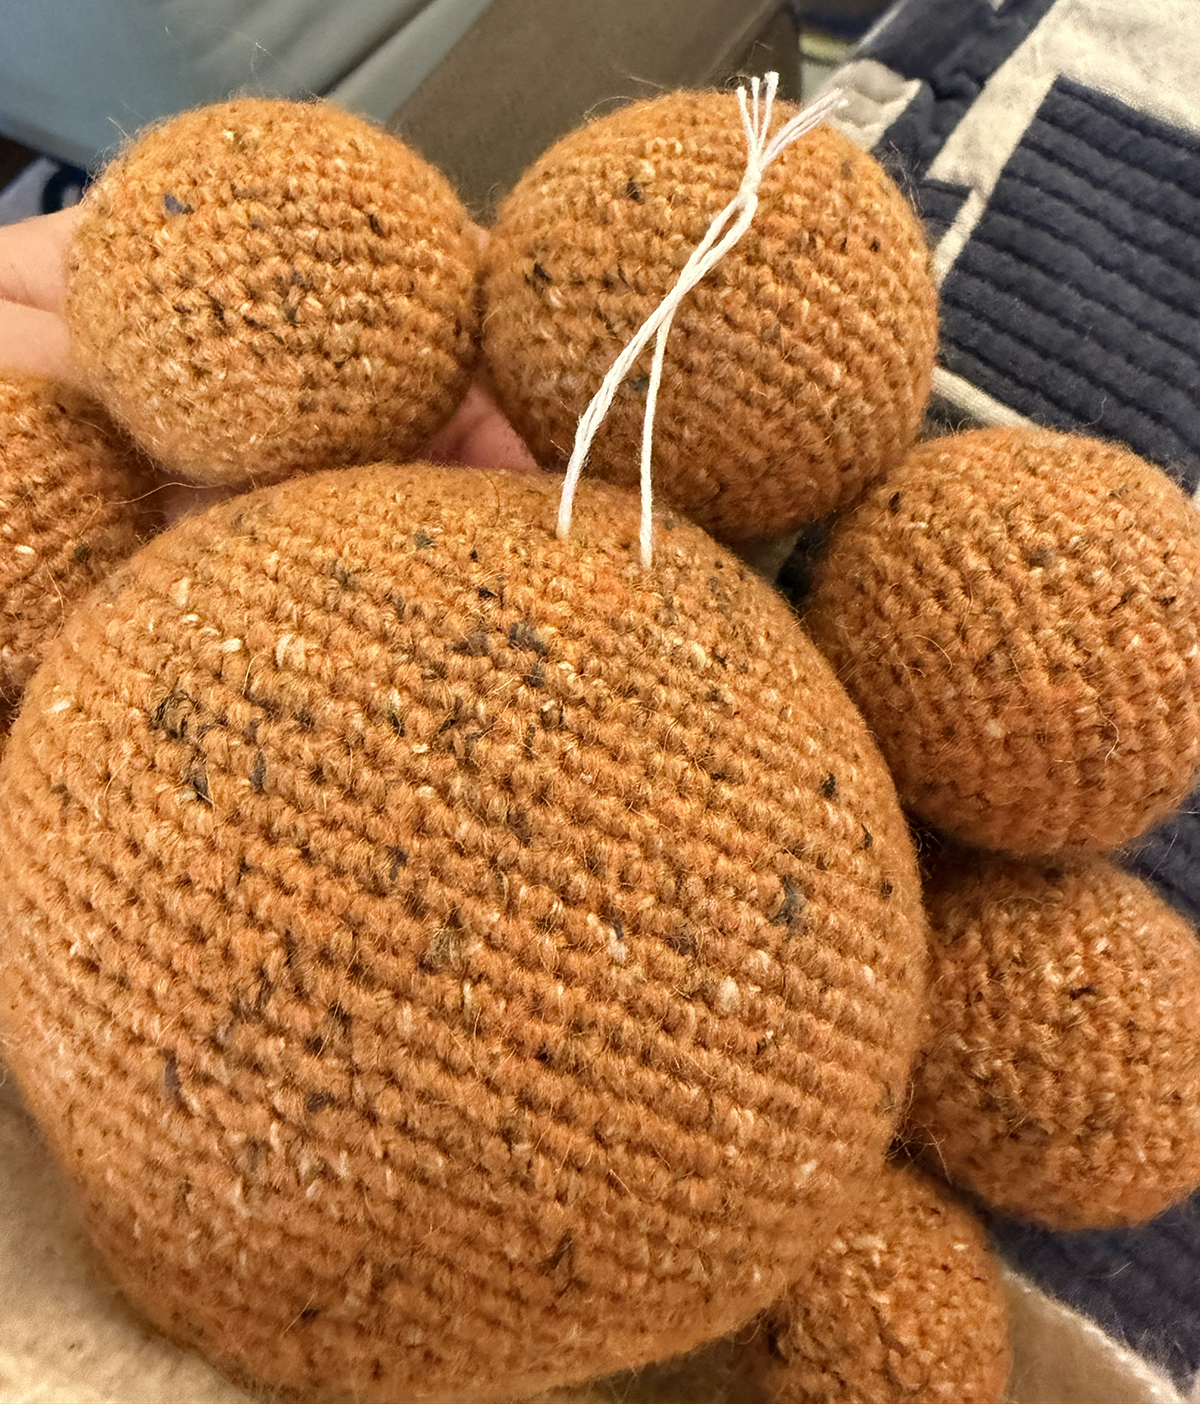
Add loops made of the fingering weight white yarn or a coordinating white scrap yarn, embroidery thread, or sewing thread to the back of both main bodies/faces for hanging. I used a white linen embroidery thread.
Congratulations!
You now have a Castform Weather Charm you can hang on your wall. Let me know if you have any success controlling the weather. ;)