I found a wonderful free crochet pattern for the Pokémon Ditto from Loops by Kat, but I decided I wanted to make a version with more than 3 "leg" blobs like the original pattern had. Specifically, I wanted to add two more smaller blobs in the back to help stabilize Ditto when they're sitting and also add a butt to our favorite transforming blob.
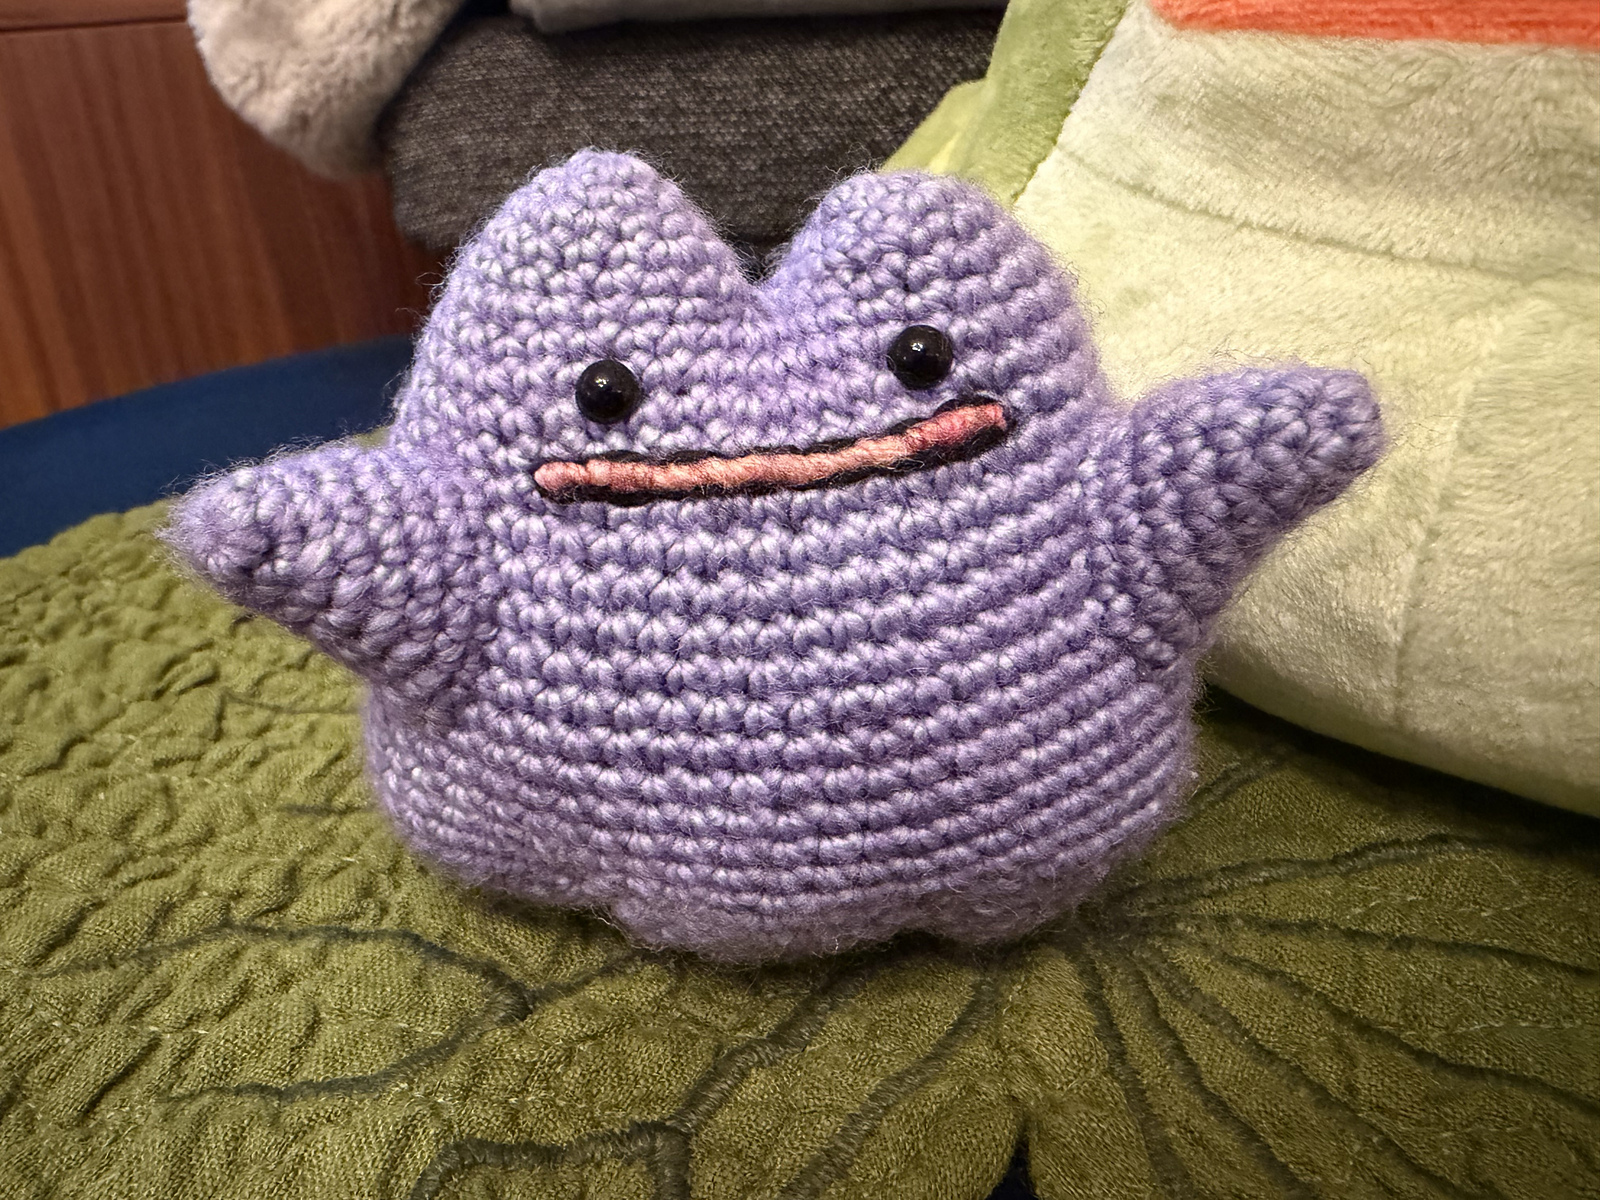
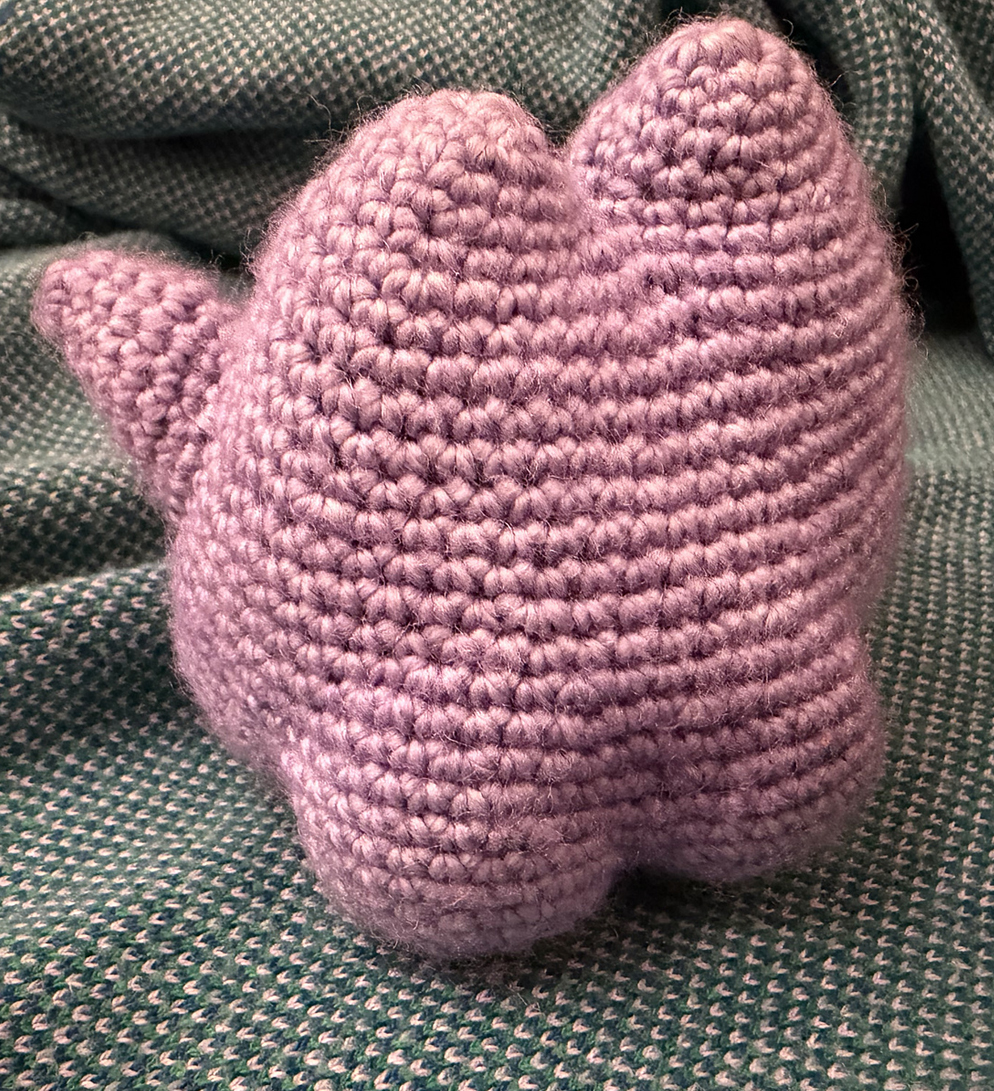
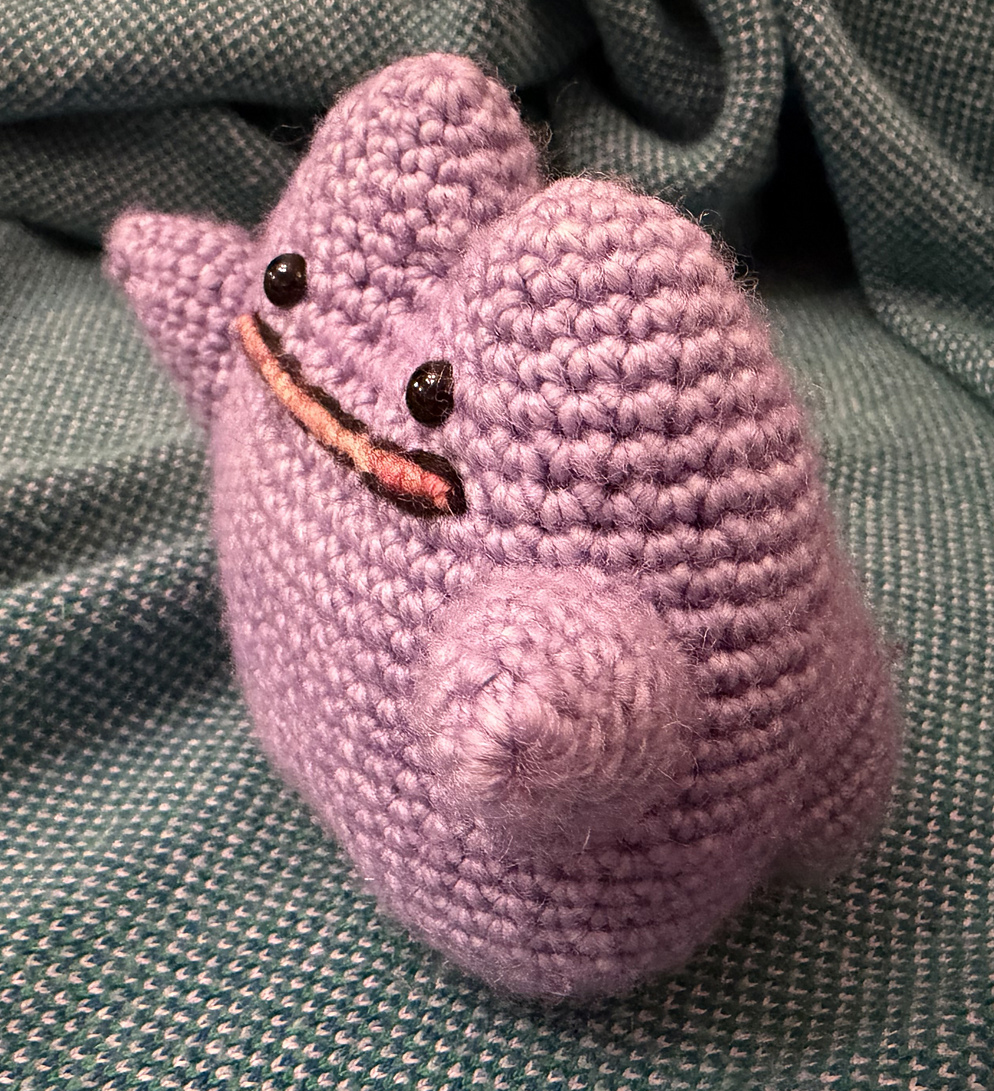
I made Ditto's 2 additional booty blobs intentionally off-center by embracing the natural lean of crochet stitches - this gives a more animated or "in motion" feel to Ditto. As an added bonus, this simplifies the pattern as everyone's tension will be a little different, and thus everyone's off-centering a little delightfully different, too, but centering it instead wouldn't be the same for everyone!
Here's all the information to modify Kat's crochet pattern to create a 5-blobbed Ditto. I use US crochet terminology. This pattern modification is also available as a pdf.
Follow Kat's pattern through round 13. At round 14, it's time to start modifying to add the space and shaping for the additional blobs. There are also 3 more rows in this section to better fit the new 5-blob proportions.
Modified increases in body, beginning at round 14 (with additional rounds, too):
- Round 14: 3 sc, 1 inc, 46 sc, 1 inc, 3 sc (56)
- Round 15: 56 sc (56)
- Round 16: 2 sc, 1 inc, 2 sc, 1 inc, 44 sc, 1 inc, 2 sc, 1 inc, 2 sc (60)
- Round 17: 60 sc (60)
- Round 18: inc, 4 sc, inc, 48 sc, inc, 5 sc (63)
- Round 19: 63 sc (63)
- Round 20: dec (through front loop of first stitch and both loops of second stitch), inc, 9 sc, inc, 38 sc, inc, 11 sc (65)
At this point, the original pattern suggests placing the safety eyes, but I think it makes more sense to do this after you've made the "butt" and divided the stitches the 3 main "front" "leg" blobs from the original pattern. You'll still have plenty of access to place them then.
Roadmap for doing 5 "leg" blobs instead of 3
To make 5 blobs, you use some of the main body's stitches and some created stitches for each. Created stitches are a combination of chains, pickups on the back of chains, pickups in the connections between the chains and the main body, and pickups in the connections between the chains.
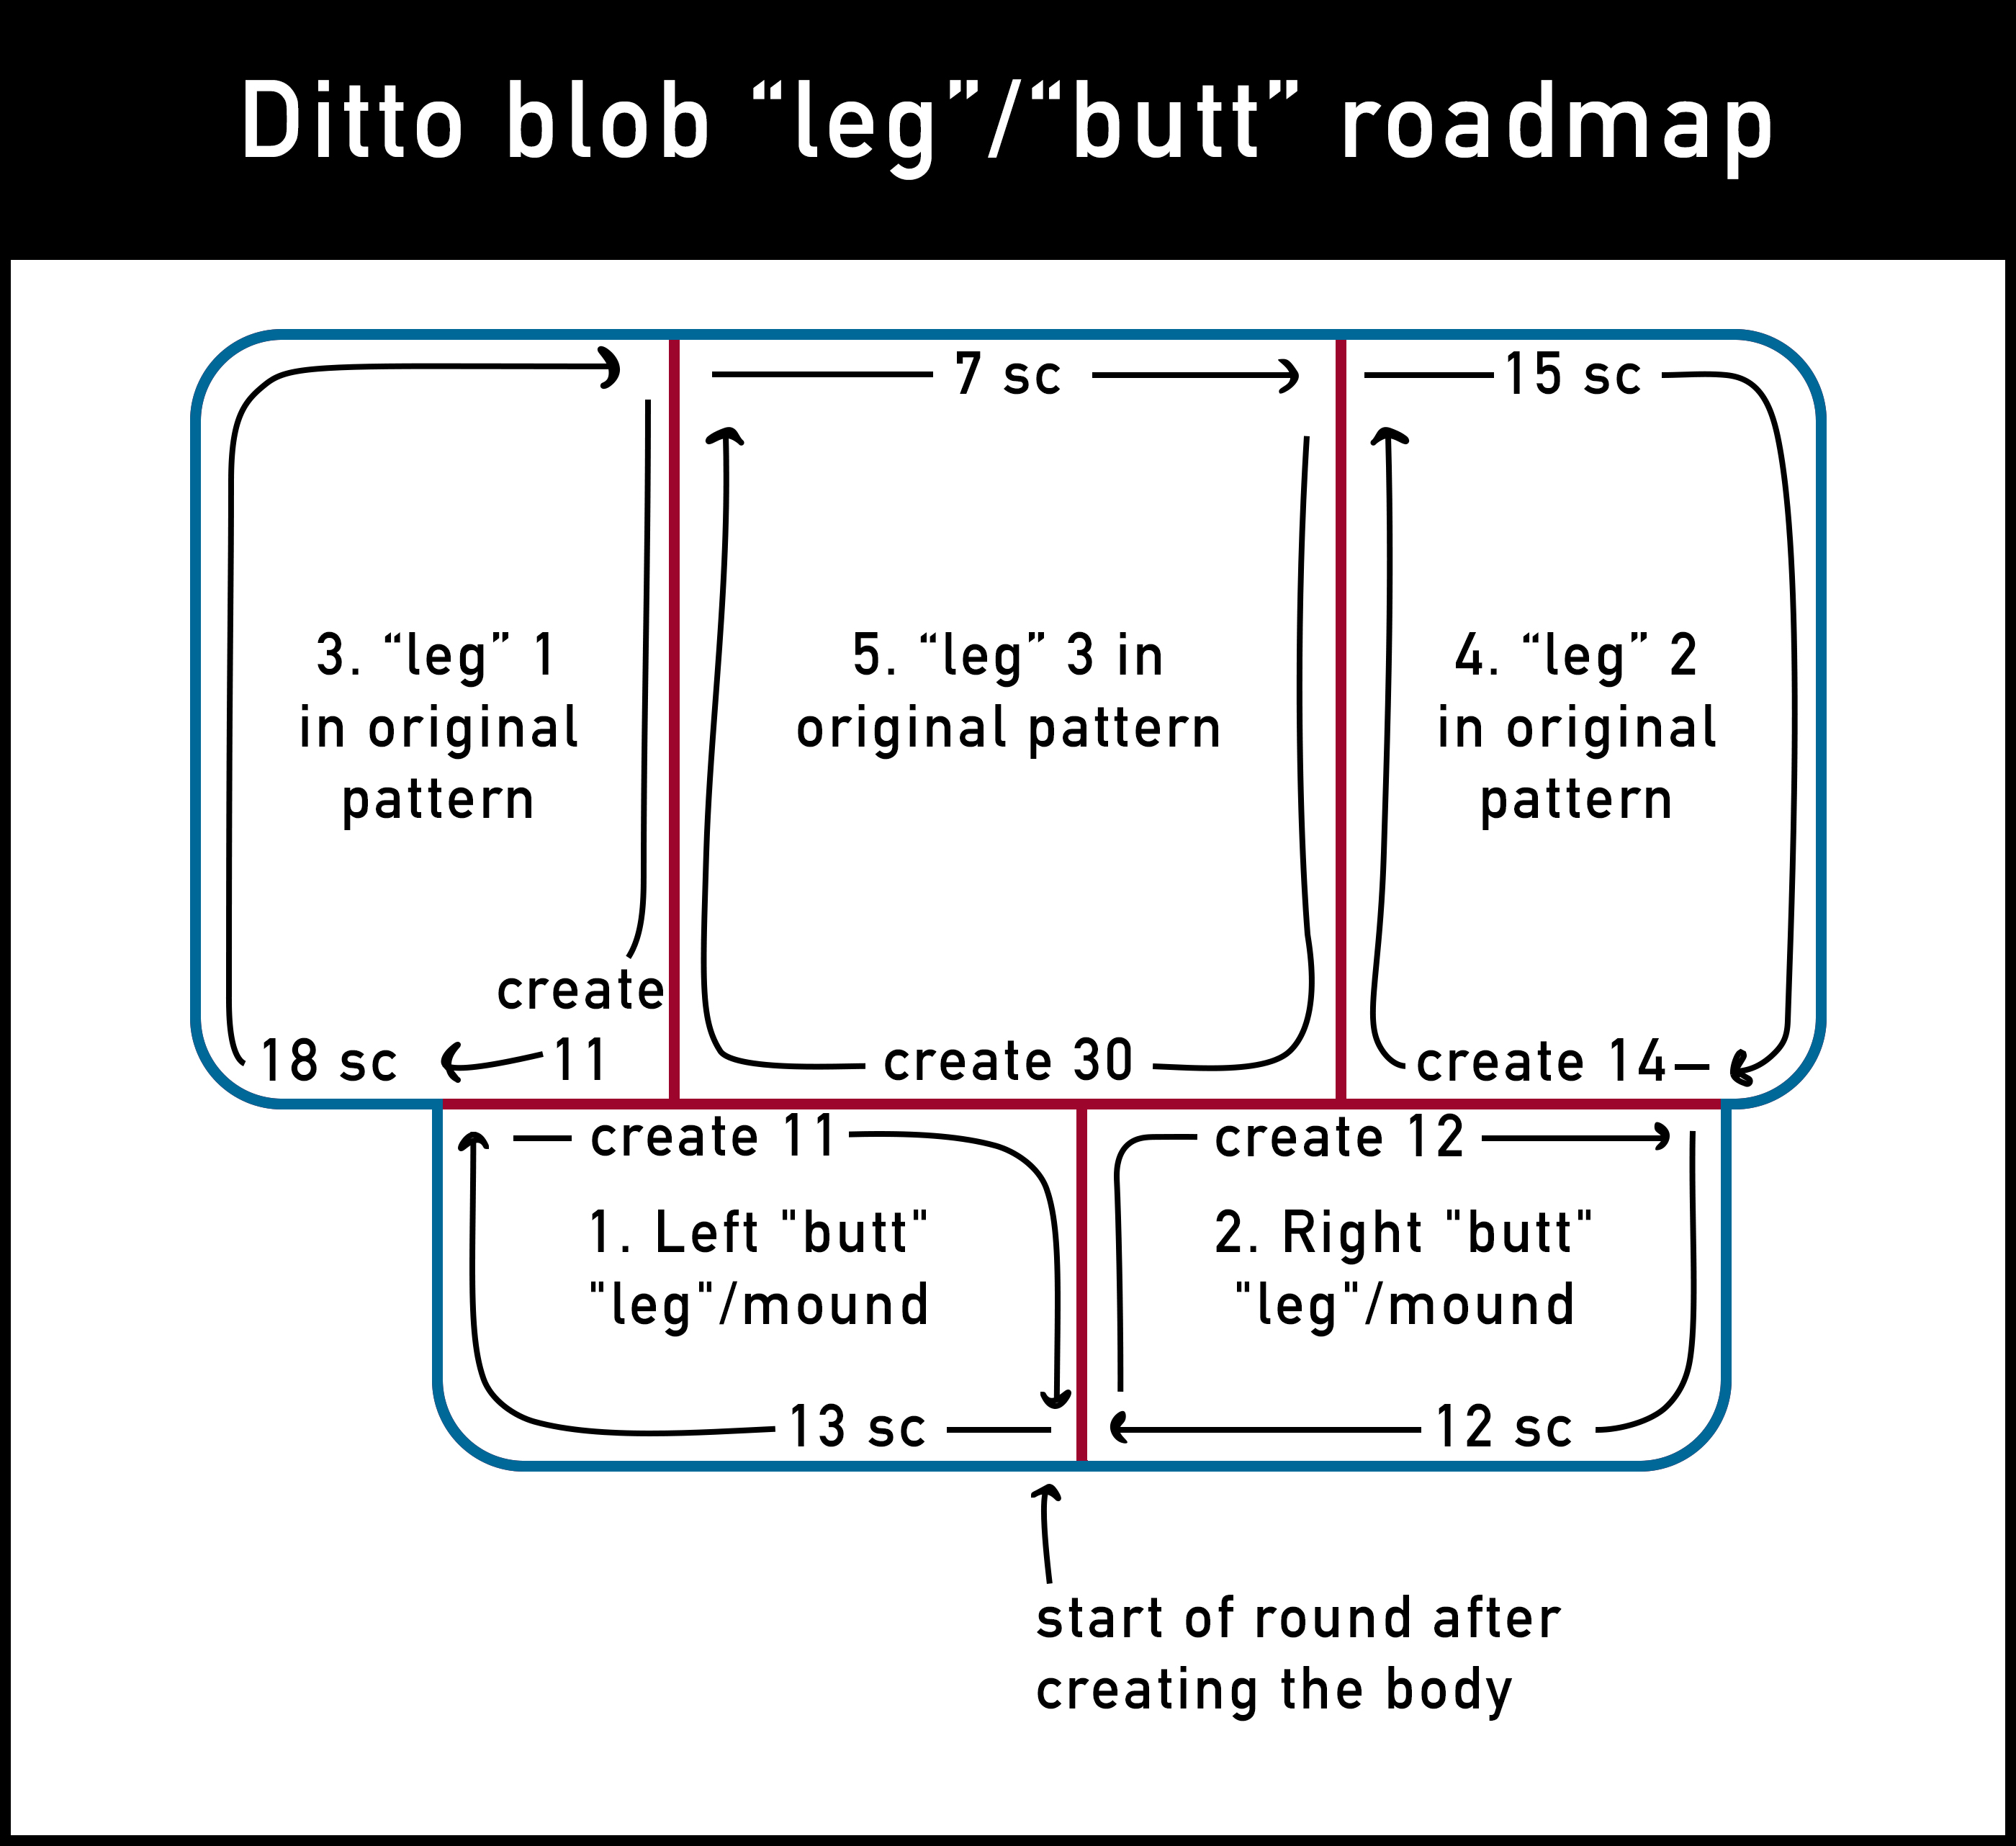
The "butt" "leg"/mounds are created before the 3 original "legs," and the left "butt" "leg"/mound is made before the right one.
1. Left "butt" "leg"/mound:
This is the left "butt" cheek when viewed from the bottom. (While this is really the right butt cheek from Ditto's perspective, I'm calling it left because we're crocheting while viewing from below so it's backwards.)
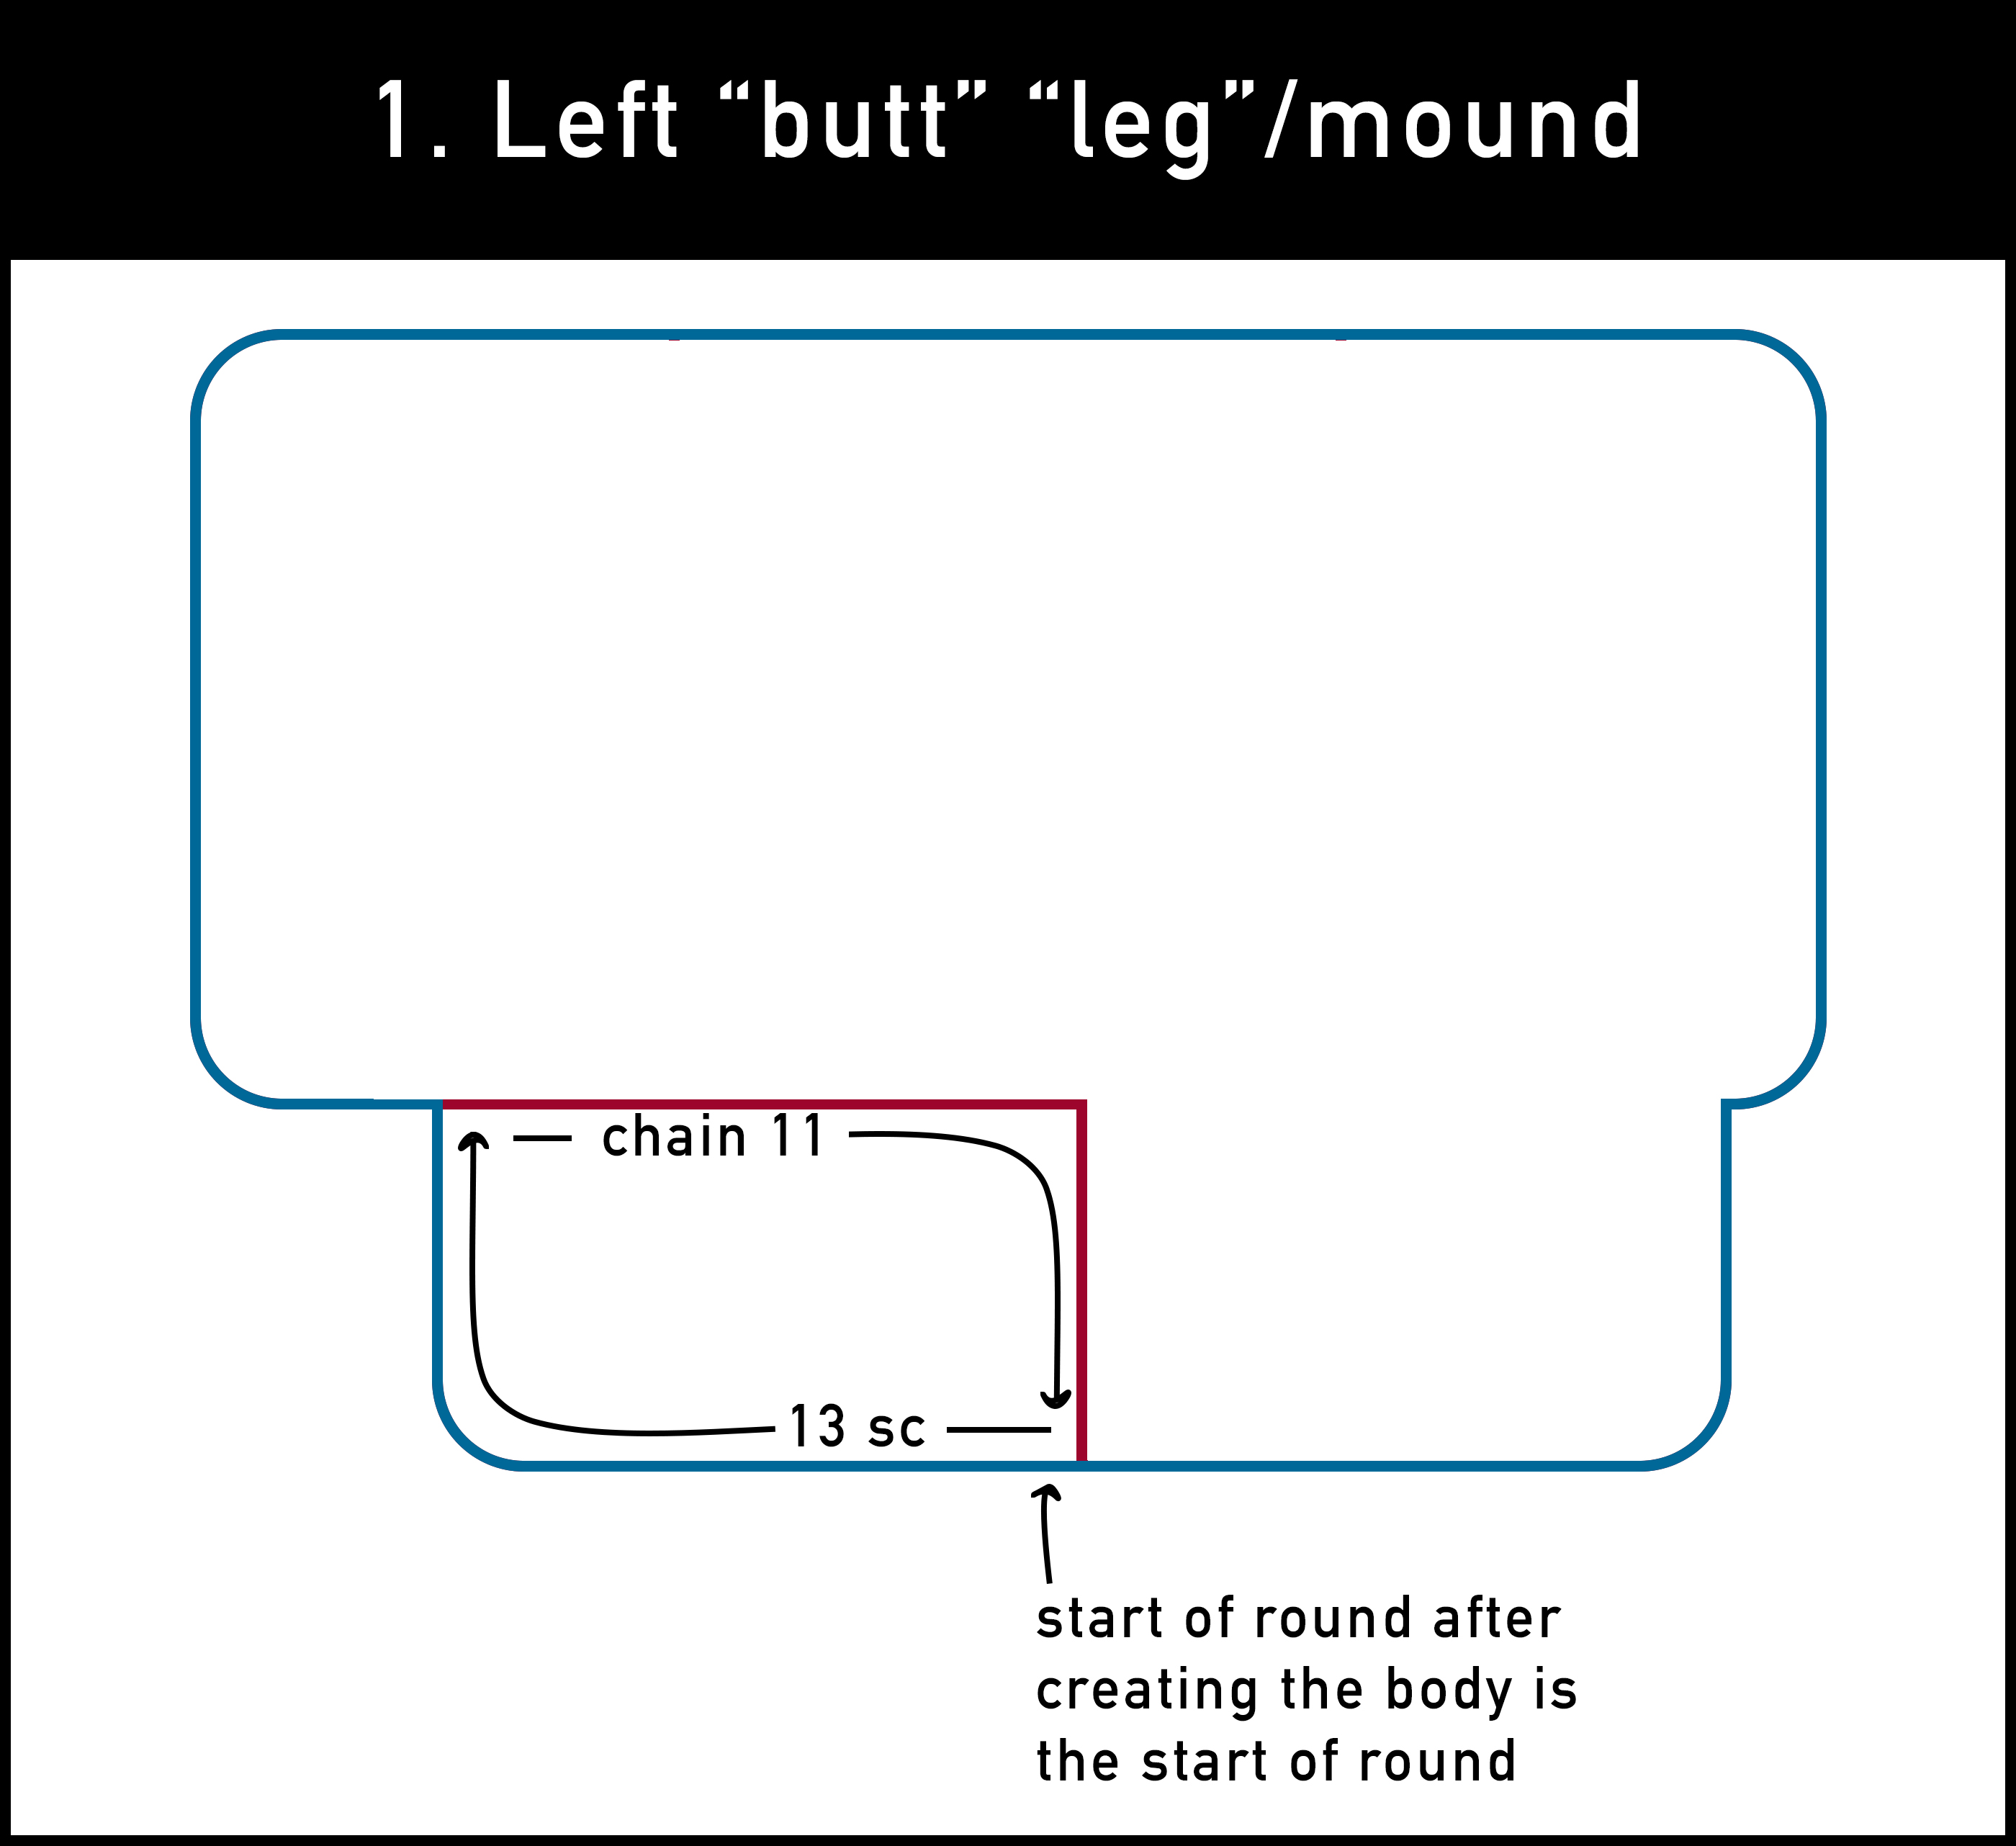
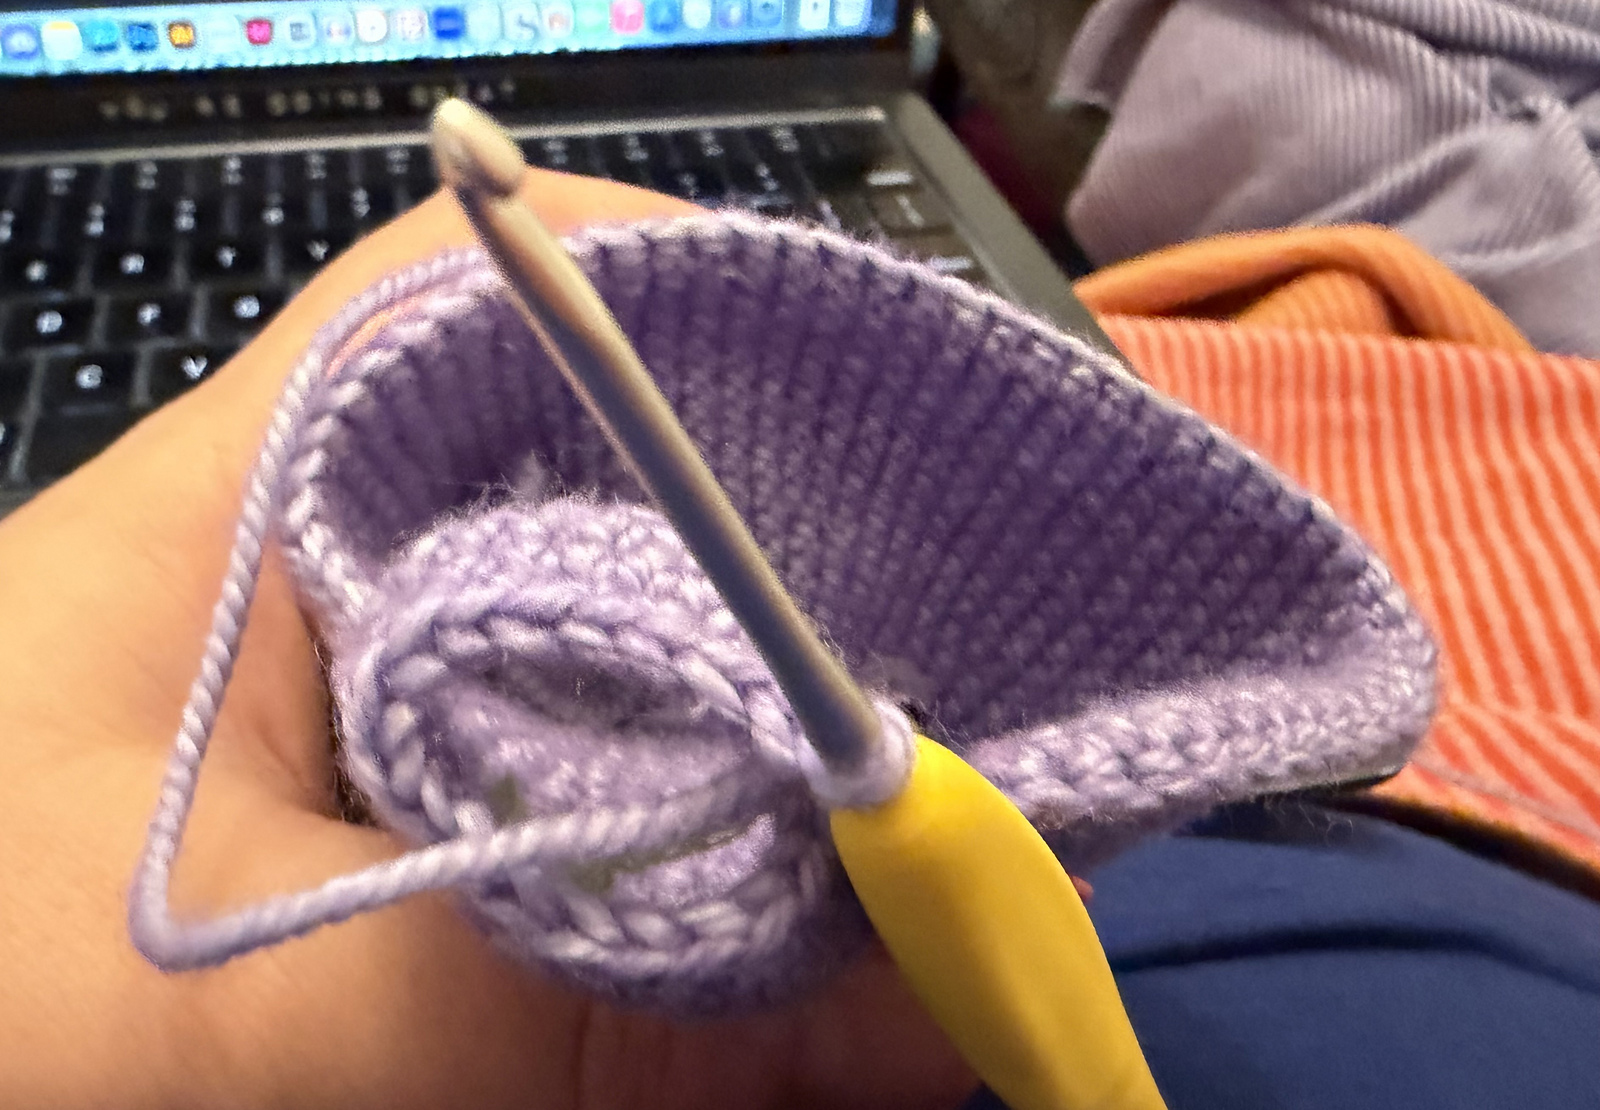
The start of round is the same as the start of round from making the body of the blob, so you can continue as usual.
- Round 1: 13 sc, chain 11 (24)
- Round 2: connect chain at previous start of round (skipping 52 stitches) then 24 sc (24)
- Round 3: (6 sc, dec) x 3 (21)
- Round 4: (2 sc, dec, 3 sc) x 3 (18)
- Round 5: (sc, dec) x 6 (12)
- Round 6: 6 dec (6)
- Finish off by looping through front loops of all 6 stitches and pull tight, etc.
2. Right "butt" "leg"/mound:
This is the right "butt" cheek when viewed from the bottom.
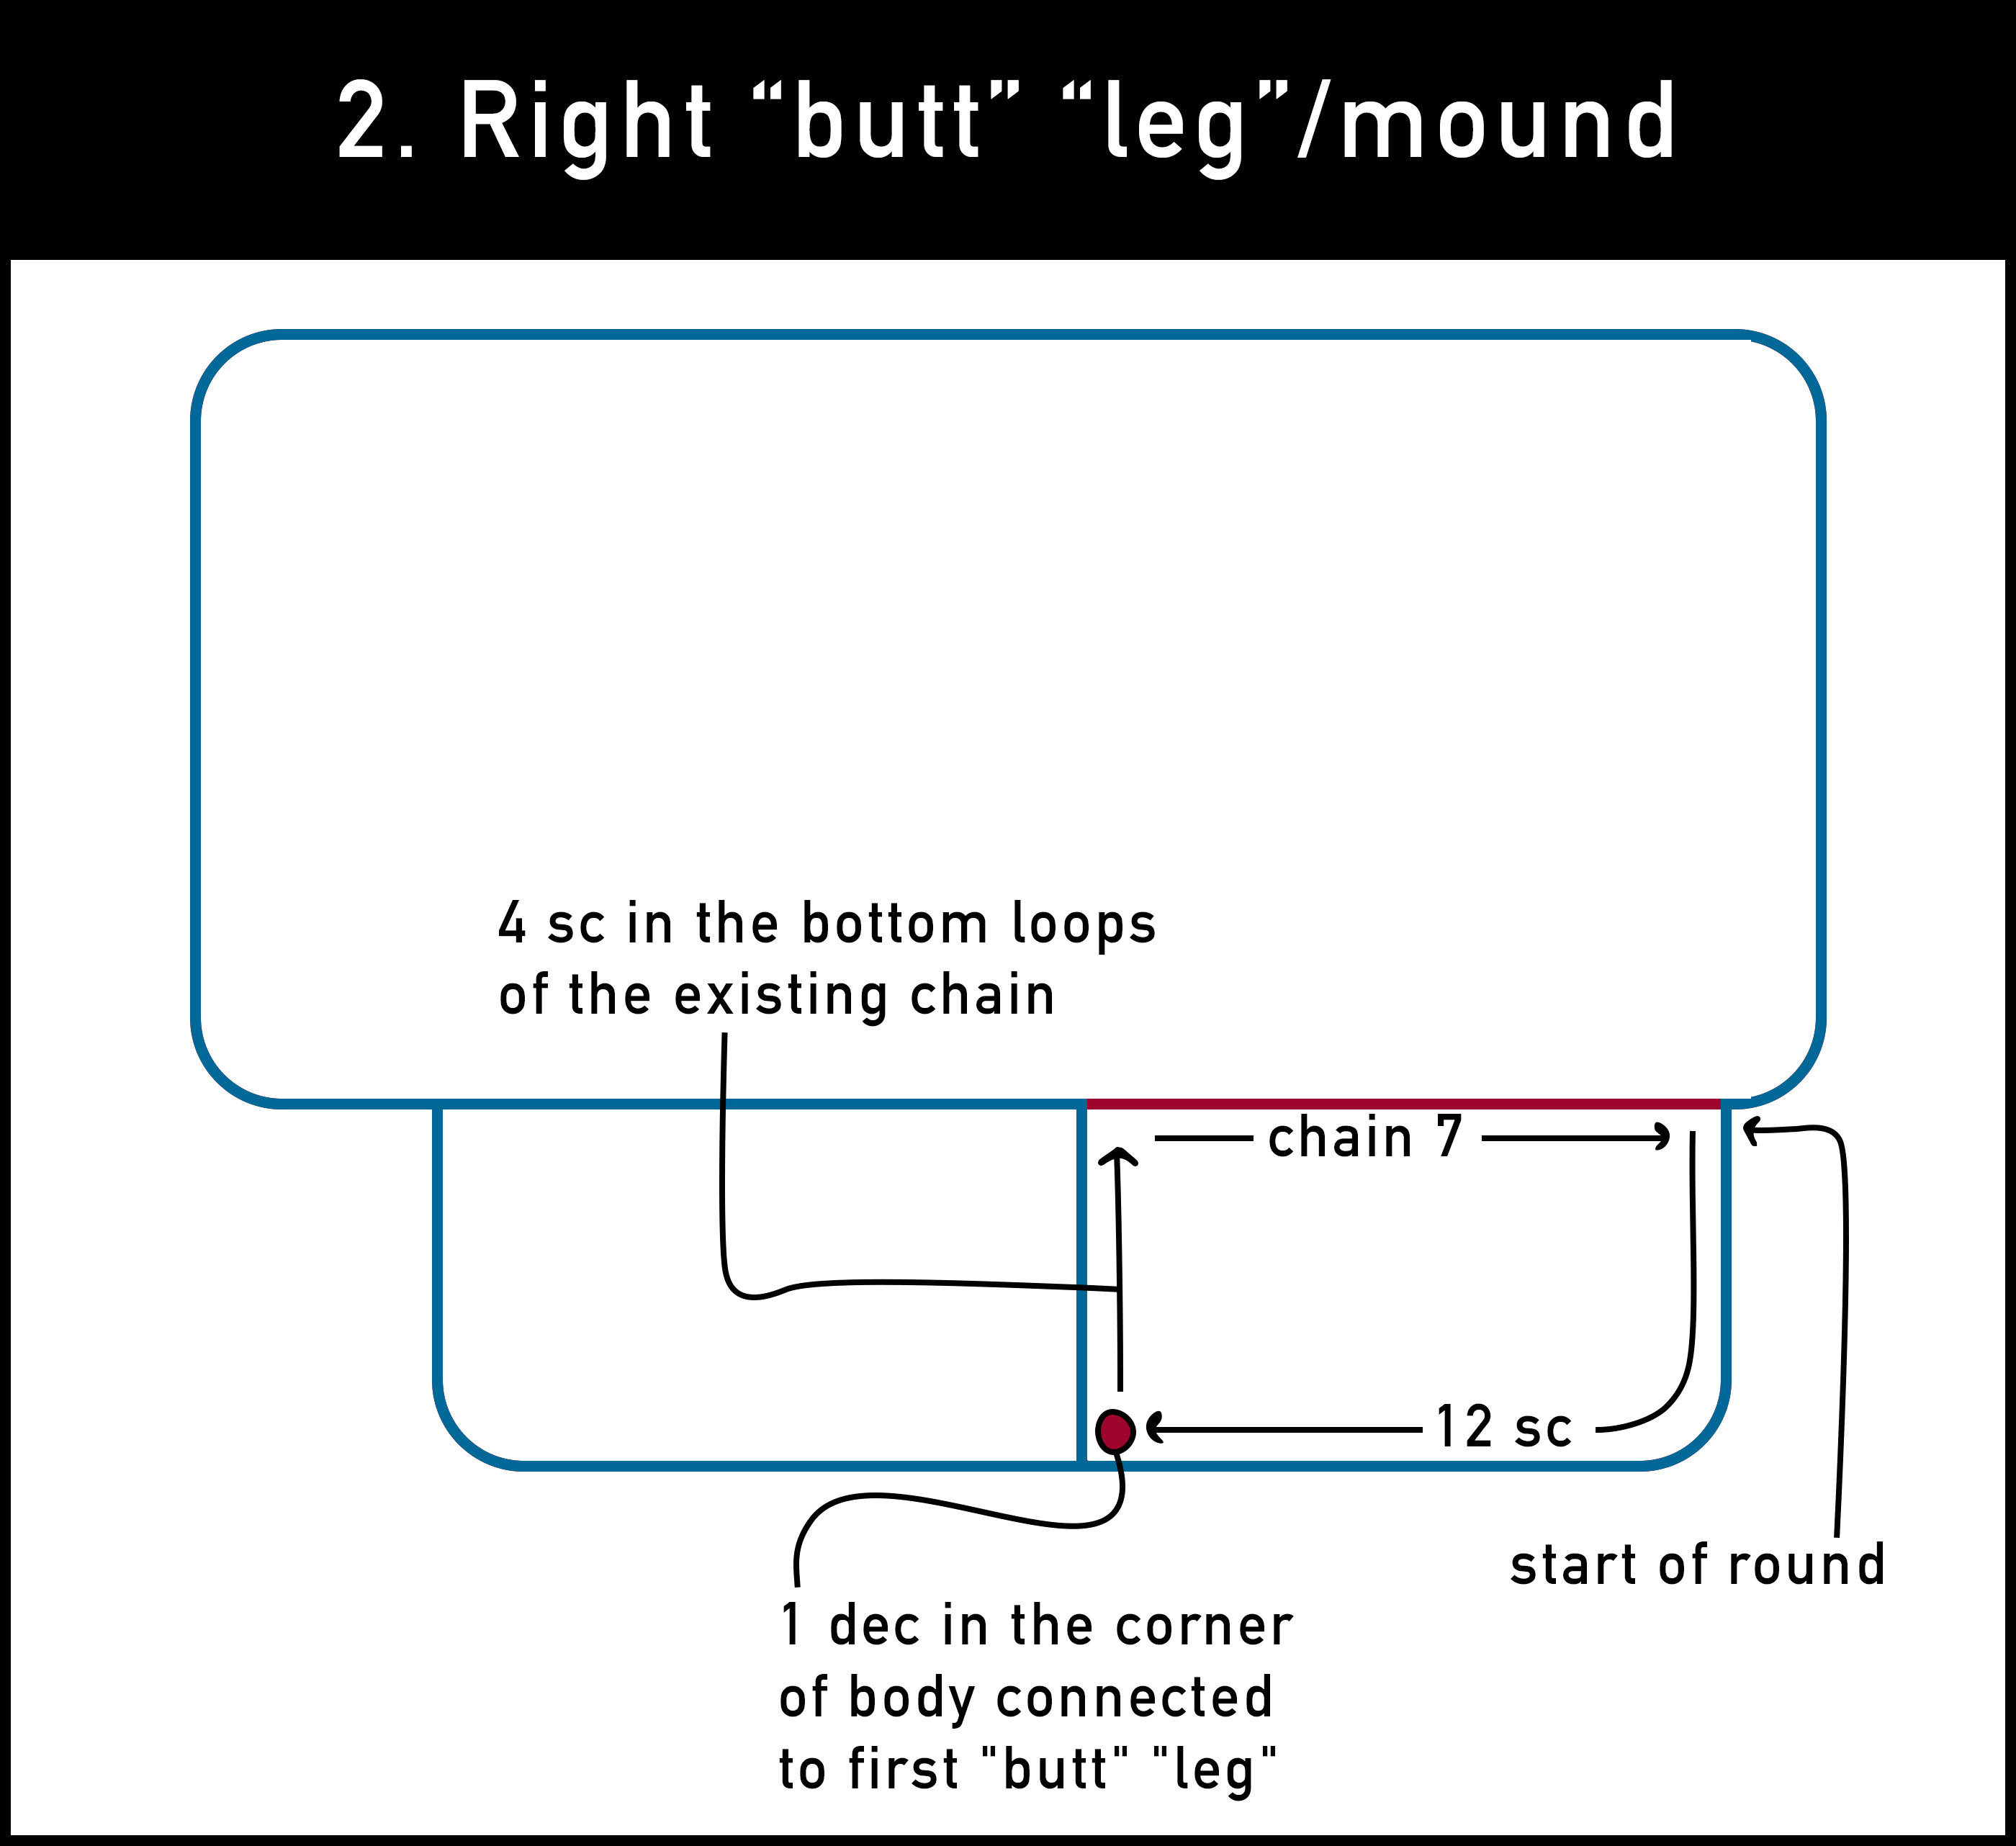
The start of round for this "butt" "leg" is 12 stitches before the body/left "butt" leg start of round. This is the second stitch in an increase from the last round of the body.
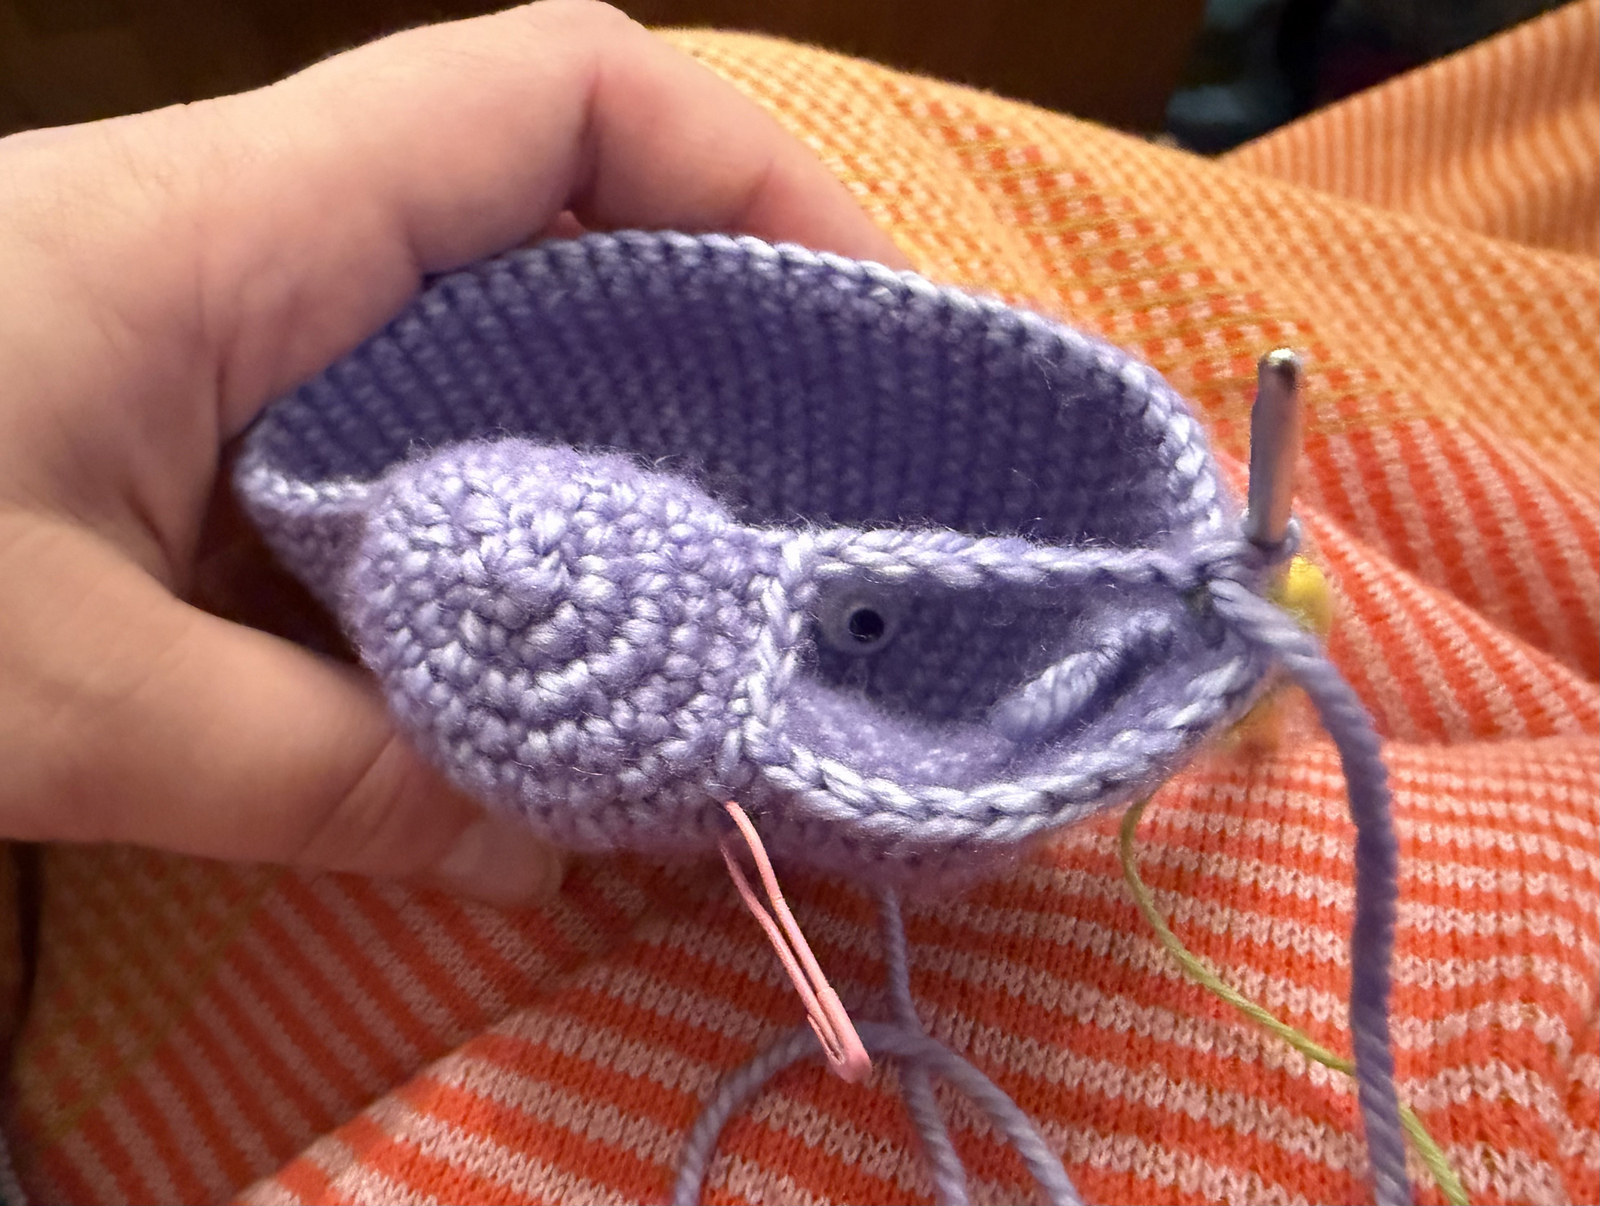
- Round 1: 12 sc, 1 dec in the corner of body connected to first "butt" "leg" (pictured below), 4 sc in the bottom loops in the existing chain, chain 7 (24)
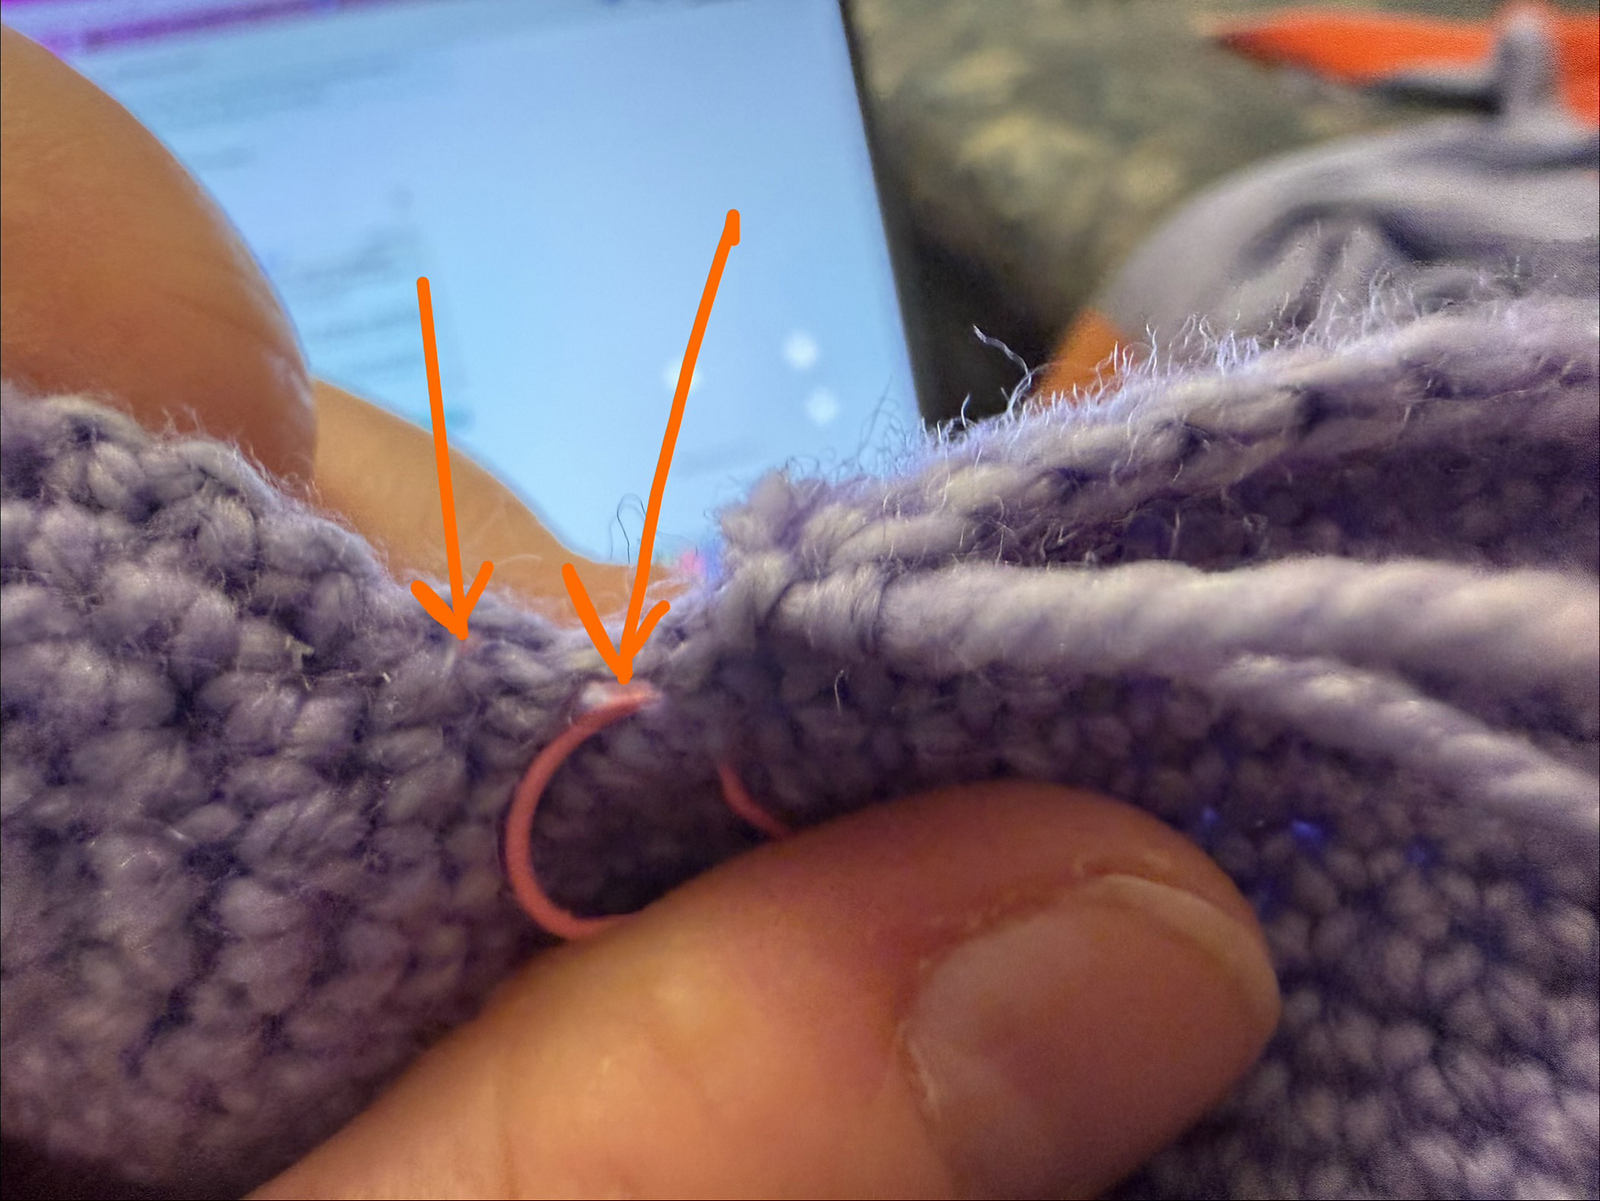
- Round 2: connect chain at start of round for this "butt" "leg" (skipping other blob's additional 7 chains and 40 stitches in the main body) then 24 sc (24)
- Round 3: (6 sc, dec) x 3 (21)
- Round 4: (2 sc, dec, 3 sc) x 3 (18)
- Round 5: (sc, dec) x 6 (12)
- Round 6: 6 dec (6)
- Finish off by looping through front loops of all 6 stitches and pull tight, etc.
Getting back to the original pattern for the 3 main "legs":
After both "butt" "legs"/mounds are done, there are 40 stitches on the original body, 7 chain stitches that can be picked up from each "butt" leg" that haven't been picked up in a second location, which totals the original 54 stitches - this sets you up for the 3 blobs as described in the original pattern. Between each "butt" "leg" and the main body and between the two "butt" "legs" themselves are an additional 3 connections that are also picked up and decreased appropriately to keep the seams between "legs" tight.
As a reminder, here's the road map, which shows how to divide up these stitches for the Ditto's main three "legs:"
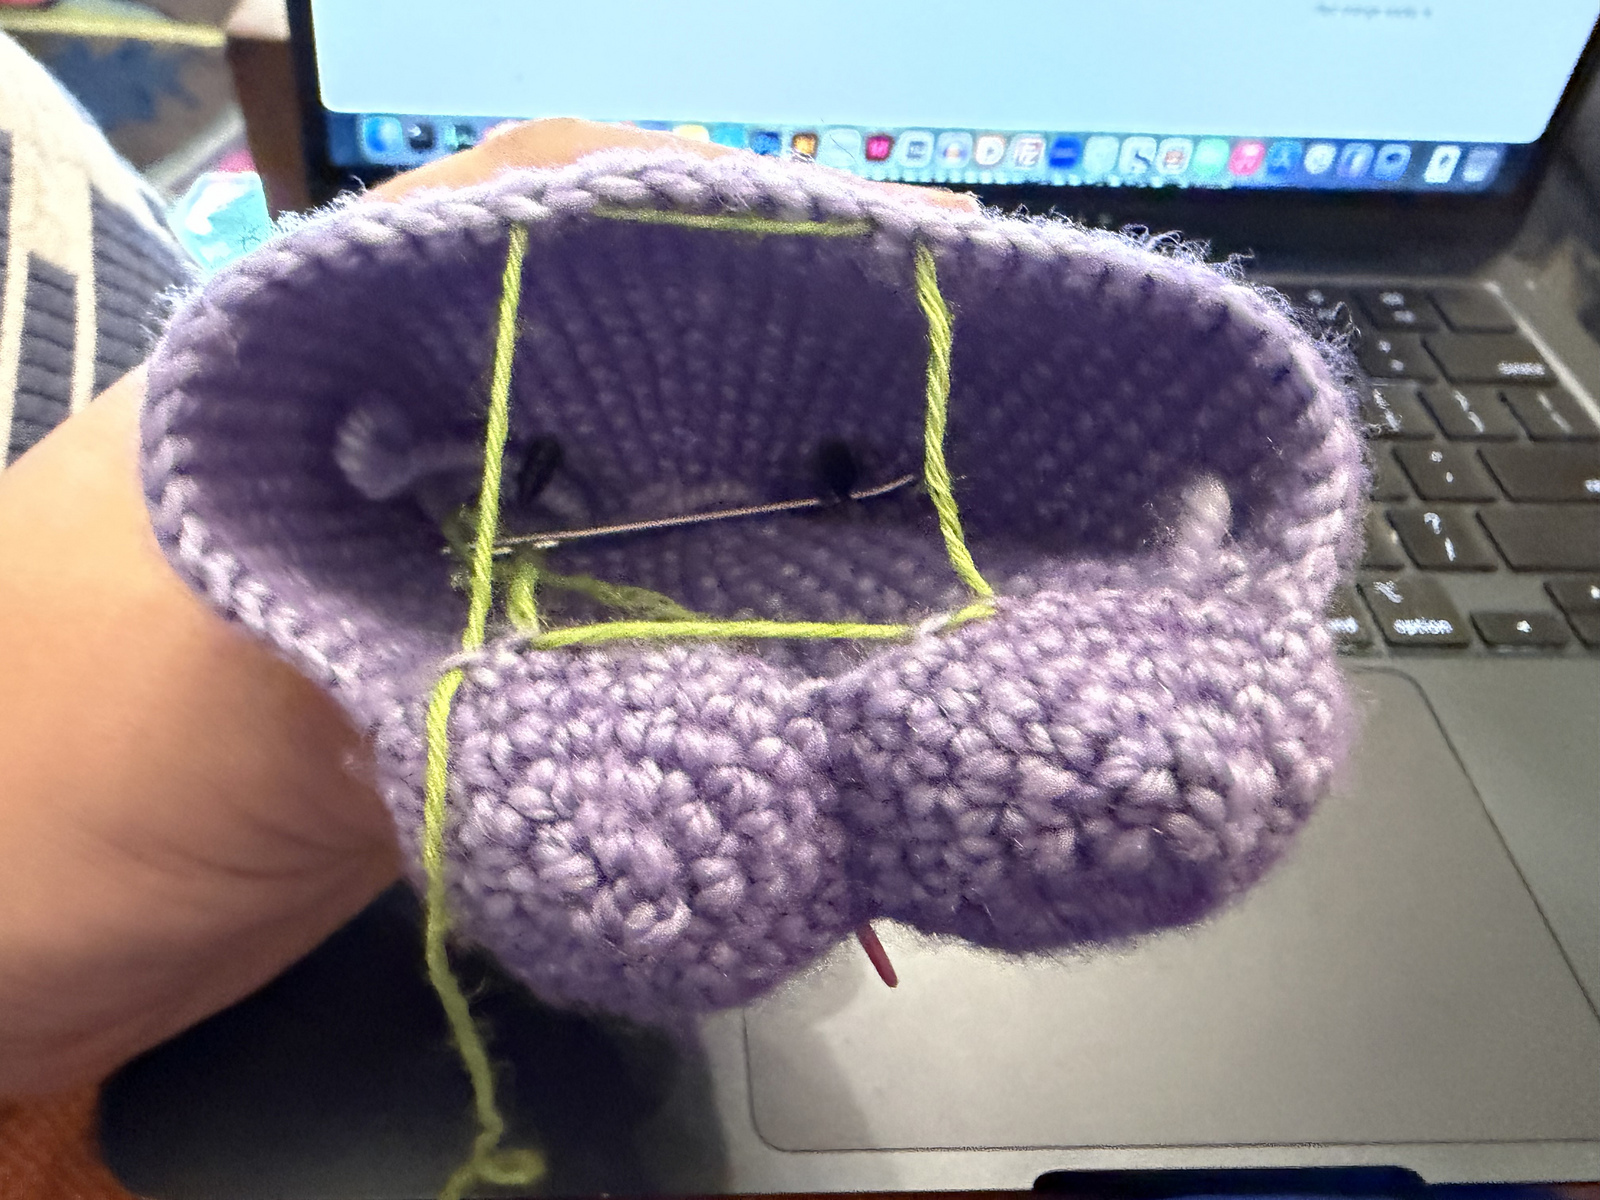
You might find it helpful to visualize this division by temporarily stringing up some scrap yarn to preview the divisions:
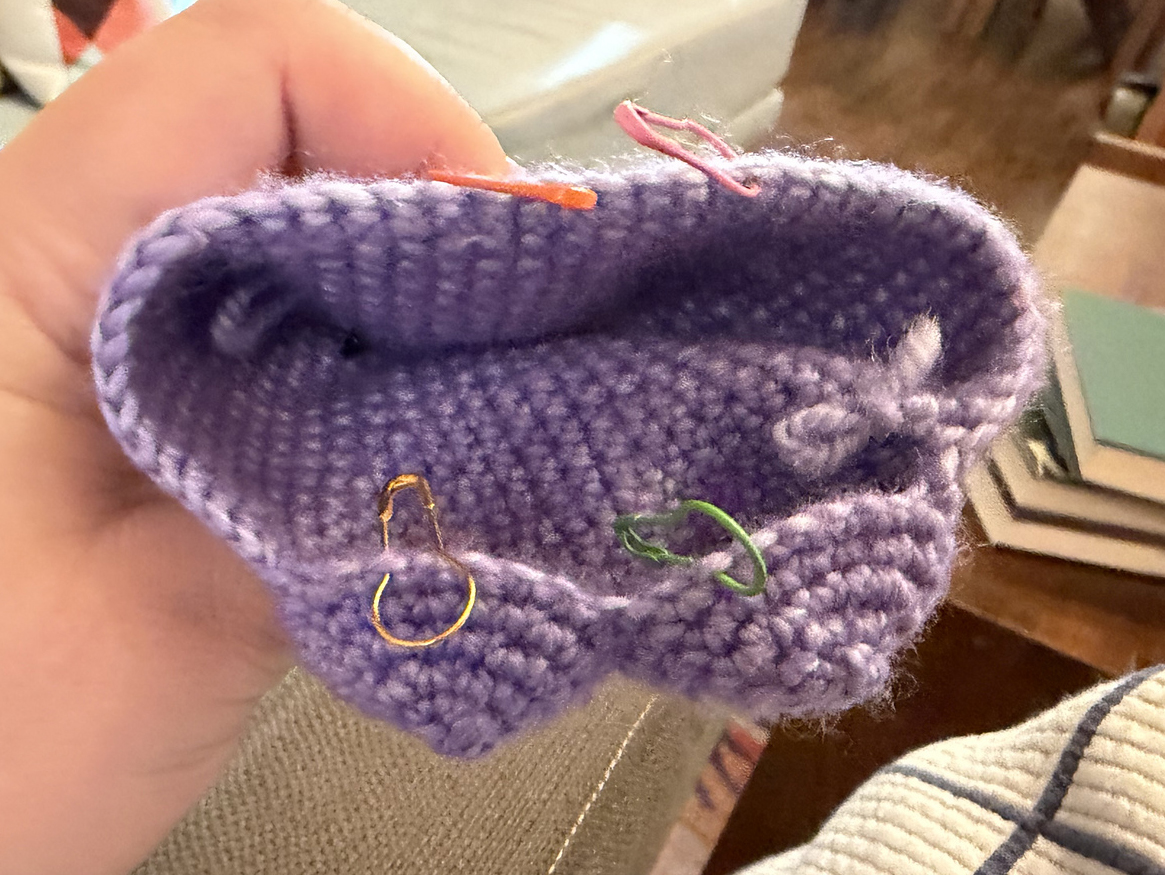
If you'd like, place stitch markers like I did to delineate the division:
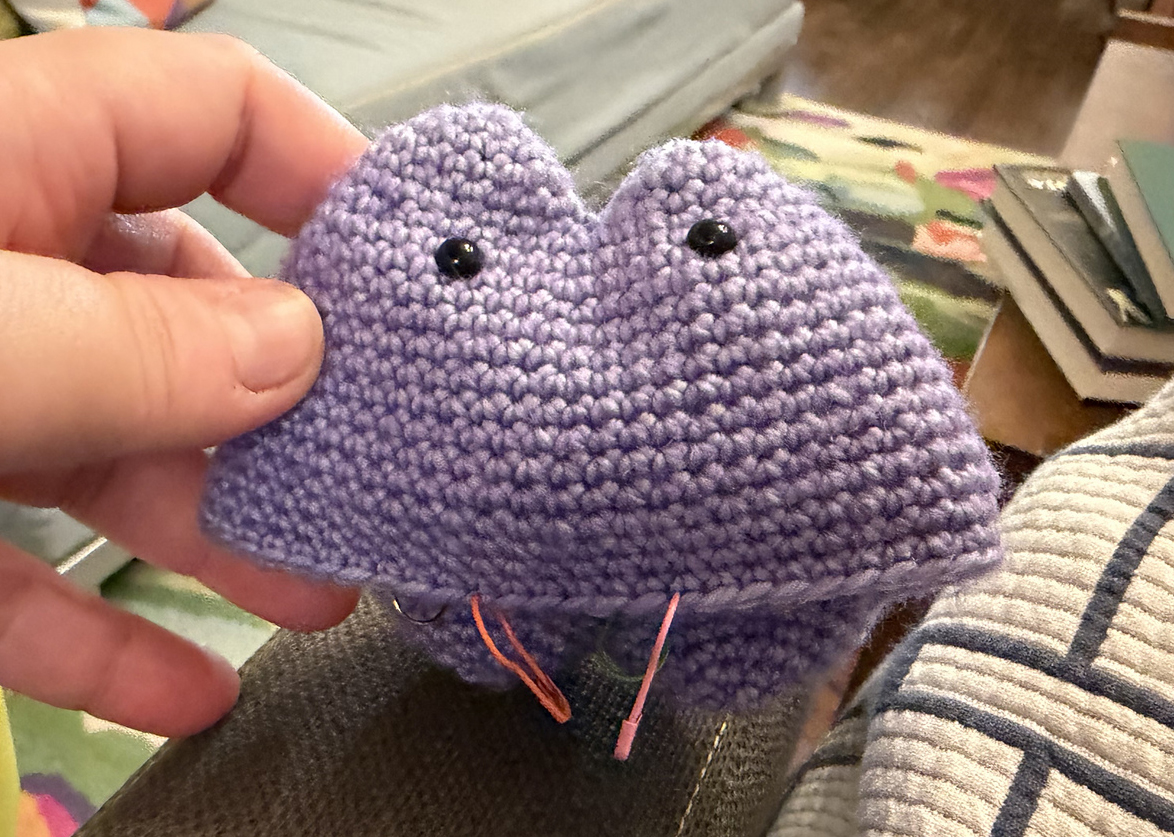
Now that you've visualized how you're dividing the main "leg" blobs, it's a good time to place safety eyes if you're using safety eyes for eyes. I placed mine between rows 7 and 8 counted down from the small head blob and left 8 stitches between the eyes.
Now you can proceed to make the main legs in the same order as the original pattern.
3. Main "leg" blob 1:
This is the left "leg" blob labeled 1 in the original pattern.
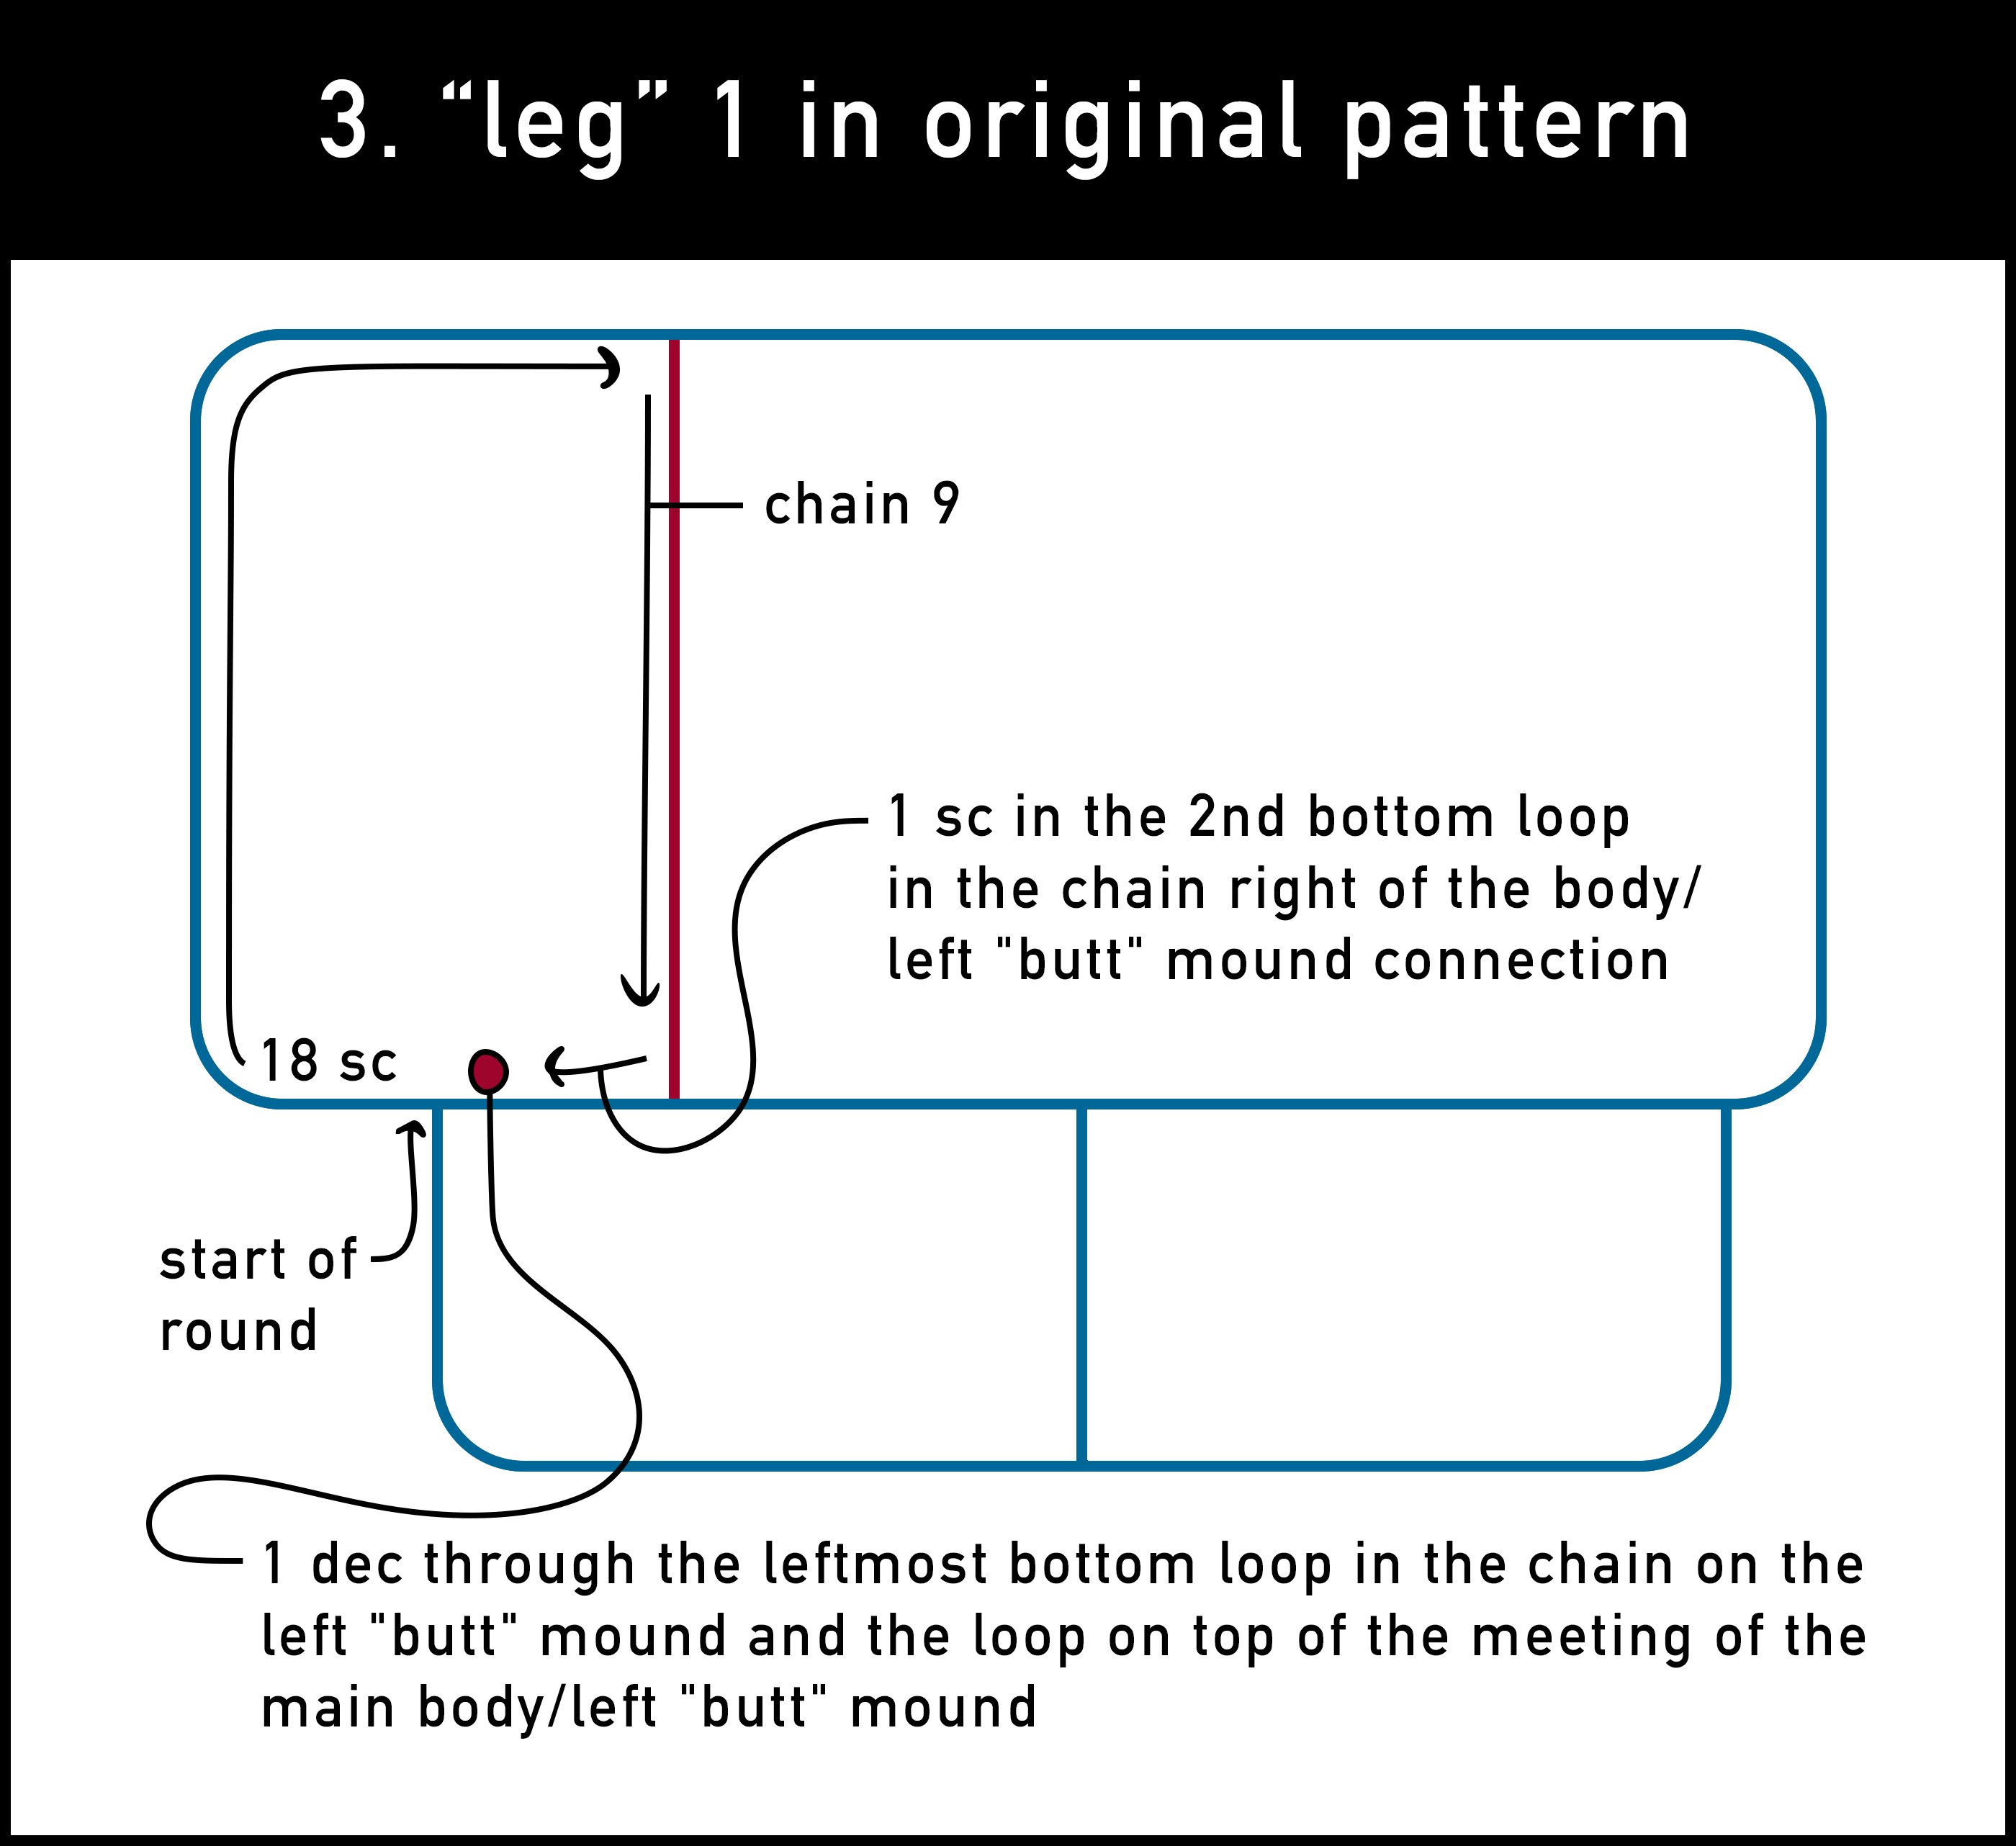
To start, connect your yarn into the first stitch in the main body after where the main body meets the left "butt" mound.
- Round 1: 18 sc, chain 9, 1 sc in the 2nd bottom loop in the chain right of the body/left "butt" mound connection, dec through the leftmost bottom loop in the chain on the left "butt" mound and the loop on top of the meeting of the main body/left "butt" mound (pictured below). (29)
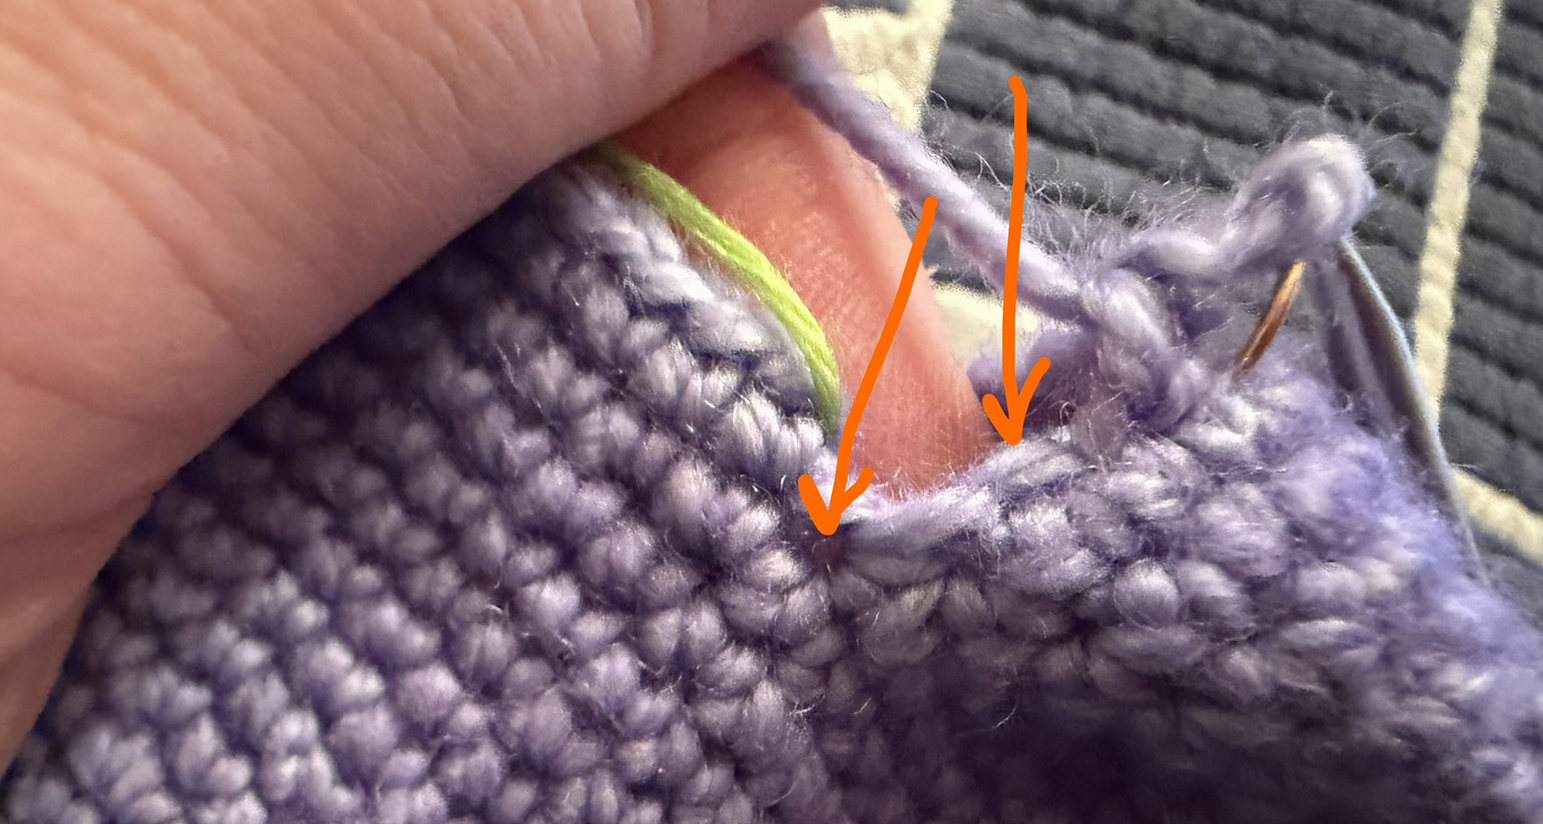
In the start of the original pattern "leg" 1, here are the two loops in the decrease through the left most chain loop on the left "butt" mound and the loop on top of the meeting of the main body/left "butt" mound.
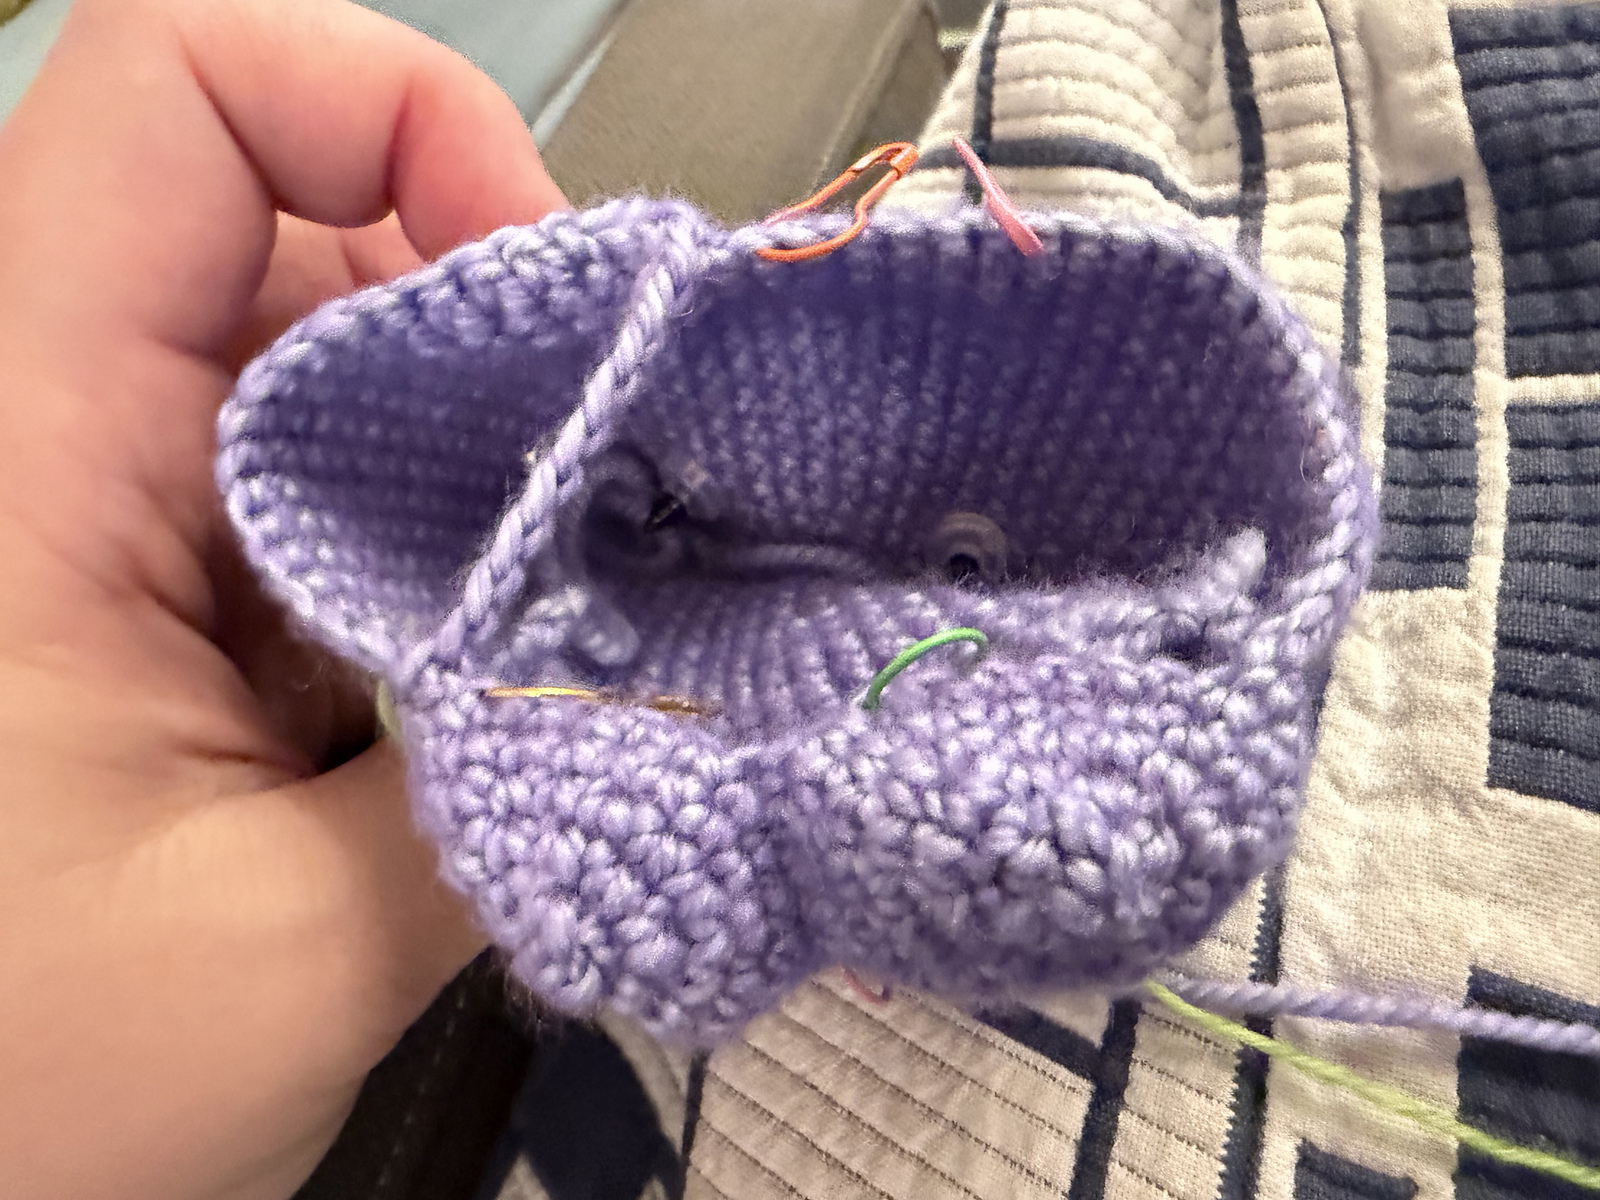
Follow the original pattern's Rounds 19 to 23 and finish off blob "leg" 1 as written.
4. Main "leg" blob 2:
This is the right "leg" blob labeled 2 in the original pattern.
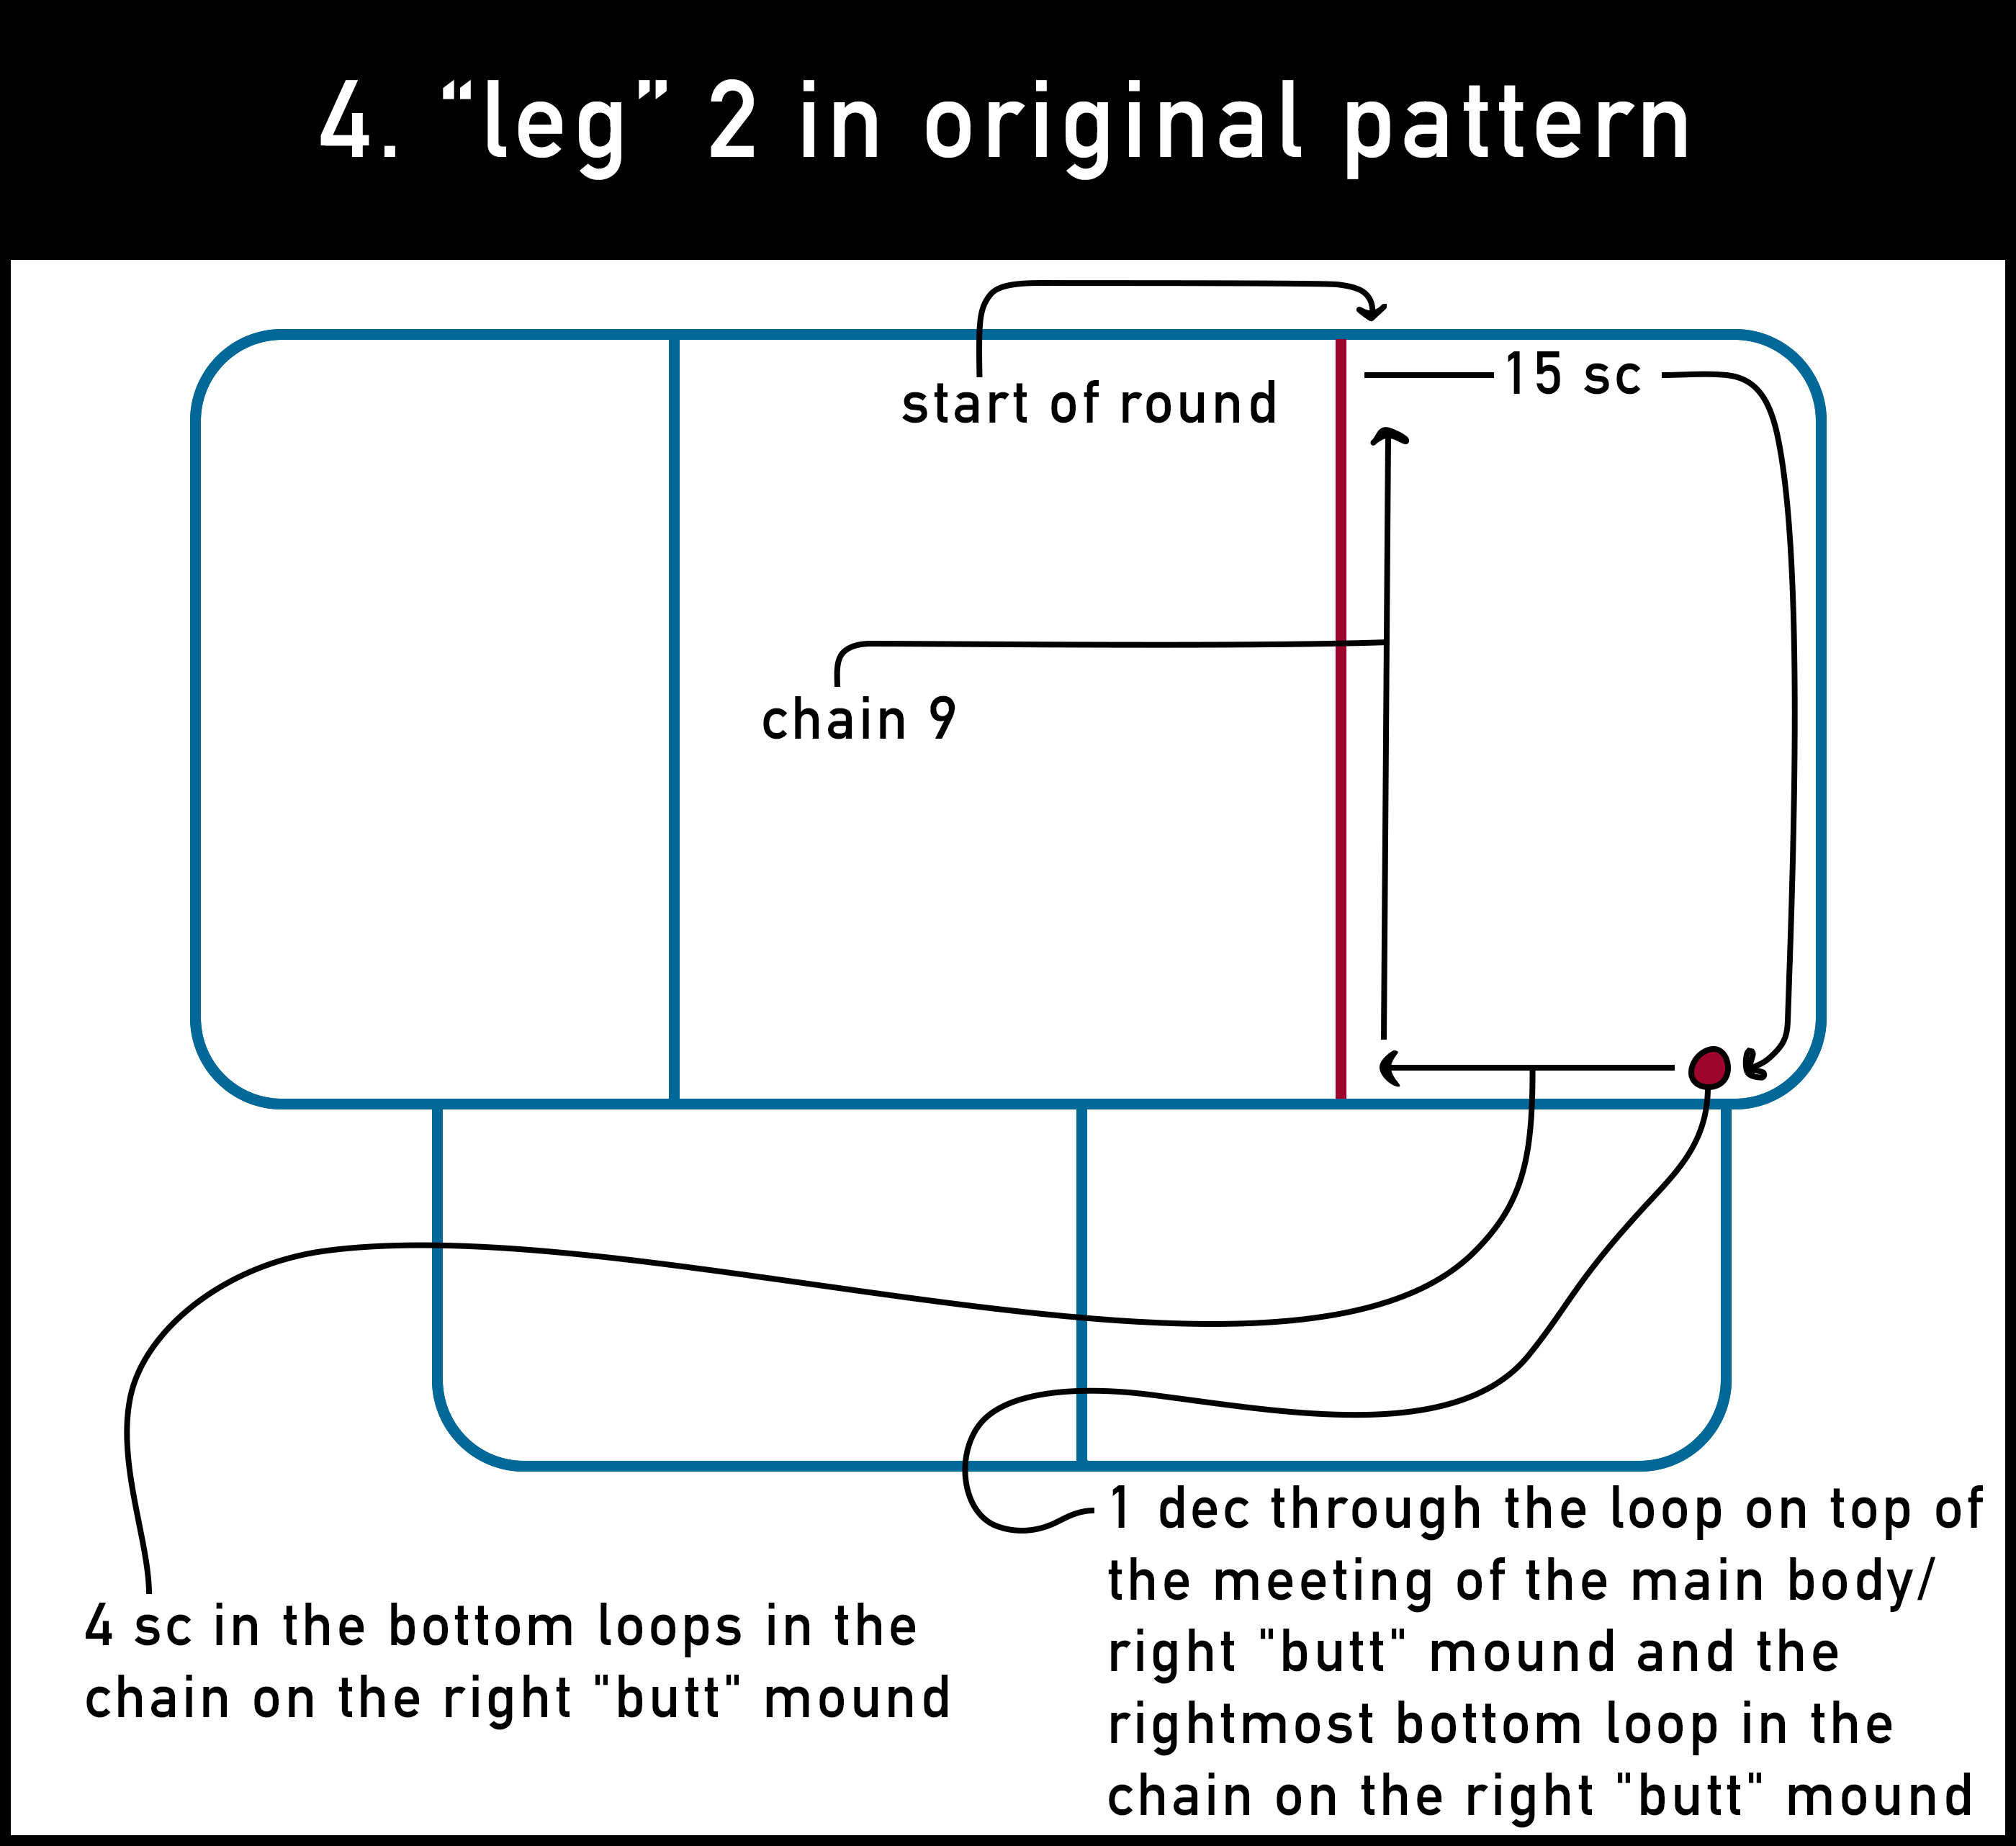
To start, connect your yarn into 15th stitch from where the main body meets the right "butt" mound - there should be 7 skipped stitches along the front of the Ditto between this start of round and the left "leg" blob's last stitch on the front side of Ditto before the chaining.
- Round 1: 15 sc, dec through the loop on top of the meeting of the main body/right "butt" mound and the rightmost bottom loop in the chain on the right "butt" mound (pictured below), 4 sc in the bottom loops in the chain on the right "butt" mound, chain 9 (29)
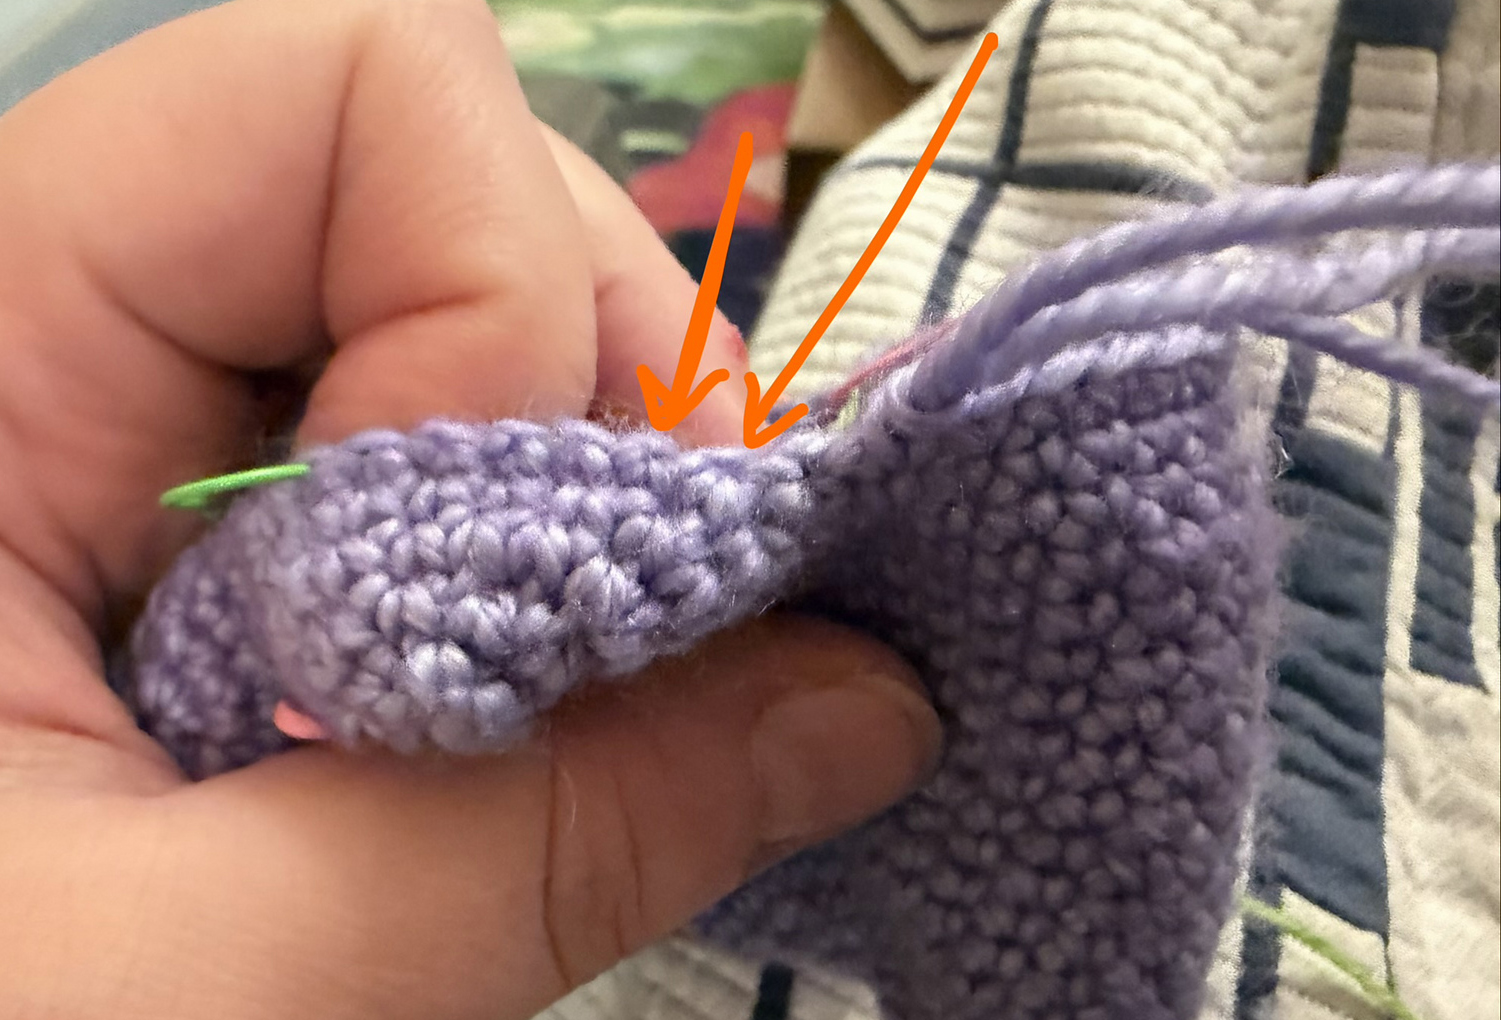
In the start of the original pattern "leg" 2, here are the two loops in the decrease through the loop on top of the meeting of the main body/right "butt" mound and the rightmost chain loop on the right "butt" mound.
Connect chain at start of round for this blob "leg" at the beginning of round 2's first sc and continue the original pattern's Rounds 2 to 6 for blob "leg" 2 as written.
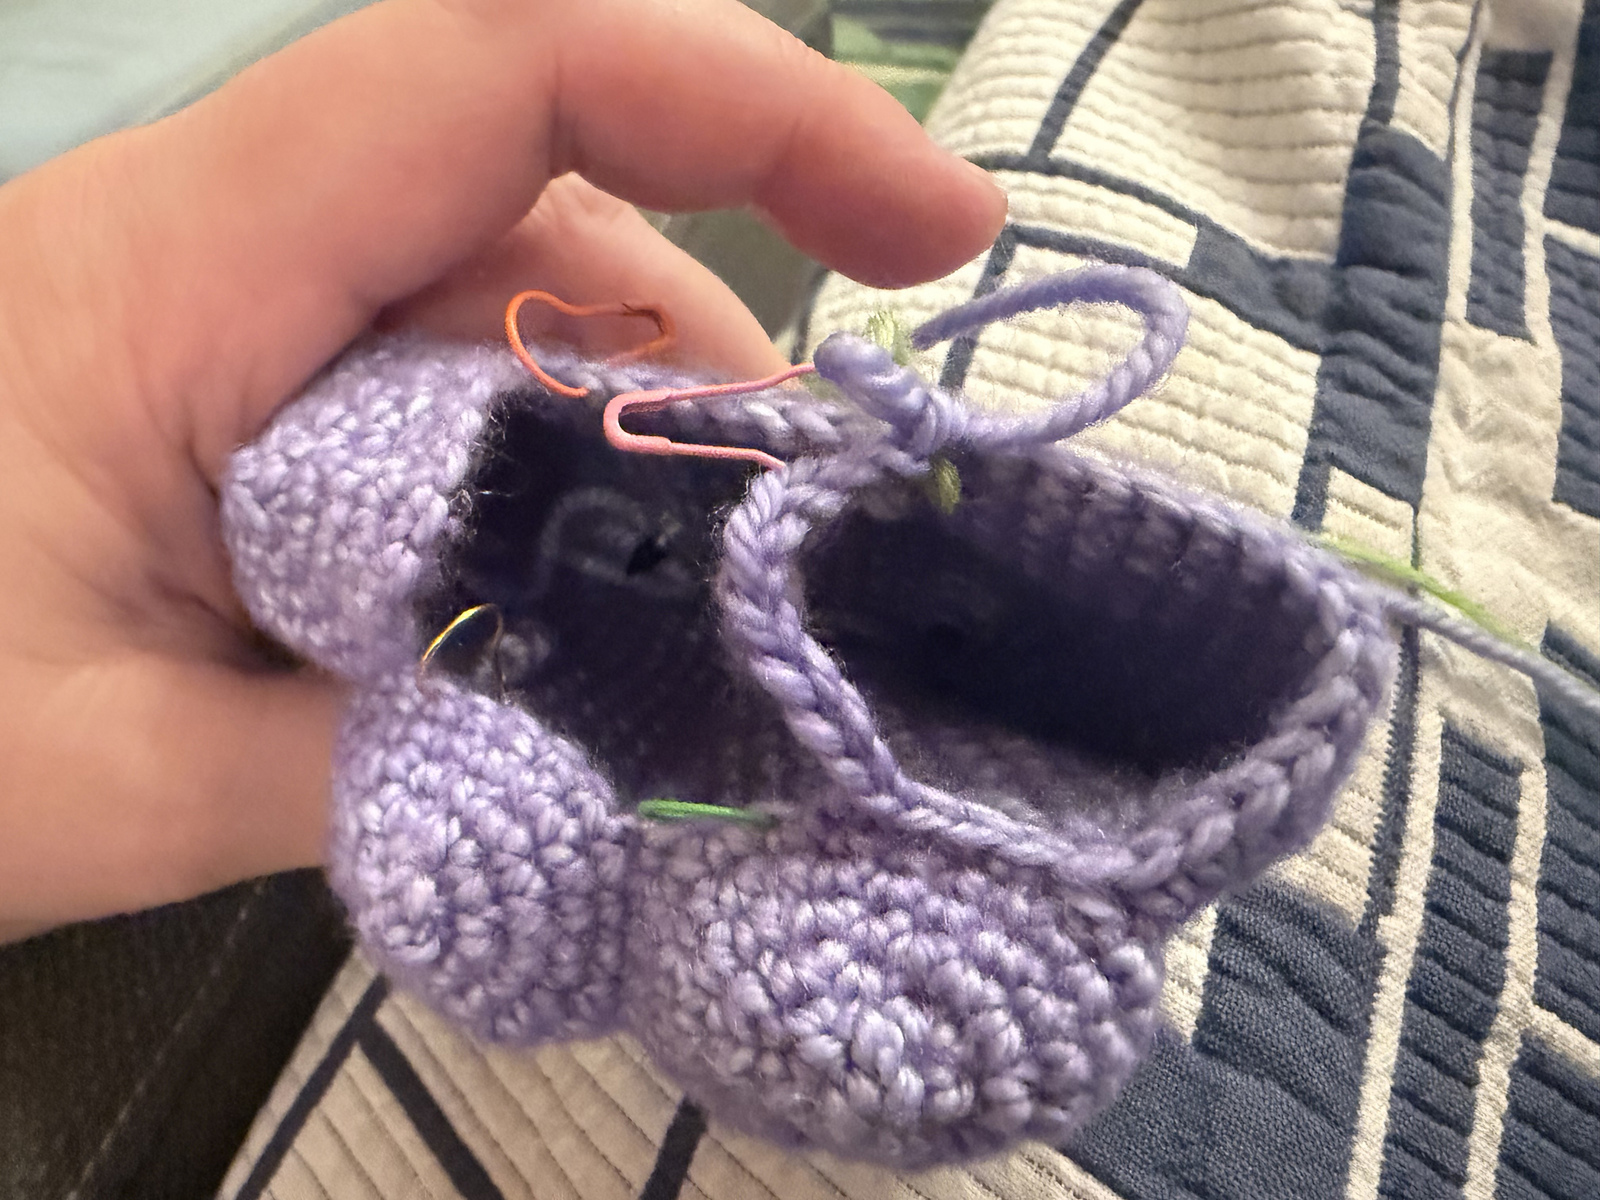
As in the original pattern, now is a good time to stuff your Ditto most of the way!
5. Main "leg" blob 3:
This is the center "leg" blob labeled 3 in the original pattern.
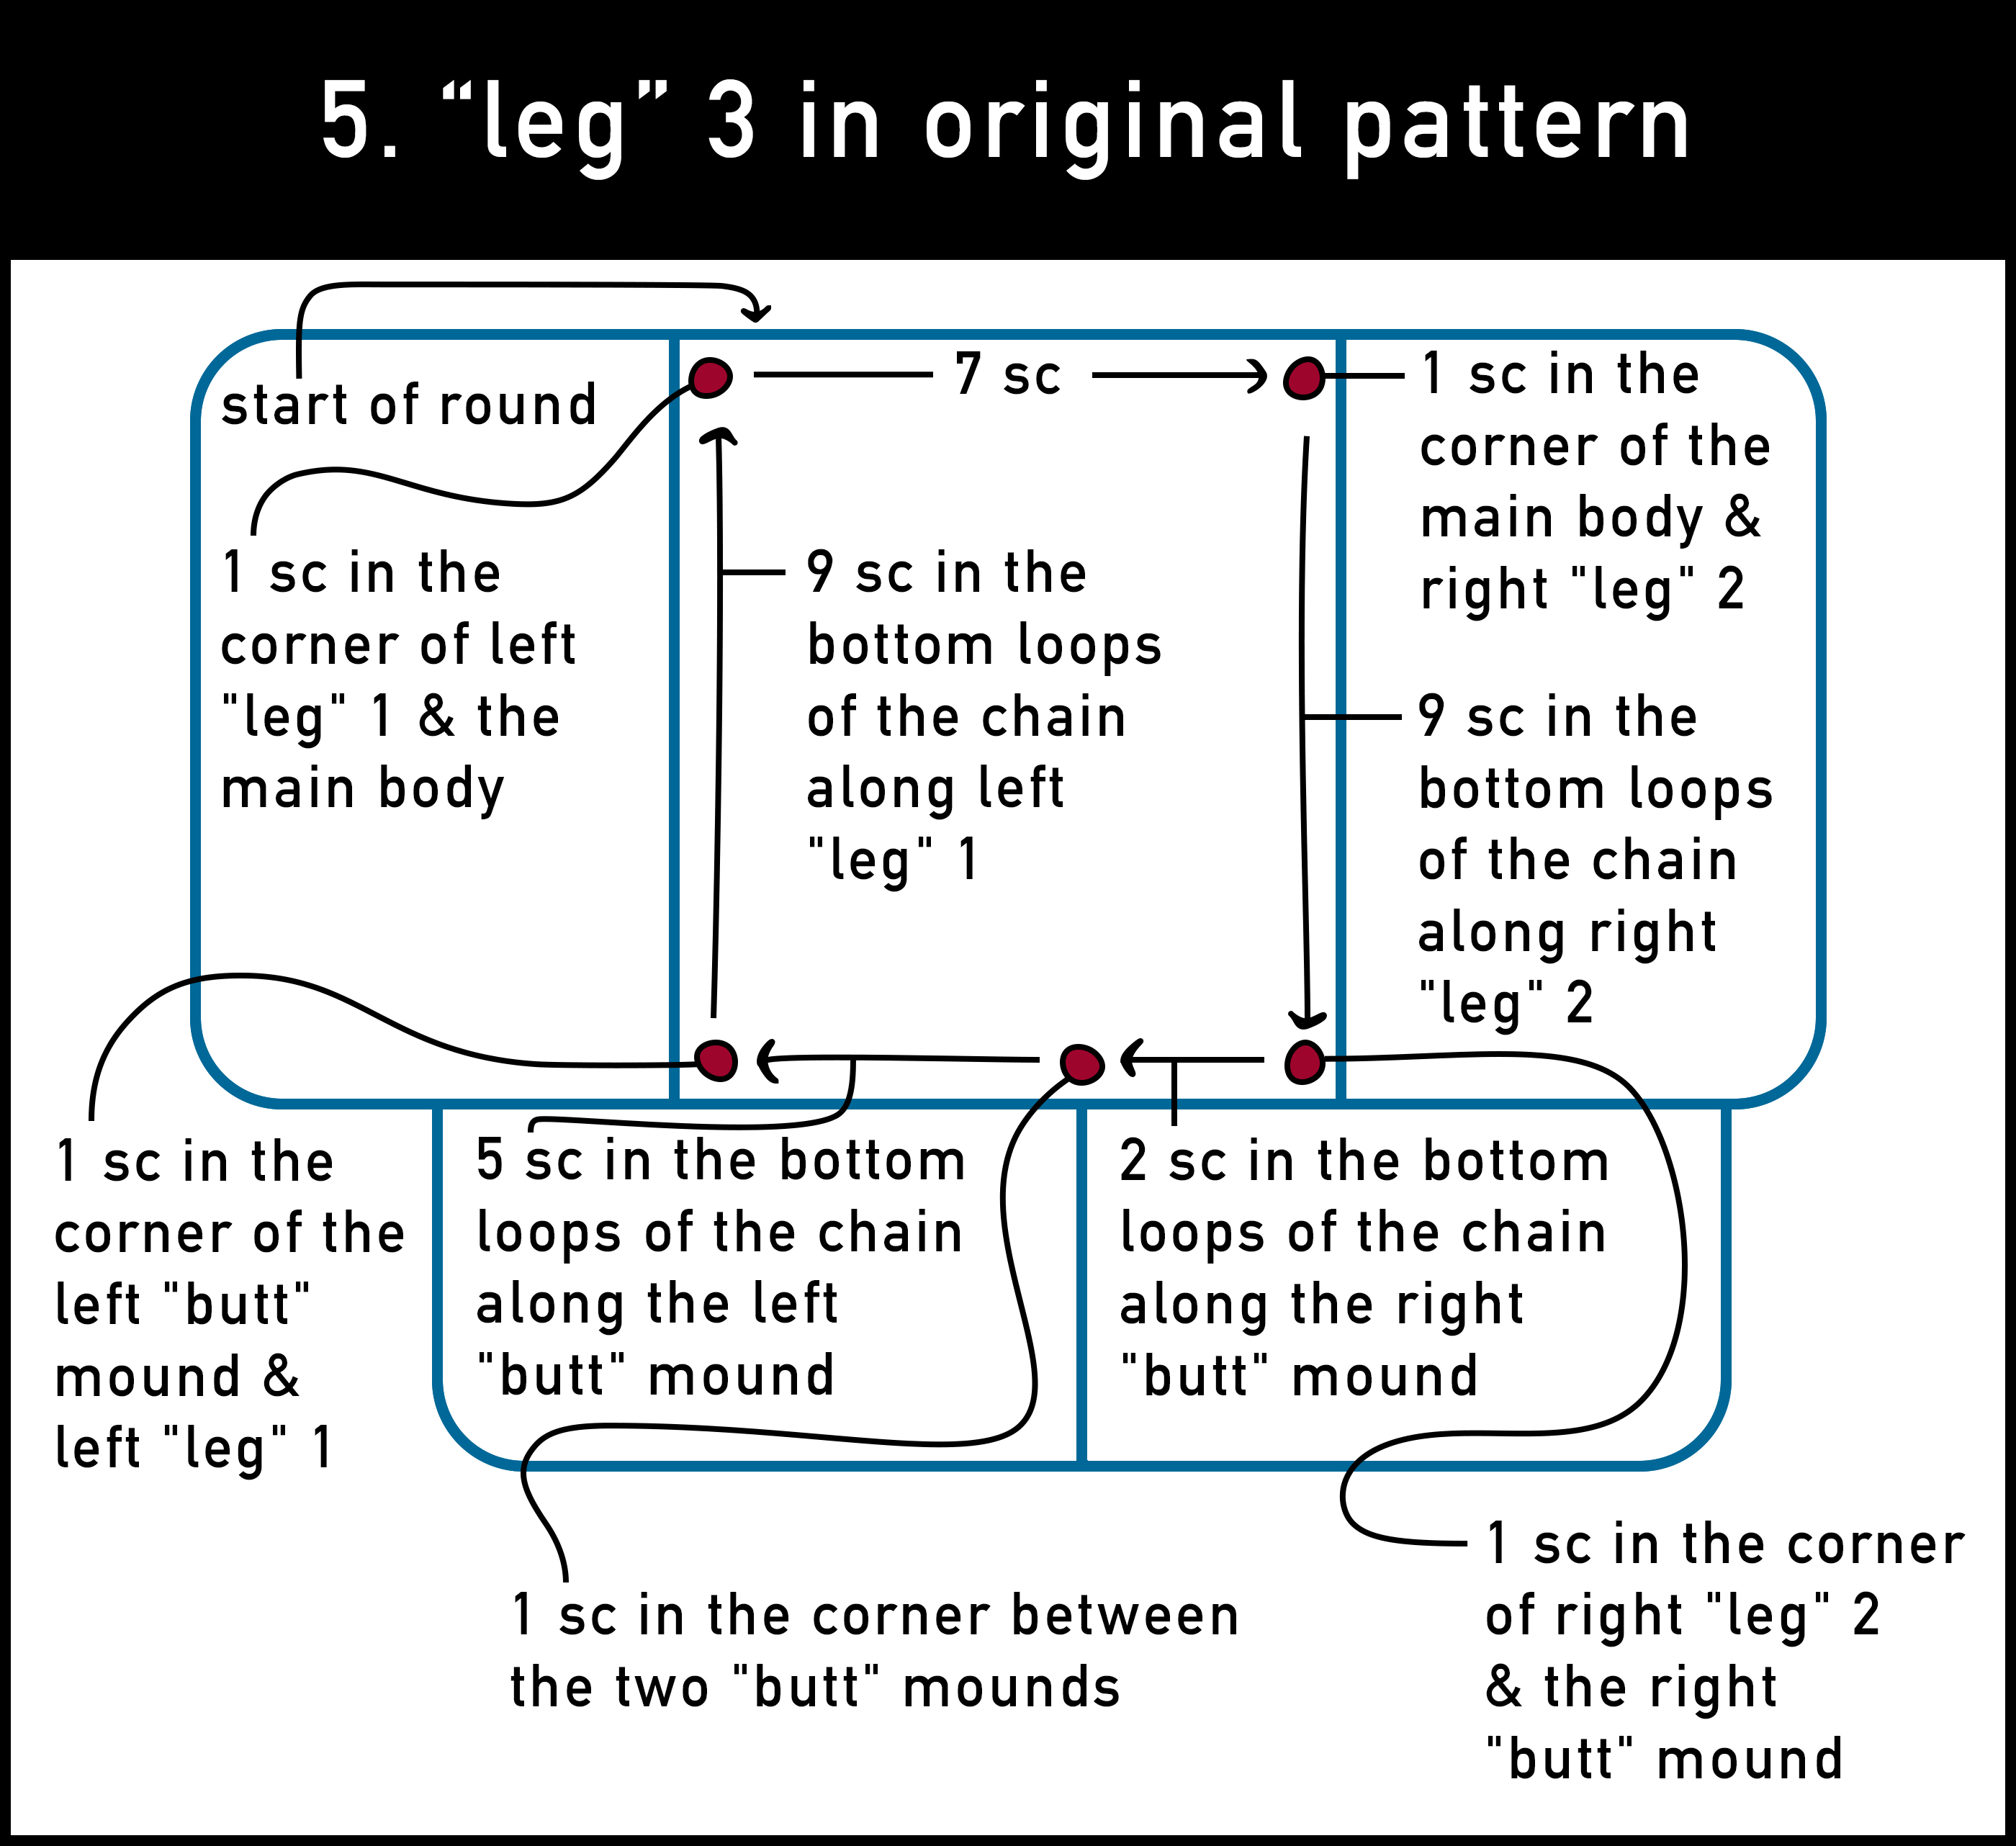
- Round 1: Start in the corner next to left "leg" 1 on the front side (pictured below). 37 sc into the following stitches you pick up:
- 7 stitches along the main body
- 1 stitch in the corner of the main body and right "leg" 2
- 9 stitches in the bottom loops of the chain along right "leg" 2
- 1 stitch in the corner of right "leg" 2 and the right "butt" mound
- 2 stitches in the bottom loops of the chain along the right "butt" mound
- 1 stitch in the corner between the two "butt" mounds
- 5 stitches in the bottom loops of the chain along the left "butt" mound
- 1 stitch in the corner of the left "butt" mound and left "leg" 1
- 9 stitches in the bottom loops of the chain along left "leg" 1
- 1 stitch in the corner of left "leg" 1 and the main body
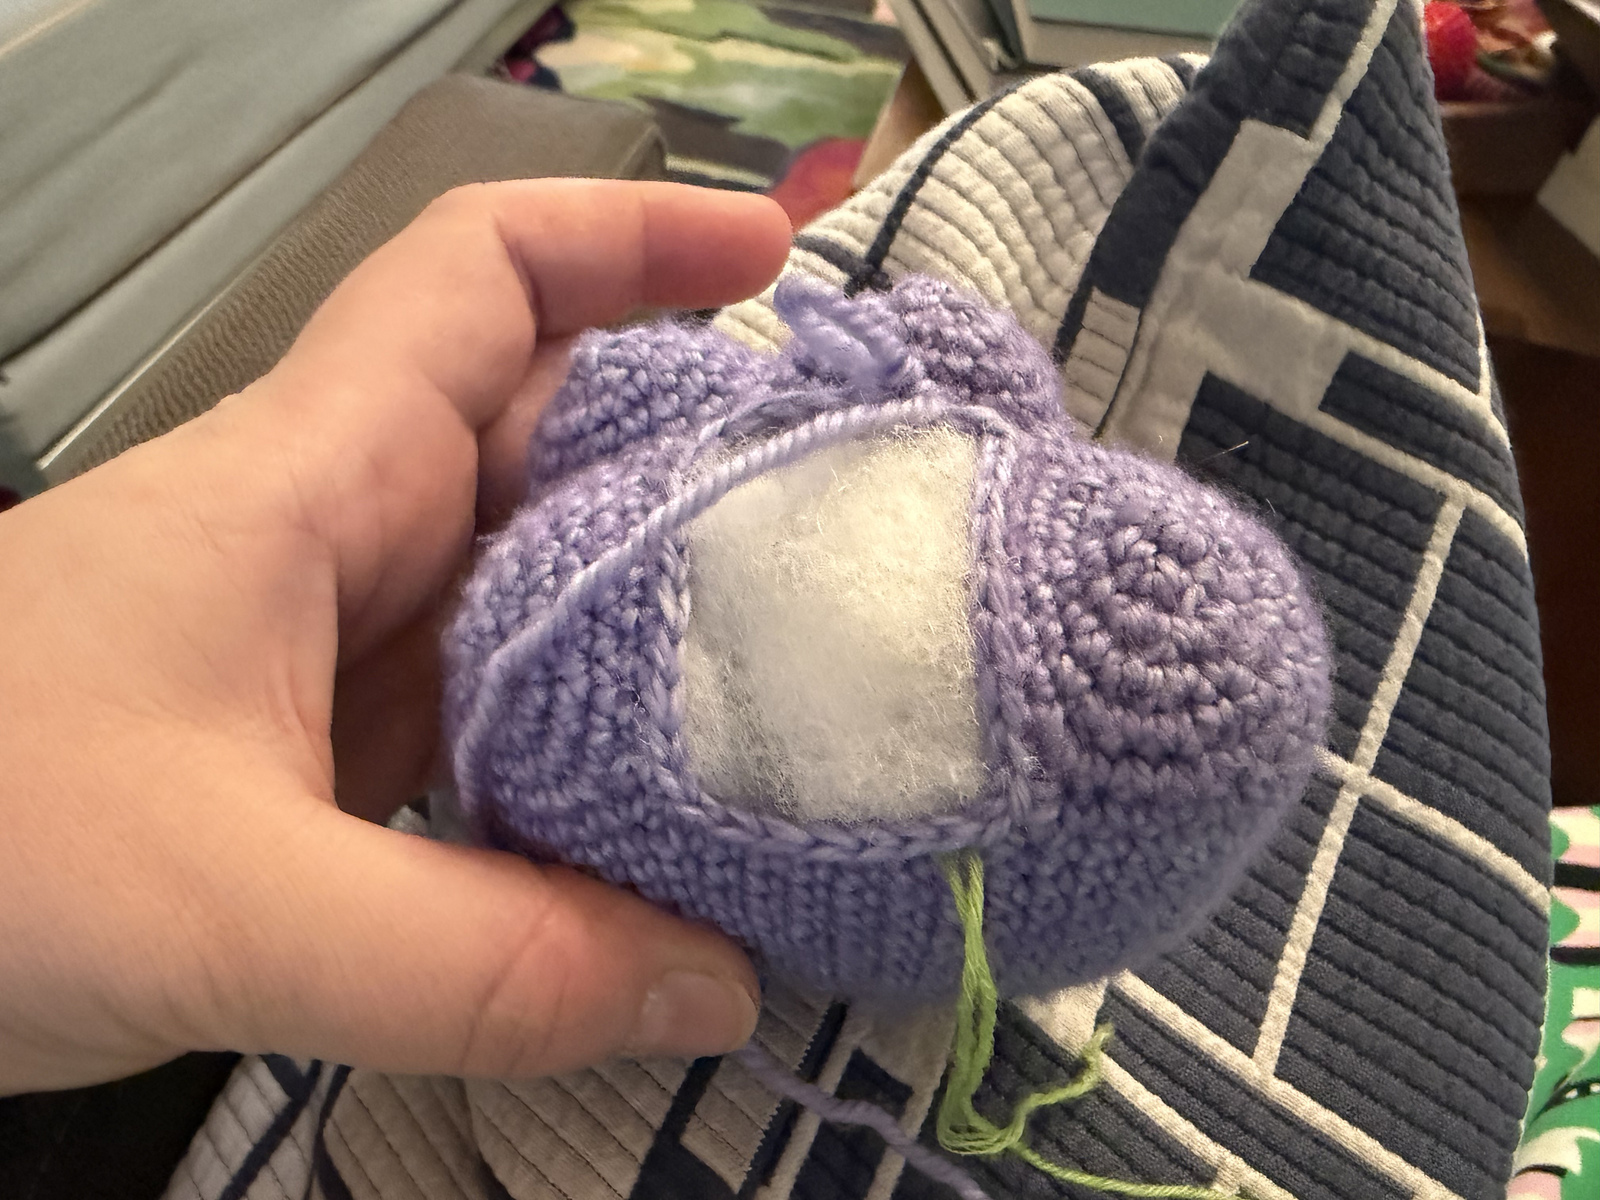
My lime green running stitch marker indicates the start of round pickup location for making the main blob "leg" 3.
To compensate for the extra 5 stitches from those corners, I decreased in the second round at the corresponding locations instead of just single crocheting the whole way around to ensure the end of my round 2 of this section had the specified 32 stitches:
- Round 2: 6 sc, dec, 8 sc, dec, sc, dec, 4 sc, dec, 8 sc, dec (32)
After round 2, I continued with the rest of the original pattern to finish the middle blob "leg" 3.
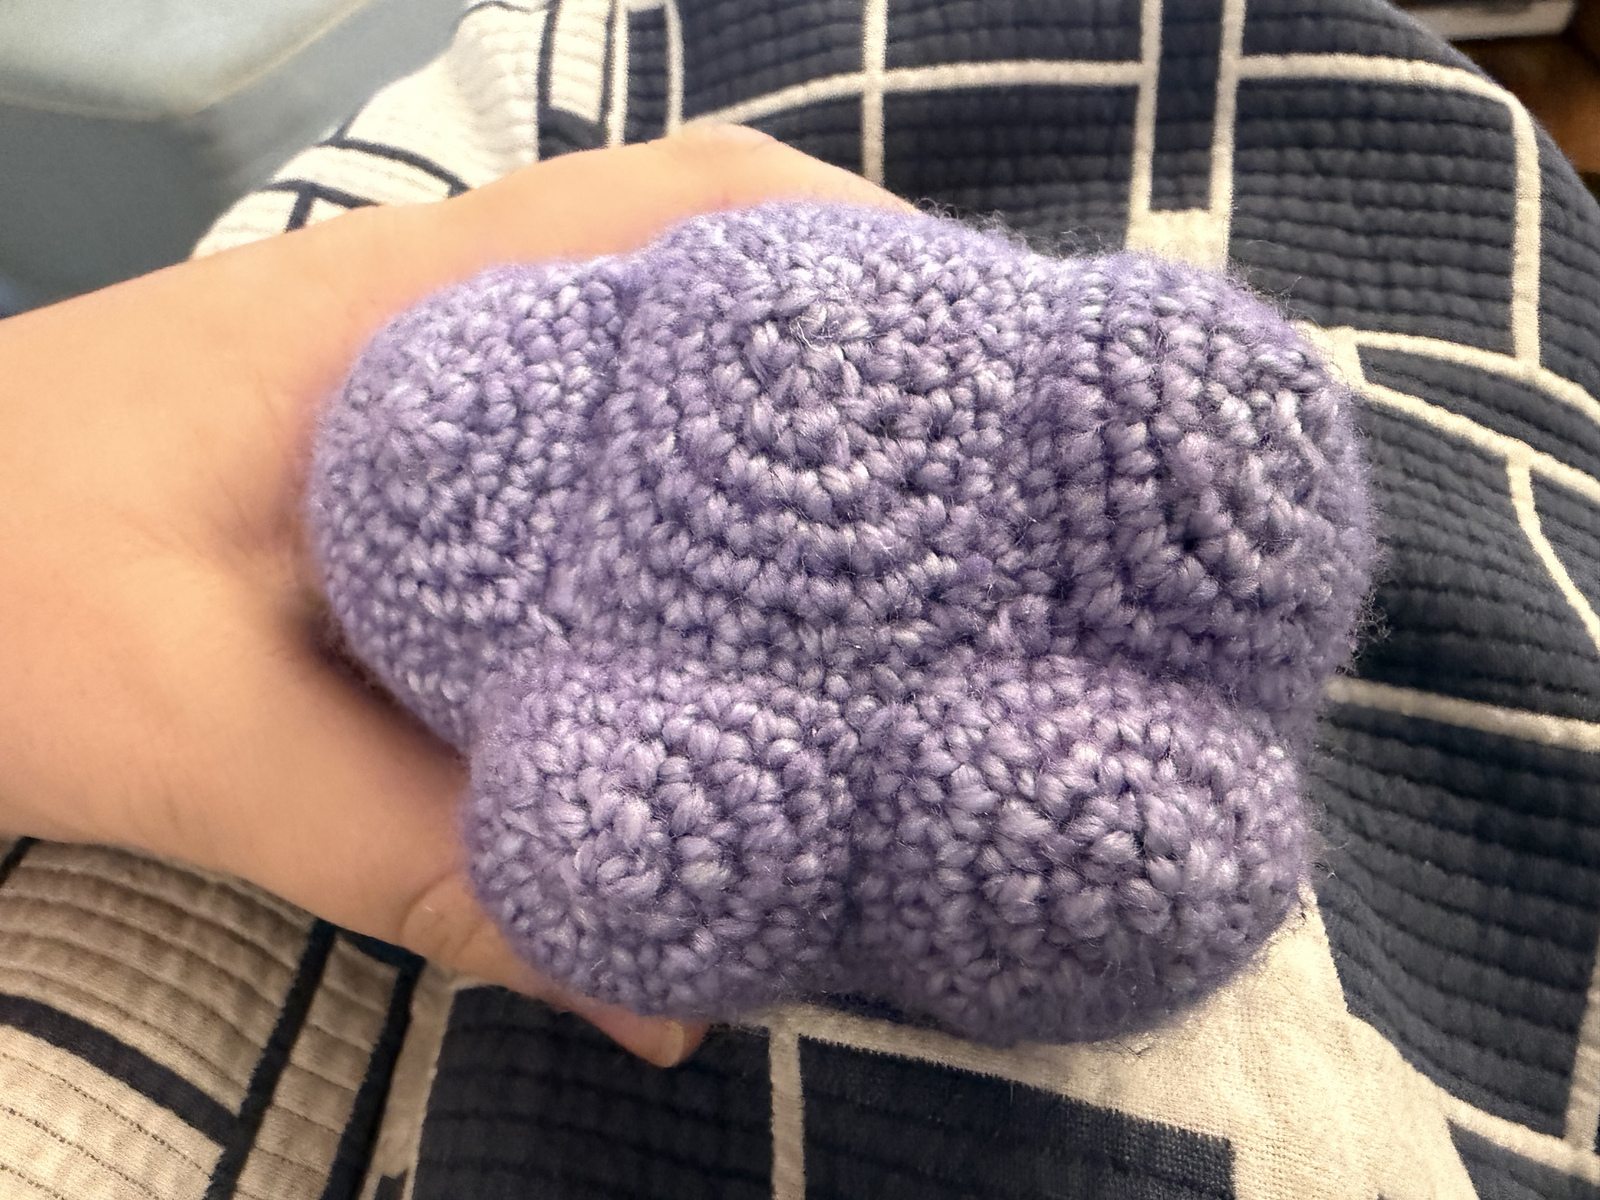
Make the two arms according to the original pattern. I attached them less symmetrically than the original suggested.
Finally, embroider a mouth for Ditto. You can either do this in black to match the safety eyes or create a two-toned mouth in red and pink to make a very happy looking Ditto like I did.
FYI, this is also documented as a project on Ravelry (though it's a lot harder to follow since photos couldn't be inline).