The shape is everything: sun-dried tomato and pesto pane bianco

I've been getting into baking bread a lot lately instead of focusing more on the sweet and pastry side of things. While I've been enjoying making fresh sourdough from fresh sourdough starter and love the end results, I sometimes find that basic breads are a lot of kneading (read: hard on my wrists) with little creativity (read: delicious but a bit boring to make).

But then something really similar to this pretty loaf I made earlier today popped up in my RSS feed:

Sun-dried tomato and pesto pane bianco

Naturally, I decided that I had to make it; I was dying to make a bread with such a beautiful and creative shape. However, I didn't have sun-dried tomatoes already, so I faked my own in an hour by taking canned diced tomatoes with Vidalia onions, cooking off the juices on the stove for about 15 minutes on medium high heat, and then baking them at 350 degrees in the oven for 45 minutes. I also didn't have any fresh basil, as its prices have recently sky-rocketed, so I opted to use homemade pesto (fresh basil, garlic, parmesan cheese, romano cheese, pine nuts, salt, pepper, and extra virgin olive oil) that I had previously frozen dramatically instead and nix the garlic powder in the original recipe. Also, considering how much I love cheese, I added a little more in and use only mozzarella and parmesan in addition to the cheeses in the pesto.

Here are images of the step-by-step:

Process of making the bread

Creating the figure-8 shape wasn't the least bit difficult; it's all in rolling the dough into a tube and making one strategic cut before one simple twist. Though, I found that it's really hard to roll out the dough before adding the toppings if it just hasn't fully doubled in size yet. If you want to play along at home, my version of the recipe follows. Next time I make this shape of bread, I'm going to fill it with caramelized onions and a touch of white cheddar.

Sun-dried tomato and pesto pane bianco

Adapted from Dianna Wara via King Arthur Flour. They also show off a lot of step by step pictures on their blog.

Ingredients:

  • 1/2 cup warm water
  • 1/4 cup sugar
  • 4 teaspoons instant yeast
  • 1 cup warm low-fat milk
  • 1/3 cup extra-virgin olive oil
  • 2 large eggs
  • 2 teaspoons salt
  • 6 cups all-purpose flour
  • 1 cup sun-dried tomatoes, oil dried
  • 3/4 cup pesto
  • 1 1/2 cups shredded mozzarella cheese
  • 1/2 cups grated Parmesan cheese

Preparation:

  1. Combine the water, sugar, yeast, milk, olive oil, eggs, salt, and flour, and mix and knead until you've made a cohesive, soft dough that forms a smooth ball. Place the dough in a bowl greased with about a tablespoon or two of olive oil, and turn to grease the top of the bread. Cover and let rise in a warm place until doubled, about 45 minutes.
  2. Meanwhile, thoroughly drain the sun-dried tomatoes; lay them on a paper towel to absorb any excess oil.
  3. Line two baking sheets with parchment. Gently deflate the dough and divide it in half. Roll one piece into a roughly 22" x 8 1/2" rectangle. Spread on half of the pesto, and sprinkle on half of the tomatoes and cheeses.
  4. Starting with one long edge, roll the dough into a log the long way. Pinch the edges to seal.
  5. Place the log seam-side down on a baking sheet. Using a knife or kitchen shears, start 1/2" from one end and cut the log lengthwise down the center about 1" deep, to within 1/2" of the other end.
  6. Keeping the cut side up, form an "S" shape. Tuck both ends under the center of the "S" to form a "figure 8" shape; pinch the ends together to seal. Cover and let rise in a warm place until double, 45 to 60 minutes. Repeat with the remaining dough.
  7. While the loaves are rising, preheat the oven to 350 degrees.
  8. Bake the first loaf for 35 to 40 minutes. Make sure to tent the loaf with foil after 15 to 20 minutes to prevent over-browning. Bake the remaining loaf.
  9. Remove loaves from their pans; cook on racks. Store any leftovers well-wrapped, at room temperature.

Yields about 2 large loaves of bread.

It's a piece of cake to bake a SIPB cake

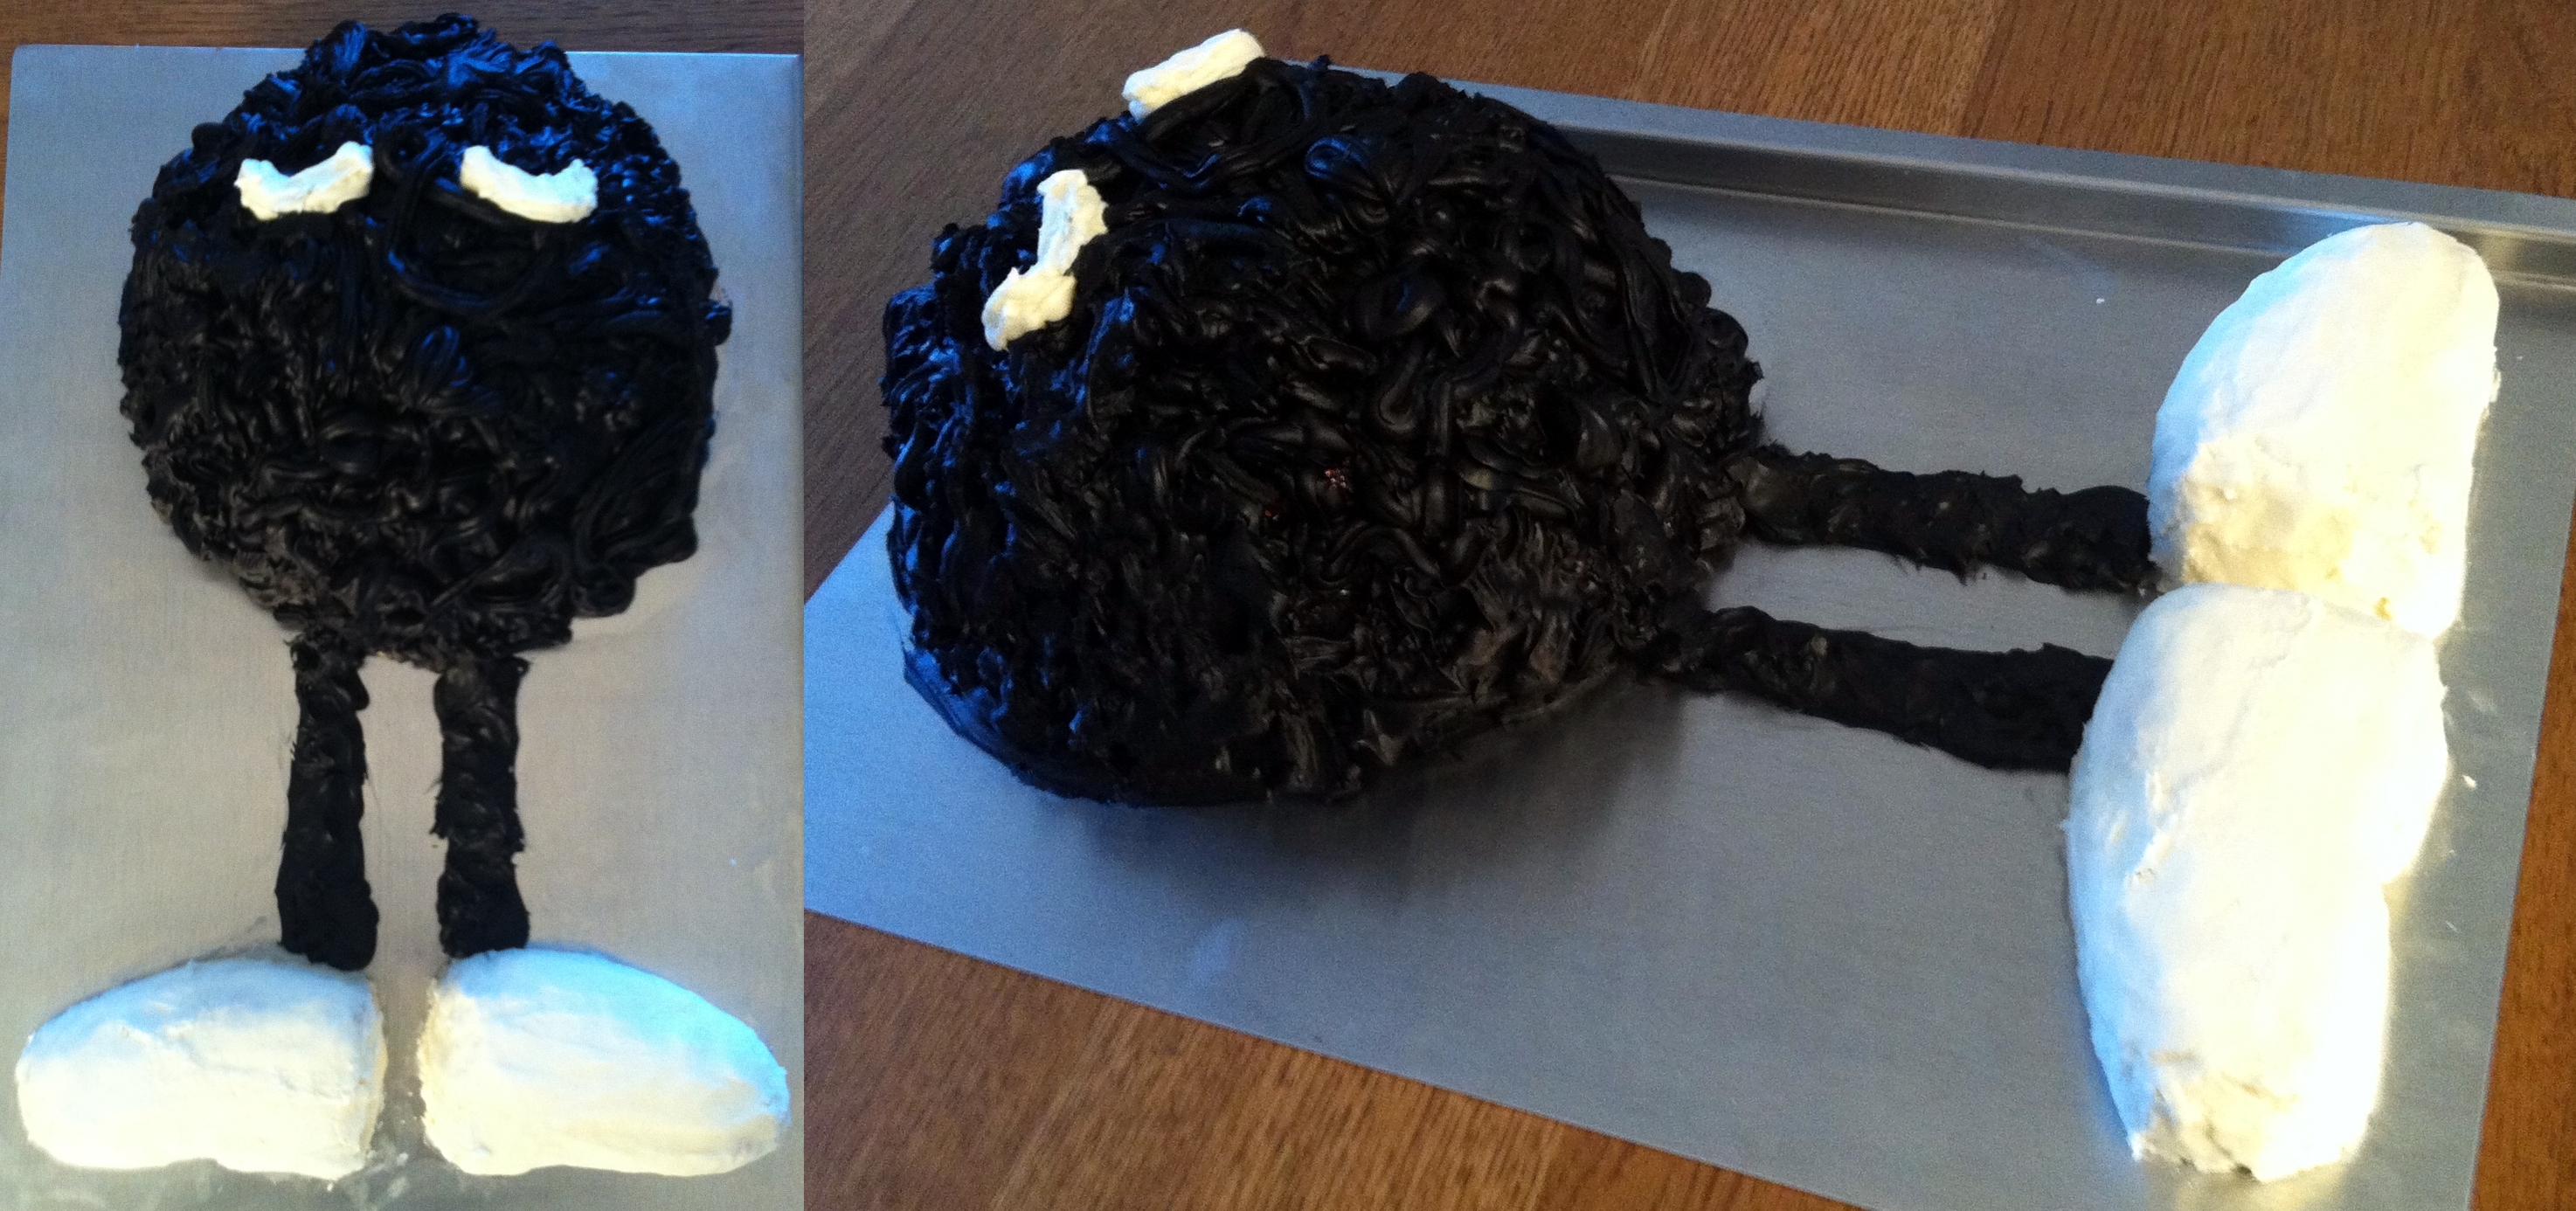
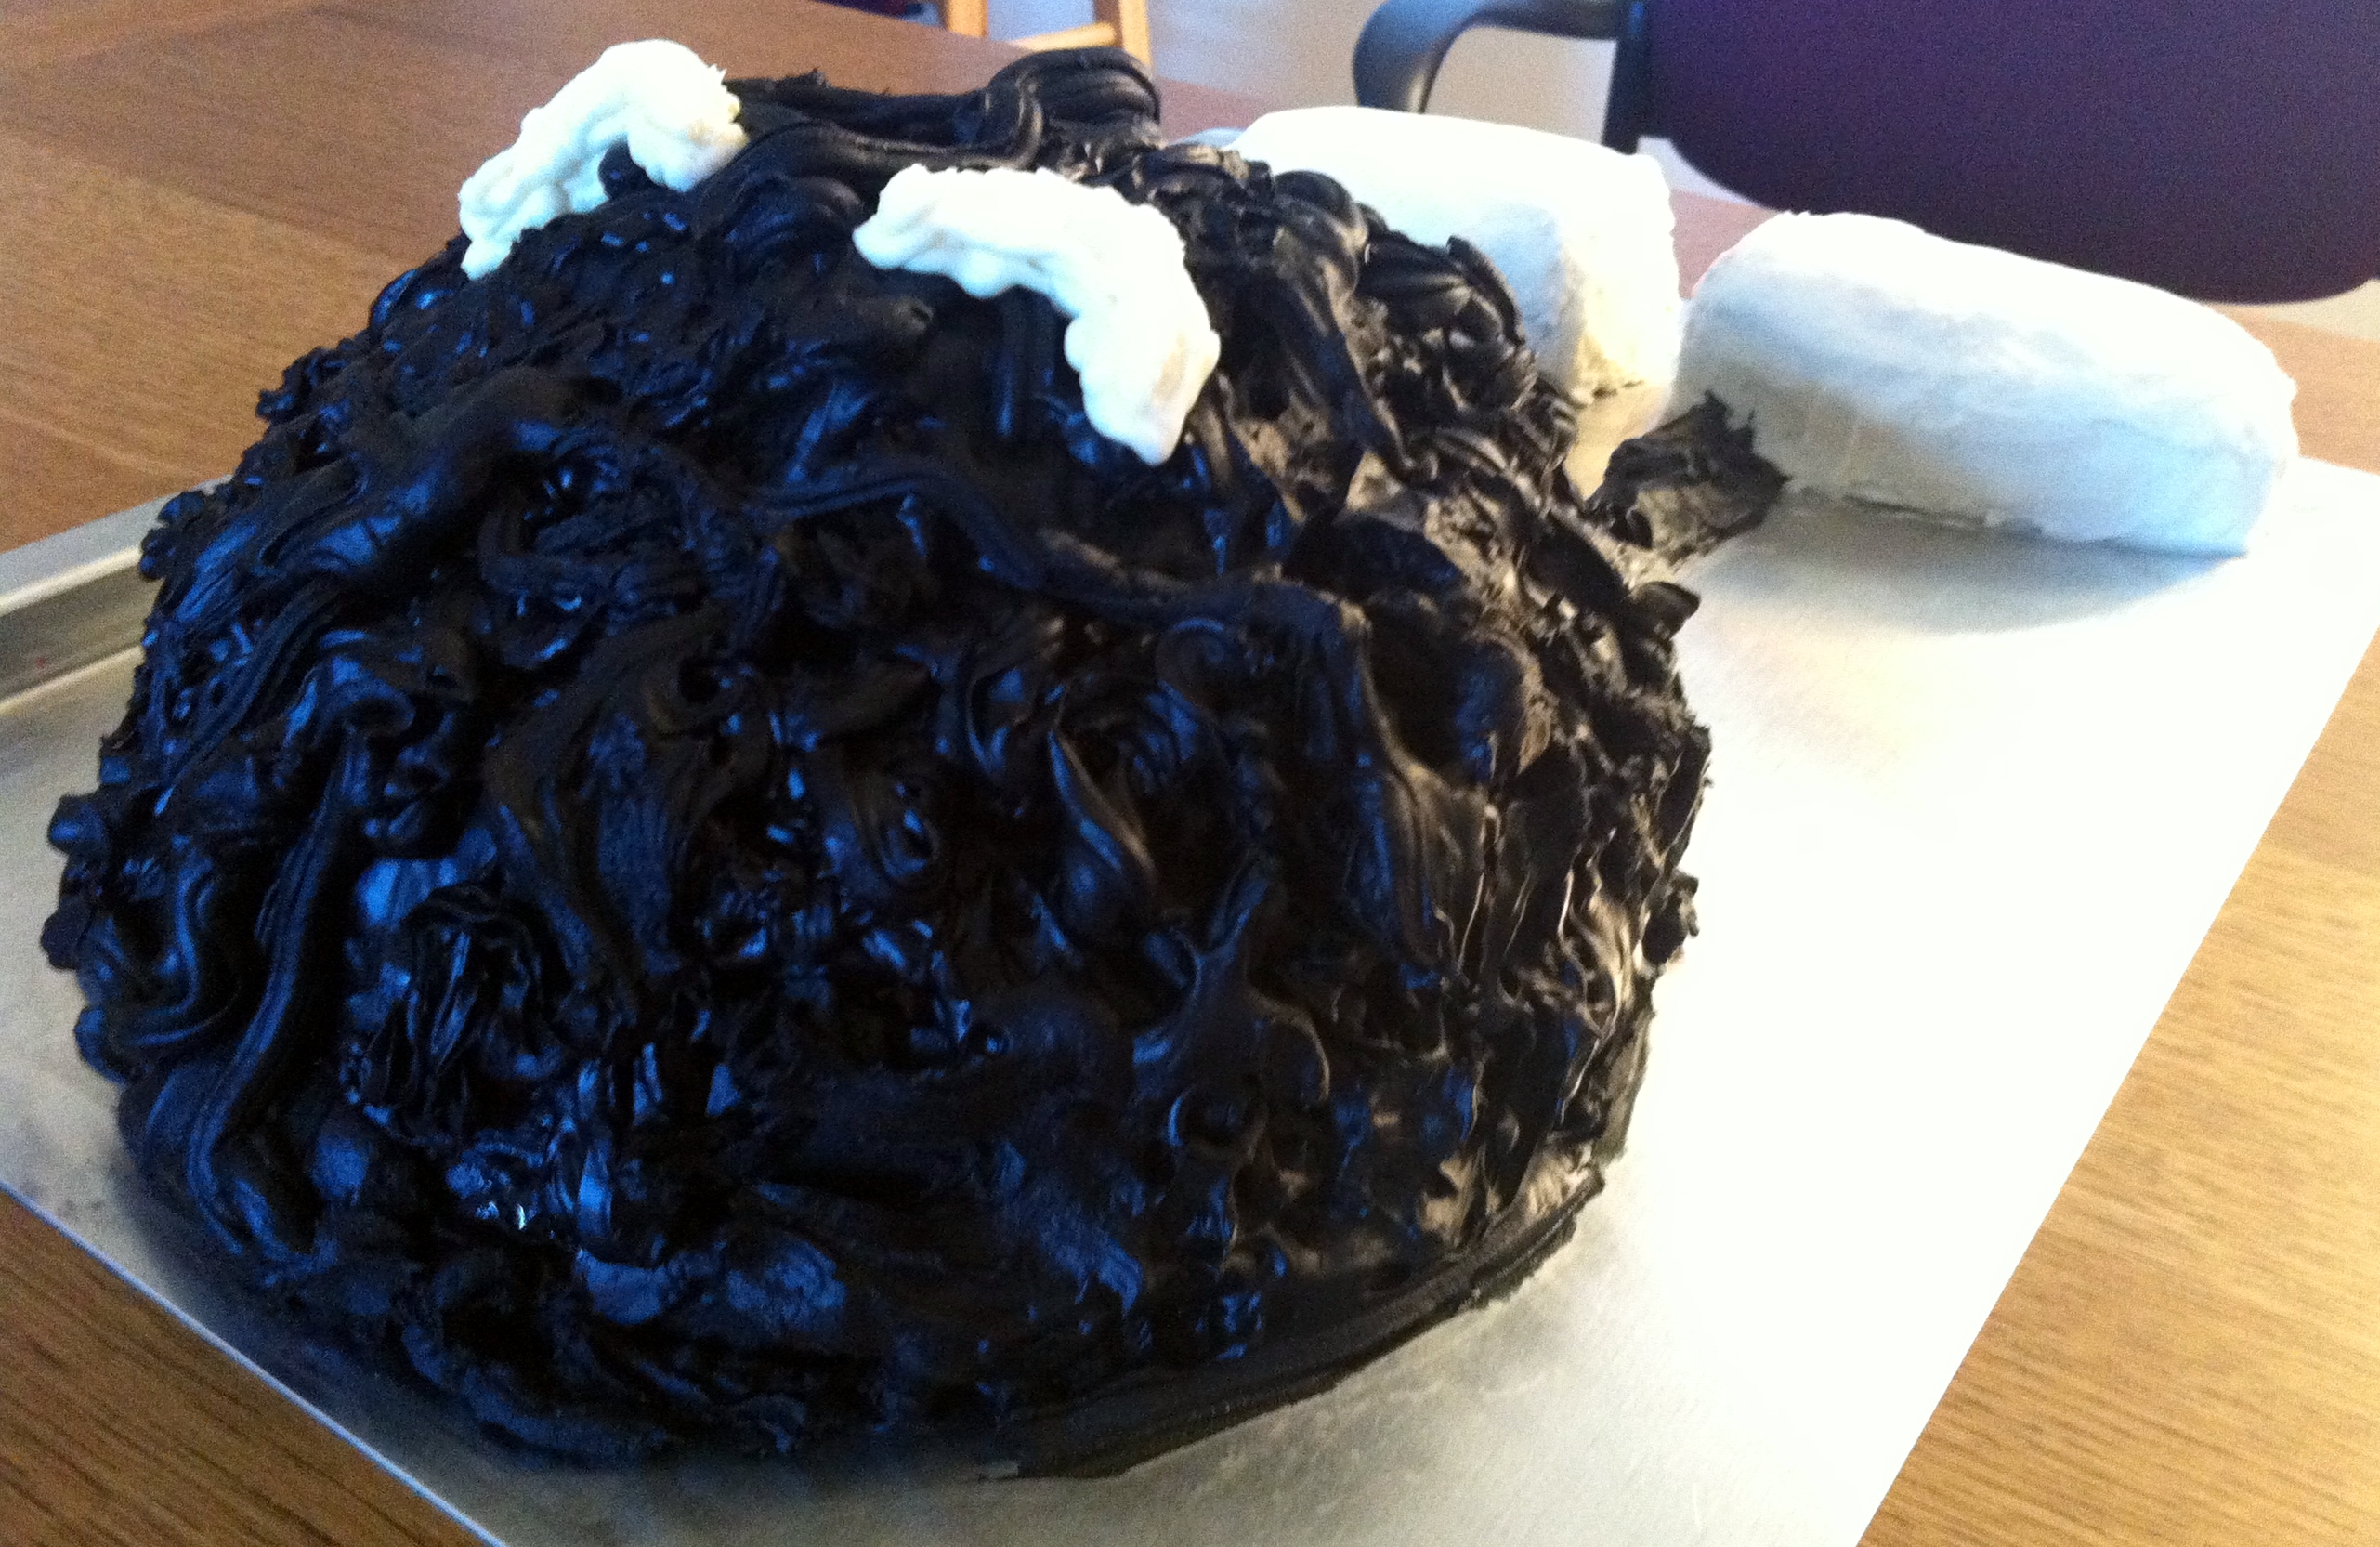
Given four batches of a dark chocolate cake for two circular layer cakes and two small loaf cakes, vanilla buttercream frosting, chocolate buttercream frosting with black food coloring, homemade white vanilla fondant, homemade black chocolate fondant, a bread knife to carve shoes out of the two loaf cakes, decorating tips, white chocolate for eyes, and lots of time, you can make an adorable grumpy fuzzball cake:

Grumpy fuzzball cake: it's even three dimensional!

I was really pleased with how this cake turned out: it tasted like a gigantic oreo and looked adorable. However, kneading the fondant was rather frustrating. I actually had to knead it twice: even though the entire cake only took one batch, I first made white fondant to cover the shoe cakes, then had to knead in Dutch-process cocoa powder and black food coloring to make the black fondant for the fuzzball's body. I'm not sure if I'll make fondant from scratch again because the process was really time consuming and tough on my hands (kneading fondant is at least five times harder than kneading even the densest of breads), but nevertheless, I will probably use fondant to decorate more of my future cakes.

Crafting a recipe: creamy Vidalia onion soup

I often find myself cooking, or sometimes even baking, without recipes or even measuring cups and spoons. The latter, especially with baking, is some linear combination of adventurousness - things haven't gone badly yet as I have always managed to produce the results I've wanted - and laziness - I'd have to commit to measuring out each ingredient as I go each time I "tweak" which sometimes ends up about three times per ingredient. The former, however, is a result of only adventurousness - trying new things in a purely experimental way without the comfort of a recipe to fall back on - and comfort level in the kitchen - once you've mastered the basic techniques and understand what spices and foods produce what flavors, it's all a matter of bringing an imagined combination of textures and flavors from your mind to the plate. But sometimes, it's good to formalize the process and write things down anyway.

This recipe's creation begins over dinner with three friends at Craigie on Main. Before you wonder how three recent college graduates and myself could afford to eat there: we decided to dine there because we heard great things about the burger (18 dollars, plus another 2 for delicious thick cut bacon). Less fortunately for our wallets, that didn't stop us from ordering an appetizer a person, each almost the price of the burger, and a fancy bottle of wine. Two of us, myself included, had a tuna sashimi salad to start, and the other two opted for the Vidalia onion soup.

Based on the accompaniments, it wasn't clear if the Vidalia onion soup was cream-based or of a softer French onion type variety. Honestly, we didn't really care because either sounded delicious. It turned out to be of the creamy variety, and it was rich but light and flavorful but not overpowering.

"You know, guys, I can make this," and their eyes light up a little.

Creamy Vidalia onion soup topped with nutmeg and pepper

After the idea was born, it began with caramelizing onions. Caramelizing onions breaks down their sugars; the process results in a tender, sweeter, dark brown savory treat. Every good cook who does this regularly seems to have his or her own set of variations on the basic technique. Personally, I like to sweat the onions first to separate the water from the onions because it lowers the risk of burning the bottoms black and retains more of that "true to onion" flavor by requiring less oil and butter to achieve caramelization. However, it's a trade-off because sweating increases the amount of time it takes to cook them.

But the process wasn't as simple as idea to paper to stove top to plate - or bowl, I suppose. The first time I made my version of this soup, it could have turned out better. The vegetable stock I used was surprisingly salty: when it combined with the salt needed to sweat the onions, I am embarrassed to say that it burned the tongue. I corrected this by adding a good deal more cream and butter, but it lost the subtler creamy nature and some of the soft but powerful caramelized onion flavor. I recommend using a good vegetable stock - I really like the one at Trader Joe's - to avoid this problem.

The second time around had another advantage over the first attempt: a new tool in my kitchen, the immersion blender. I cannot begin to tell you how much of a difference that made. Forget just about how much easier it made the soup crafting process, and I'll be the first to tell you that transferring soup in batches over to a counter top blender is quite the pain. Instead of getting a barely blended soup with the texture of consistently very finely chopped onions mixed with cream and stock, I could create a completely pureed, almost fluffy texture that would hold small peaks similar to the stiff peaks you get when beating eggs.

The following is the final recipe.

Creamy Vidalia onion soup

Ingredients:

  • 1 and a half teaspoons olive oil
  • 1 and a half teaspoons unsalted butter
  • 4 Vidalia onions
  • Kosher salt
  • 3 shallots, diced
  • 4 ounces white wine
  • 2 cups vegetable stock
  • 1 cup heavy cream (can substitute 1/2 cup with milk)
  • White pepper
  • Nutmeg
  • Black pepper and extra nutmeg for garnish (optional)

Preparation:

  1. Melt the unsalted butter over low heat. I prefer to do this in the pot I will be making the soup in so as to minimize cleaning later on, but that's not necessary. Once melted, add the olive oil. Remove from heat.
  2. Slice off the root and top ends of the onions and then peel them. Cut the onions in half. Lay them cut side down and slice the onions lengthwise so that they are about a quarter of an inch thick. You'll be pureeing the soup later, so consistency in size is important only to ensure they cook uniformly.
  3. Toss the onions in the olive oil and butter mixture and coat lightly in kosher salt. Place in a large, heavy bottomed pan, cover, and put over high heat. I prefer to use a deep pot large enough to hold the final soup for fewer pans to clean, and I even conveniently have one that has a clear lid, which makes checking on the sweating onions much easier. This is the phase where you sweat the onions, so you will be leaving them over high heat until a pool of their sweat is in the bottom of the pan. That takes anywhere between about 5 and 10 minutes, depending on how large and deep of a pan you use. You may also need "swish" the pan every few minutes so onions which have let out most of their water don't stick to the bottom and burn. Once the onions have sweat sufficiently, turn down to medium low heat with the cover still on to prevent burning the onions.
  4. After the onion sweat has stopped bubbling, about 2 minutes after turning down the heat, remove the lid. Stir in the diced shallots so that they are coated in the oil, salt, and onion sweat mixture. Let the onions and shallots cook, stirring up off the bottom frequently, so each onion piece gets roughly the same amount of time in contact with the bottom of the pan.
  5. After about 30 minutes, the onions should have reduced in size and should be well on their way to caramelizing. The shallots should be translucent and slightly smaller. At this time, add the white wine and increase the heat to medium. Continue cooking down the onions, stirring frequently, until you are satisfied with their color. I usually cook them for another 30 to 45 minutes. Be careful not to cook past a mahogany color, because they are very likely to burn then.
  6. Add the vegetable stock and use an immersion blender to mix together to roughly the desired consistency - remember that you still will be adding the cream to the soup when considering texture. Personally, I like the soup really light, so I blend very thoroughly.
  7. Once the soup is hot throughout, remove from heat. Stir in the heavy cream, and add white pepper and nutmeg to taste.
  8. Optionally garnish with black pepper and slightly more nutmeg.

Yields about 4 servings.

Chemistry at its finest: inverted sugar syrup for cocktails

Simple syrup finds its home in any well-stocked bar because sometimes sugar doesn't dissolve easily enough. Simple syrup is traditionally made by dissolving white sugar into water on a stove and then cooling before use, but sometimes, in a pinch, people will shake superfine sugar with room temperature water until dissolved. The ratio of sugar to water varies from between one to one to two to one. If you're shaking superfine sugar, you're probably using a one to one ratio; personally, I prefer to use a two to one ratio because you can always just use less. But no matter how you make it, simple syrup has a frustrating tendency to separate (or worse, grow mold) after a while, usually about a week or a month.

Maybe you go through a roughly quarter of a liter bottle of simple syrup every week to a month, but I certainly don't generally use mine up. So how can you extend the shelf life instead of discarding and making a new batch? Conveniently, chemistry has the answer to this one. You simply invert the basic sugar, sucrose, into its two basic components: glucose and fructose. The term "inverted" comes from measuring the concentration of sugar syrup through a polarimeter: when plane polarized light is passed through pure sucrose solution rotates to the right, but when it is passed through a converted mixture of sucrose, fructose, and glucose it rotates from right to left.

The best part is that if you're already making simple syrup on the stove, it doesn't take much more effort to make inverted sugar syrup instead - just a little more time. Once you have simple syrup boiling on the stove top, just add a pinch of cream of tartar (or if you don't have any on hand, you can add a small amount of lemon juice or another acid) and let the mixture simmer for another 20 minutes. You'll have more than tripled the time you can leave the syrup in the refrigerator.

In addition to making normal inverted sugar syrup, I also made a lavender sugar syrup for cocktails and other drinks by adding dried lavender flowers along with the cream of tartar before simmering:

Lavender sugar syrup on the stove

I then let the flowers sit with the syrup in the refrigerator for three days before straining. We haven't experimented too much with this flavored sugar syrup yet, but we have discovered that adding a little to either a glass of lemonade or a gin and tonic is a delicious decision.

Inverted sugar syrup

Ingredients:

  • 2 parts white granulated sugar
  • 1 part water
  • Pinch cream of tartar (alternatively, lemon juice or another acid)

Preparation:

  1. In a saucepan, combine sugar and water. Bring to a boil, stirring constantly, until the sugar has dissolved.
  2. Add a pinch of cream of tartar and stir completely into the boiling simple syrup. Turn down the heat to medium low and let simmer, stirring occasionally, for 20 minutes.
  3. Allow inverted sugar syrup to cool and store in a refrigerator.

My favorite secret to baking healthier: white whole wheat flour

Replacing white bread with wheat bread has been becoming more and more popular recently, and people seem to be wondering how to generally add more whole grains to their diets. This doesn't come as much of a surprise: whole grains haven't had their bran and germ removed through milling, and as such, they are better sources of fiber and other nutrients than their refined counterparts. Even though many refined grains are enriched by the addition of vitamins and minerals, they won't provide as many nutrients as the whole grains, especially as much fiber. My favorite benefit of high-fiber foods is that they tend to make you feel full longer.

The problem is that the whole grain taste is very different from that of refined grains; mentally compare the flavors of white rice and brown rice - odds are you love one and hate the other. If you're like me, you grew up eating twelve grain whole wheat bread, brown rice, and foods that were generally low on excessive amounts of butters, oils, and creams, so whole grain baked goods not only seem like a healthy alternative to mix into your routine periodically, but what you want to eat. But that's certainly not true for everyone.

Enter the white whole wheat flour. It's milled from white wheat instead of red wheat like traditional whole wheat flours, which gives it a look closer to traditional white flour:

All-purpose flour, white whole wheat flour, traditional whole wheat flour

The flour on the left is all-purpose flour, white whole wheat flour is in the center, and traditional whole wheat flour is shown on the right. The visual differences in the flours themselves are more pronounced than those the final baked goods; those made with only white whole wheat flour look a bit richer in color - almost a more buttery color instead of that darker brown we usually associate with whole grain wheat.

In addition to visually being able to pull a fast one on your friends and family who may be more opposed to whole grains than you, white wheat is a milder tasting wheat than red wheat, which means it'll pass the taste test, too. White whole wheat baked goods taste a whole lot more like the recipes you've made with white all-purpose flour for years and years than regular whole wheat baked goods. Also, you can generally substitute white whole wheat flour for all of the all-purpose flour in a recipe.

One of my favorite white whole wheat flour recipes is muffins. I love the slightly heavier texture that this flour lends to it in a way that white all-purpose flour just can't. It makes the batter light enough to fold in delicate fruits like fresh blueberries and cranberries but strong enough to support cups of chocolate chips. Last night, I made a double batch of white whole wheat blueberry muffins for myself, my brother, and my office:

Double batch of white whole wheat blueberry muffins

The recipe follows. I like to think of it as a good white whole wheat flour muffin base recipe; while it calls for blueberries, you can really substitute any other kind of fruit or even chocolate chips - just remember to adjust the surrounding flavors like cinnamon accordingly.

White whole wheat blueberry muffins

Ingredients:

  • 1/2 cup (1 stick) unsalted butter
  • 1 cup granulated sugar
  • 2 teaspoons baking powder
  • 1/2 teaspoon kosher salt
  • 1 teaspoon vanilla extract
  • 1/2 teaspoon cinnamon
  • 1/8 teaspoon nutmeg
  • 1/2 cup milk
  • 2 large eggs
  • 2 cups white whole wheat flour
  • 1 1/2 cups fresh blueberries
  • Demerara sugar for topping

Preparation:

  1. Preheat the oven to 350 degrees. Lightly grease or line with muffin cups a standard-size muffin pan.
  2. Cream the butter and sugar together.
  3. Add in baking powder, salt, vanilla, cinnamon, and nutmeg and mix until fluffy.
  4. Mix in the milk and eggs.
  5. Mix in the flour.
  6. Once fully mixed, fold in the fresh blueberries.
  7. Spoon the batter into the muffin cups; each of the muffin cups should be filled.
  8. Top each muffin with a light sprinkle of demerara sugar.
  9. Bake the muffins for about 25 minutes (until a toothpick comes out clean).
  10. Remove from the oven and place muffins on a cooling rack.

Yields about 14 regularly sized muffins.